Managing ODK-X Tables
Table Manager
The Table Manager provides you with access to administer tables, import/export data, modify their settings, or delete them altogether.
The Table Manager is the default home screen that is shown when you launch Tables, unless you have a custom home screen configured. See instructions for Showing/Hiding the Custom Home Screen.
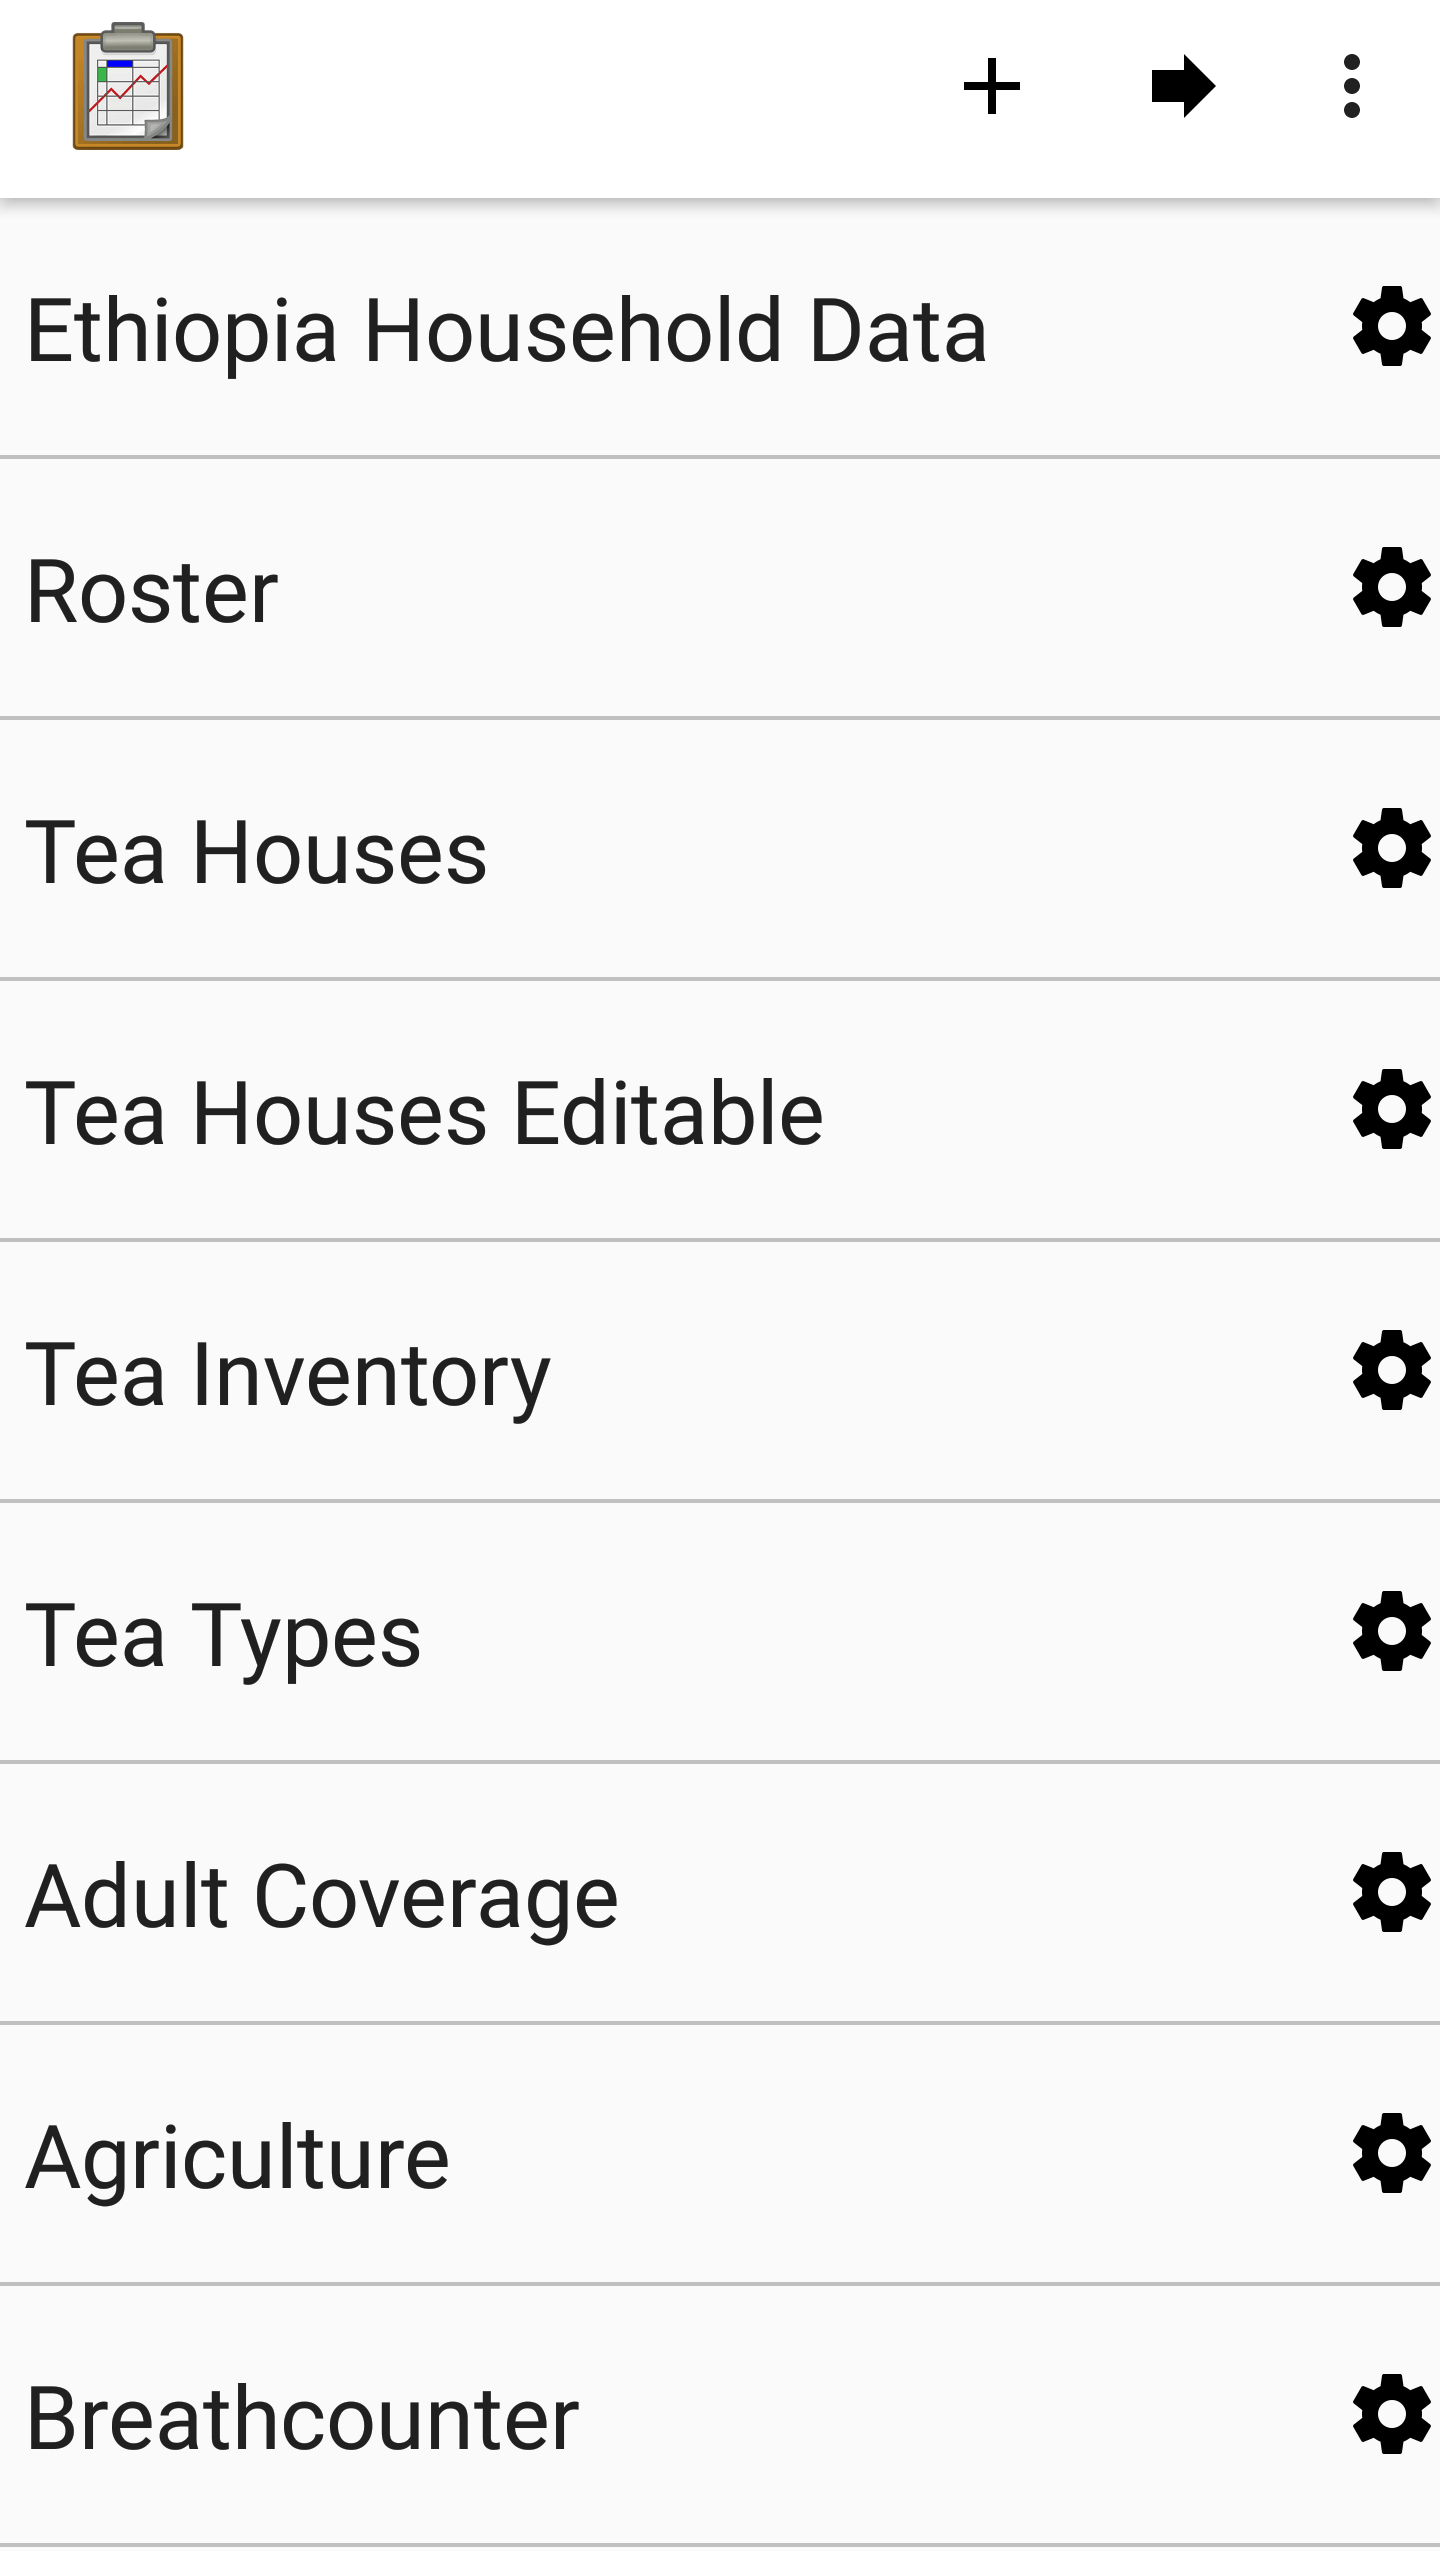
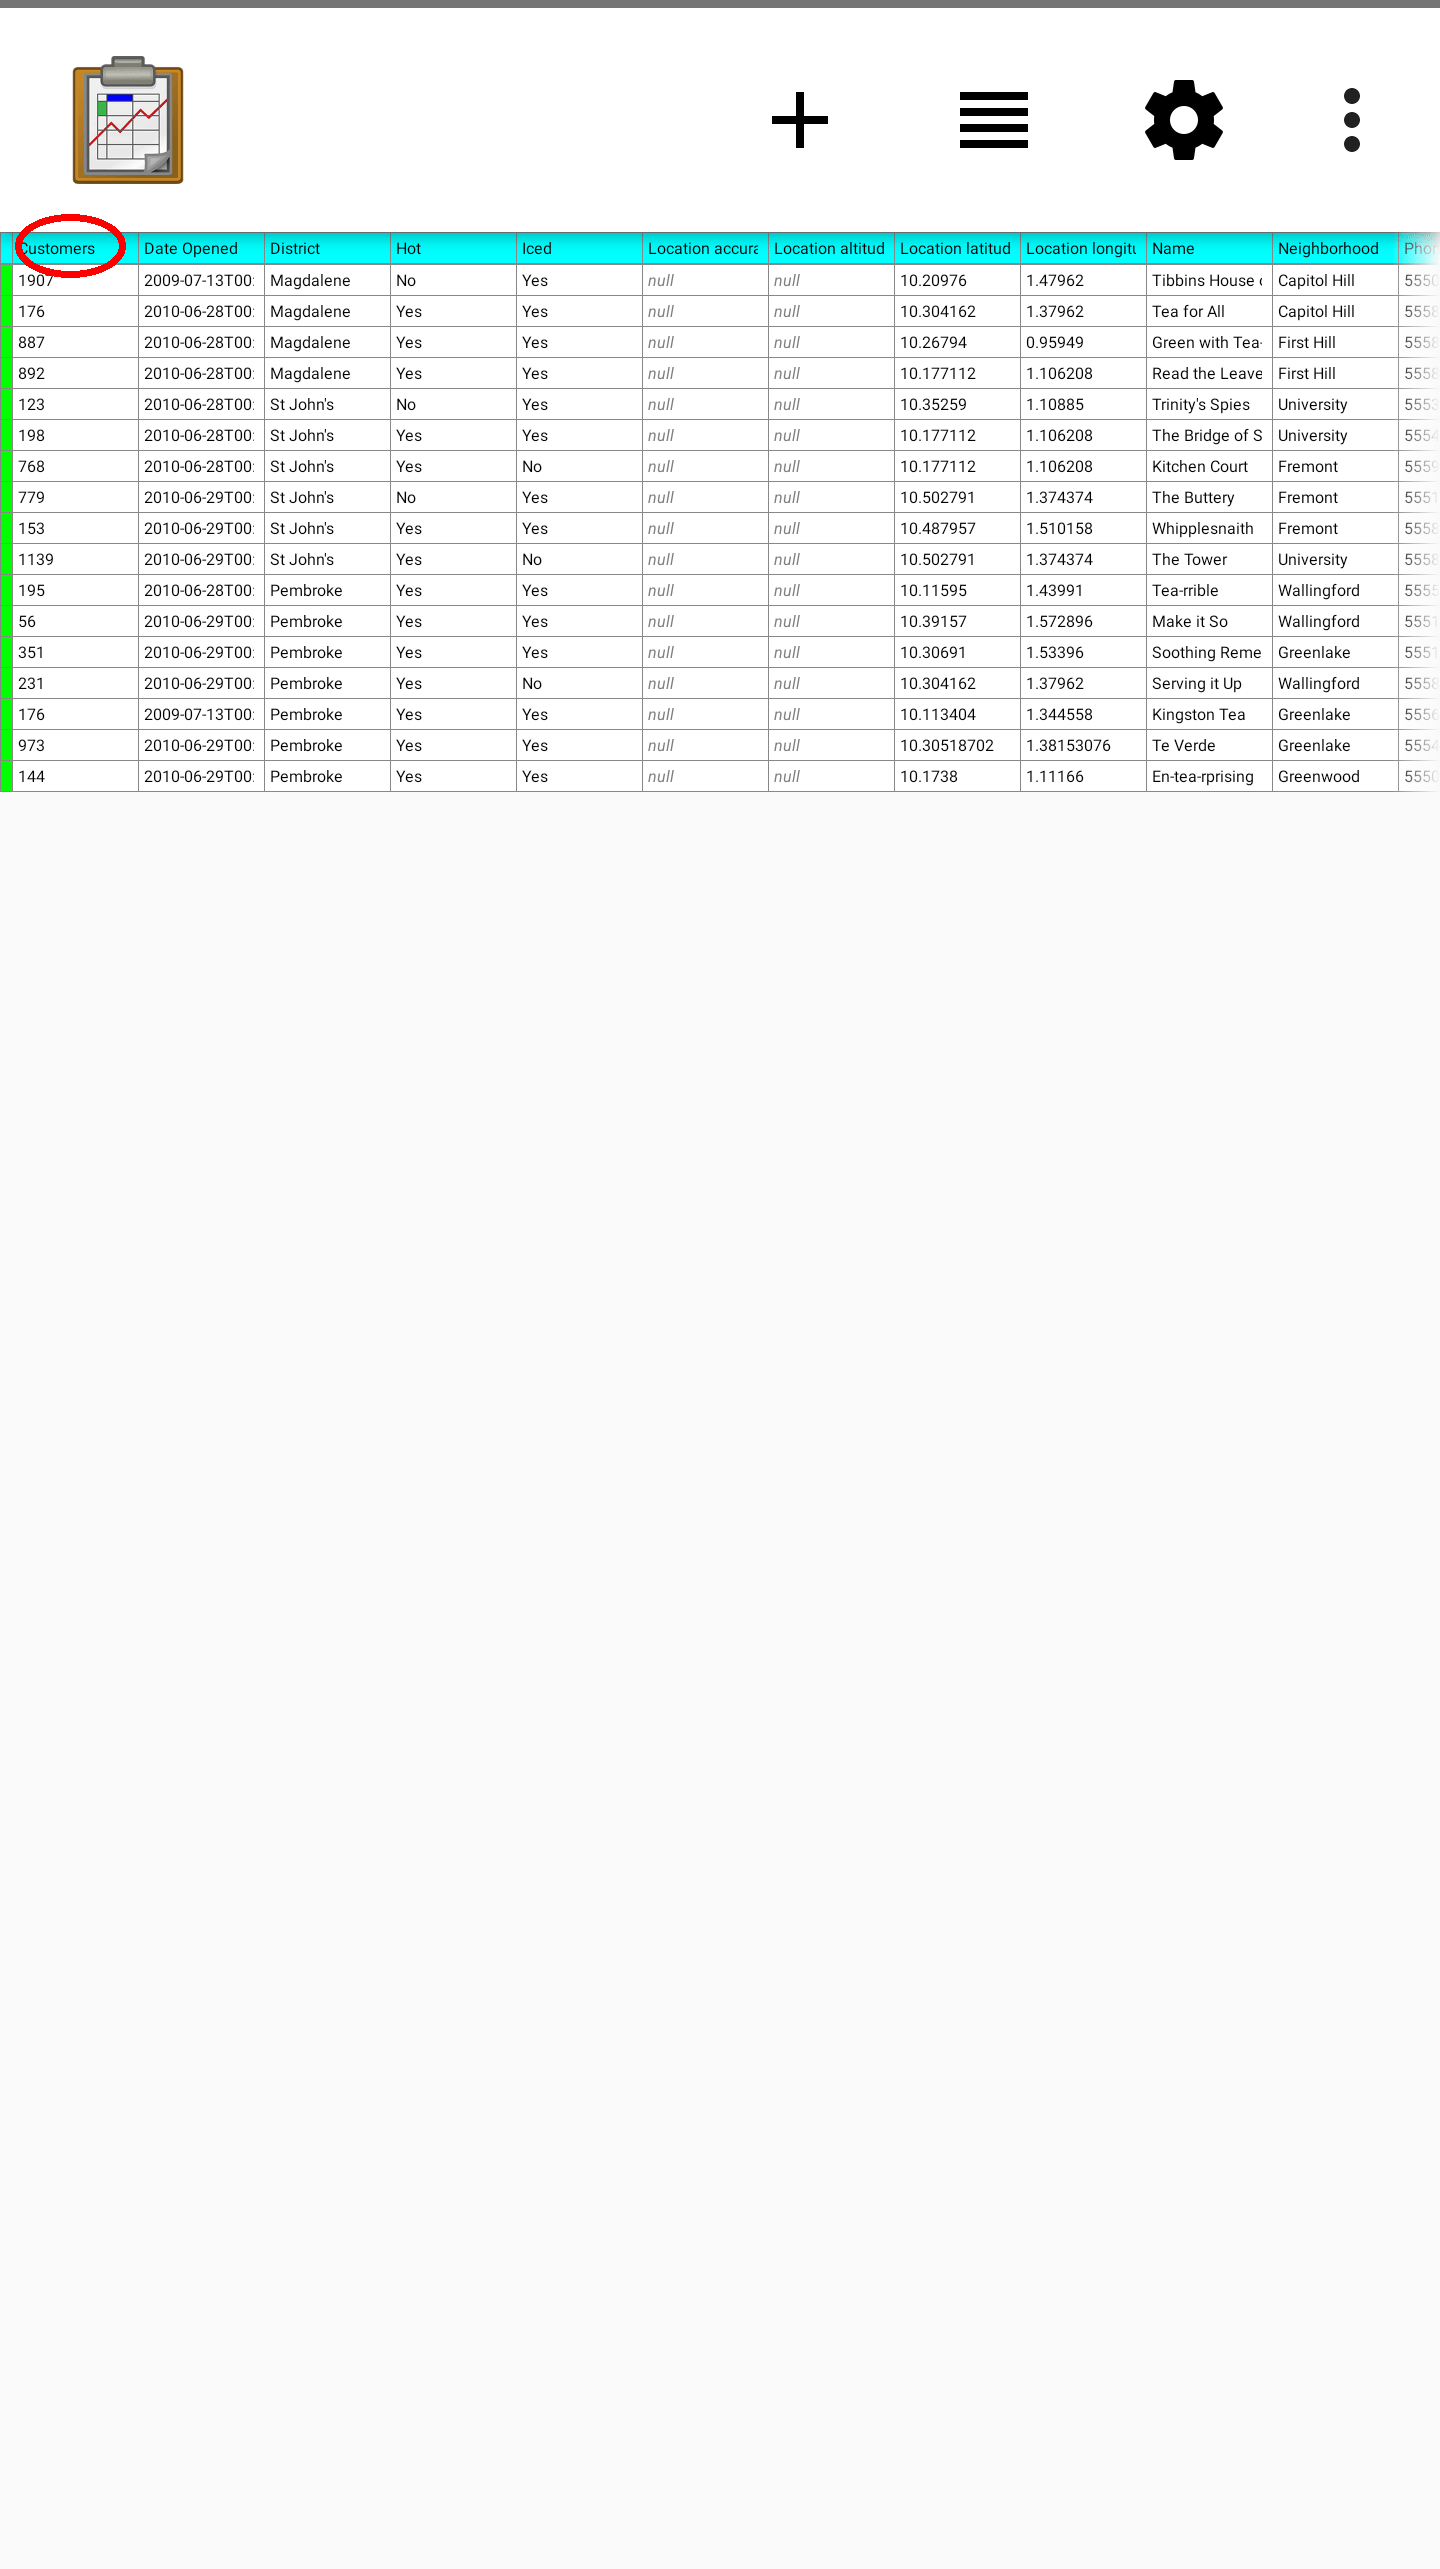
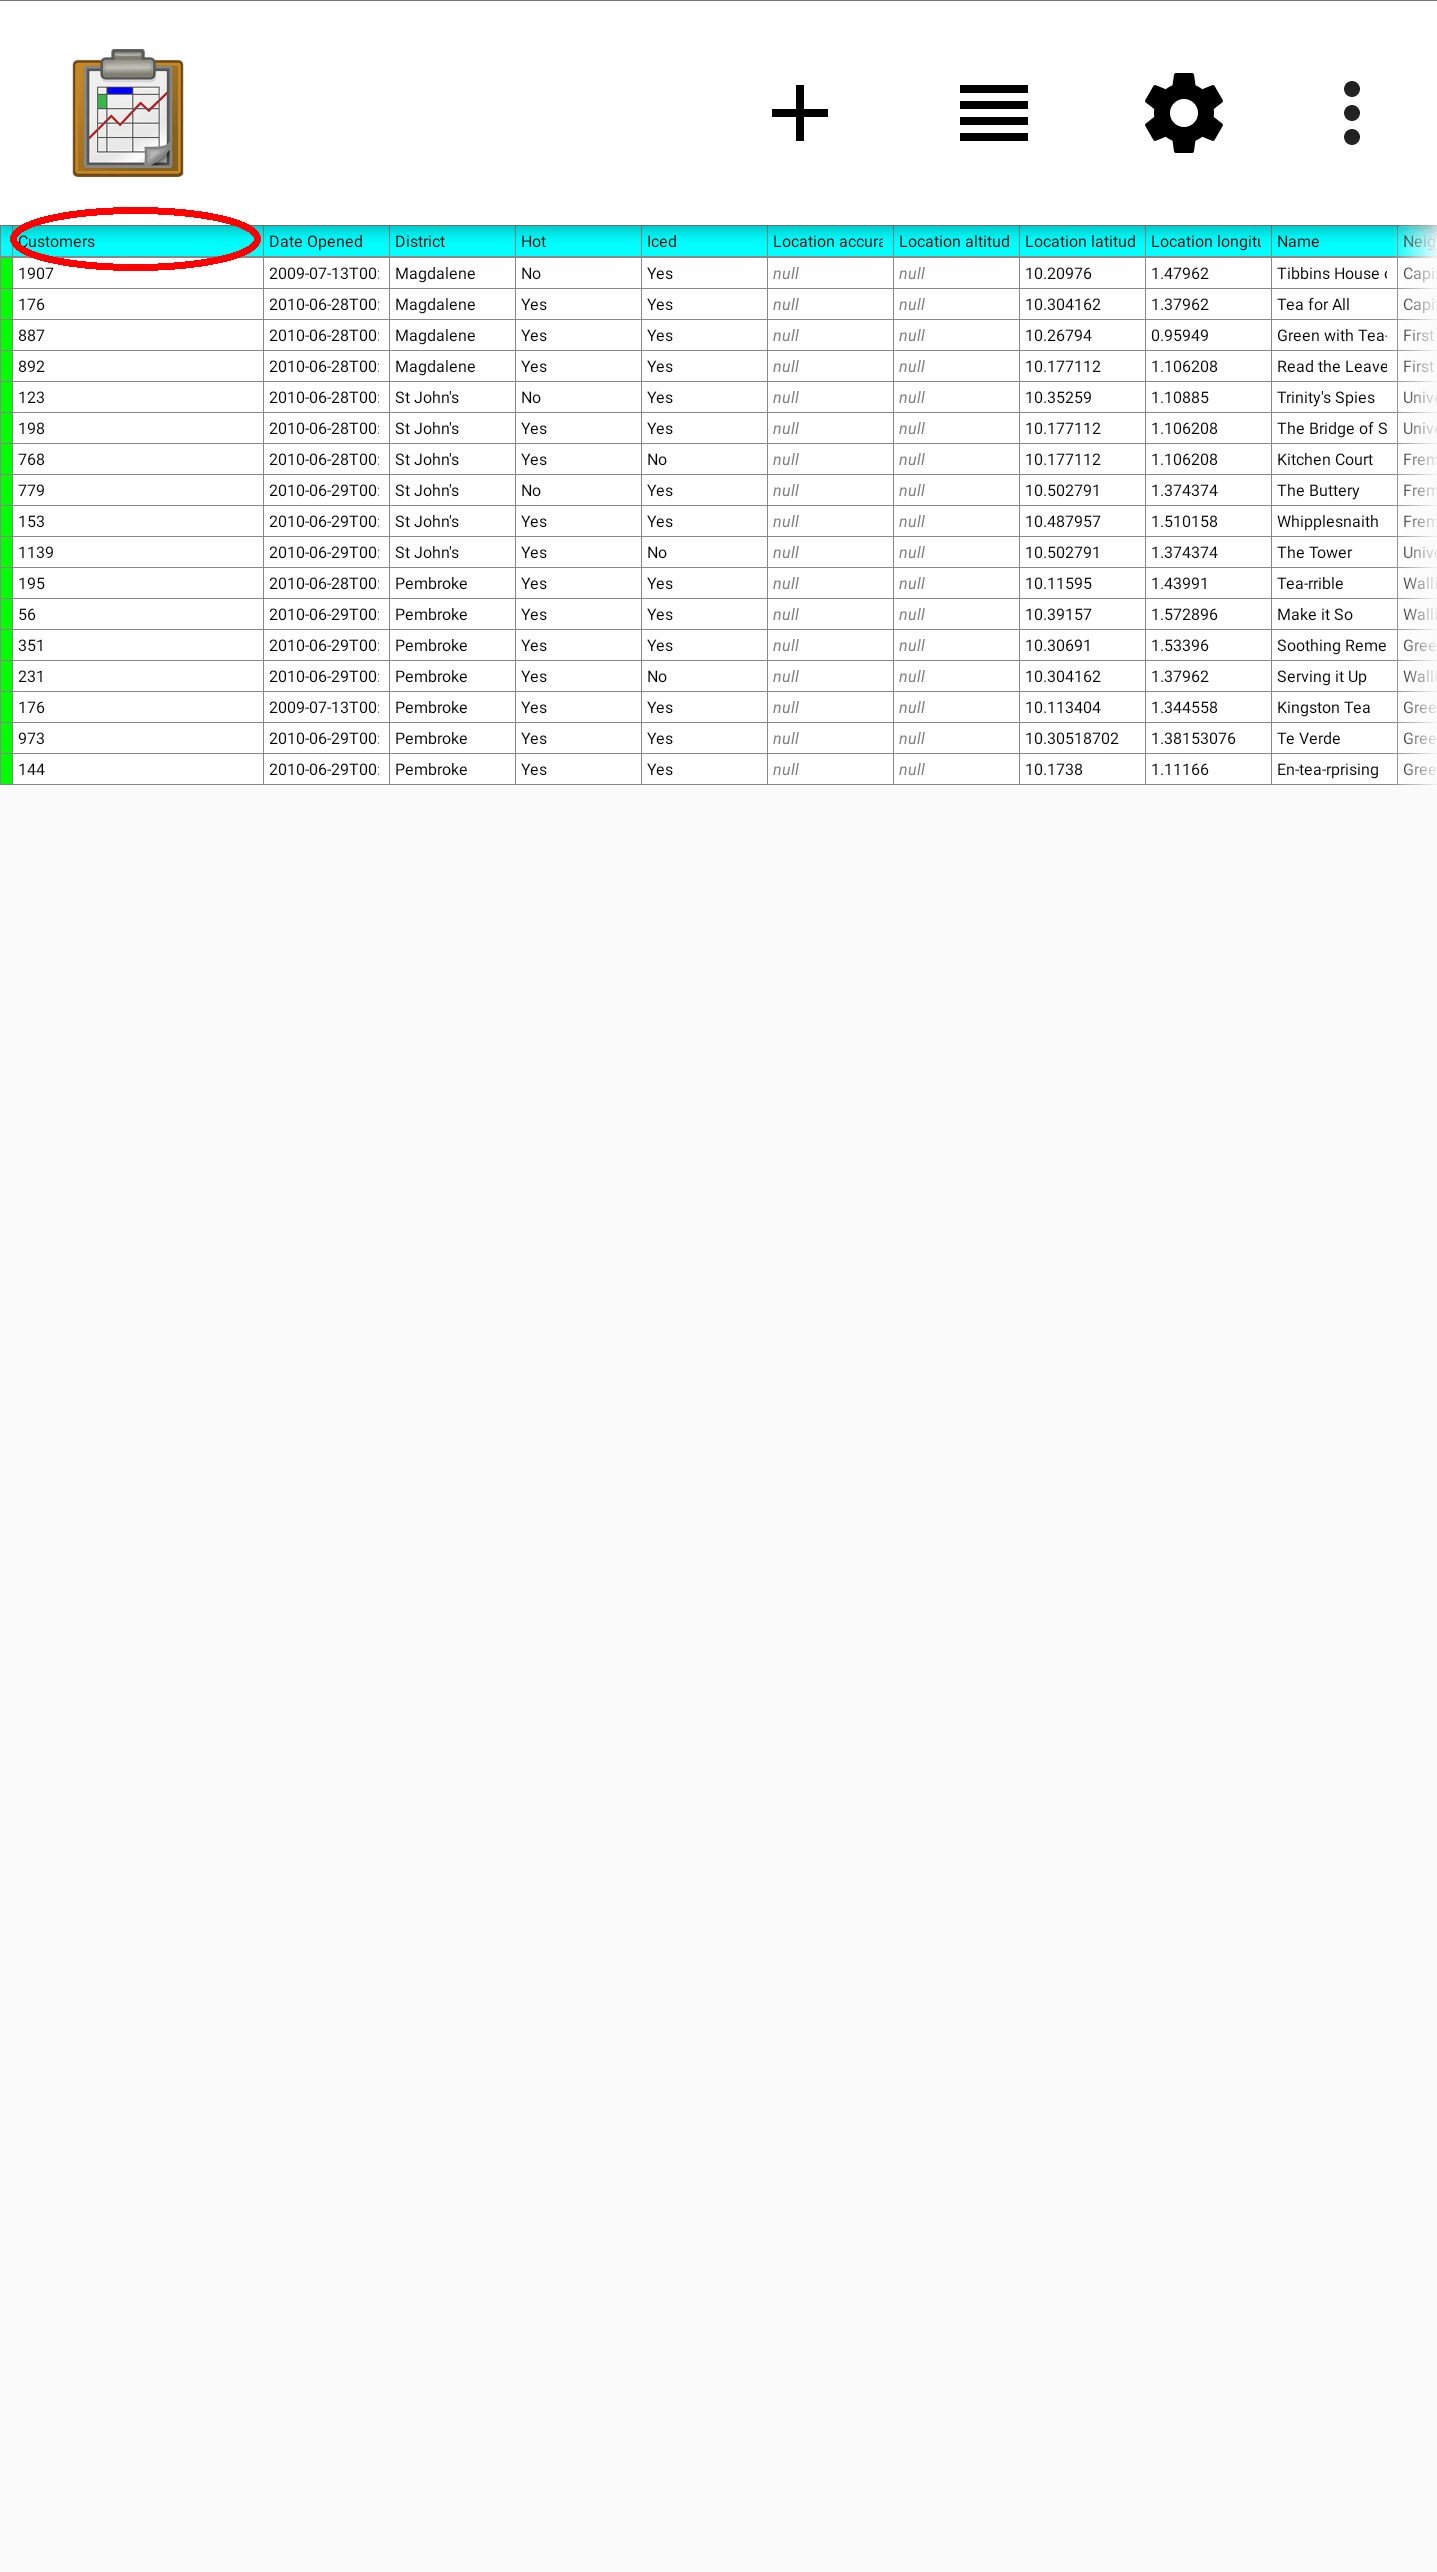
This view lists every table on the device. If you tap on the name of a table, a Spreadsheet View will launch and you can view or edit the contents of that table.
Importing Data
You can load data from a CSV directly into a table that has been defined on the device. To learn how to add a table, see Adding Your Own Tables.
A CSV is a comma-separated values file. It is a common way to transport tabular data between different programs. Microsoft Excel can save and open CSV files, as can Open Office and a variety of other programs. Tables expects a certain format of the data in order to import the data correctly: the first line must be the comma-separated list of column names. The remaining lines must be the data for each of the corresponding columns.
For example, assume you wanted to load data into table of people's names, with column (field) names of Name and Age. In addition to those columns, your CSV file must also specify the unique row id (instance id) for each data row (the _id column). You can also specify the creator of the row, the time of creation, and other information. But, at a minimum, the file should look like:
_id,Name,Age
myUniqueIdforSam,Sam,27
This can be achieved by creating a spreadsheet in a spreadsheet editor and saving it as a CSV, or by copying the above text into a text editor and saving it with a .csv extension.
The upload process is as follows:
Place the CSV file onto the device and place it in the
config/assets/csv/directory with a filename oftableid.csv. For example,/sdcard/opendatakit/default/config/assets/csv/people.csvwould be the CSV file for the people table.Launch ODK-X Tables and navigate to the Table Manager screen.
Press the plus + button at the top of the Table Manager screen.
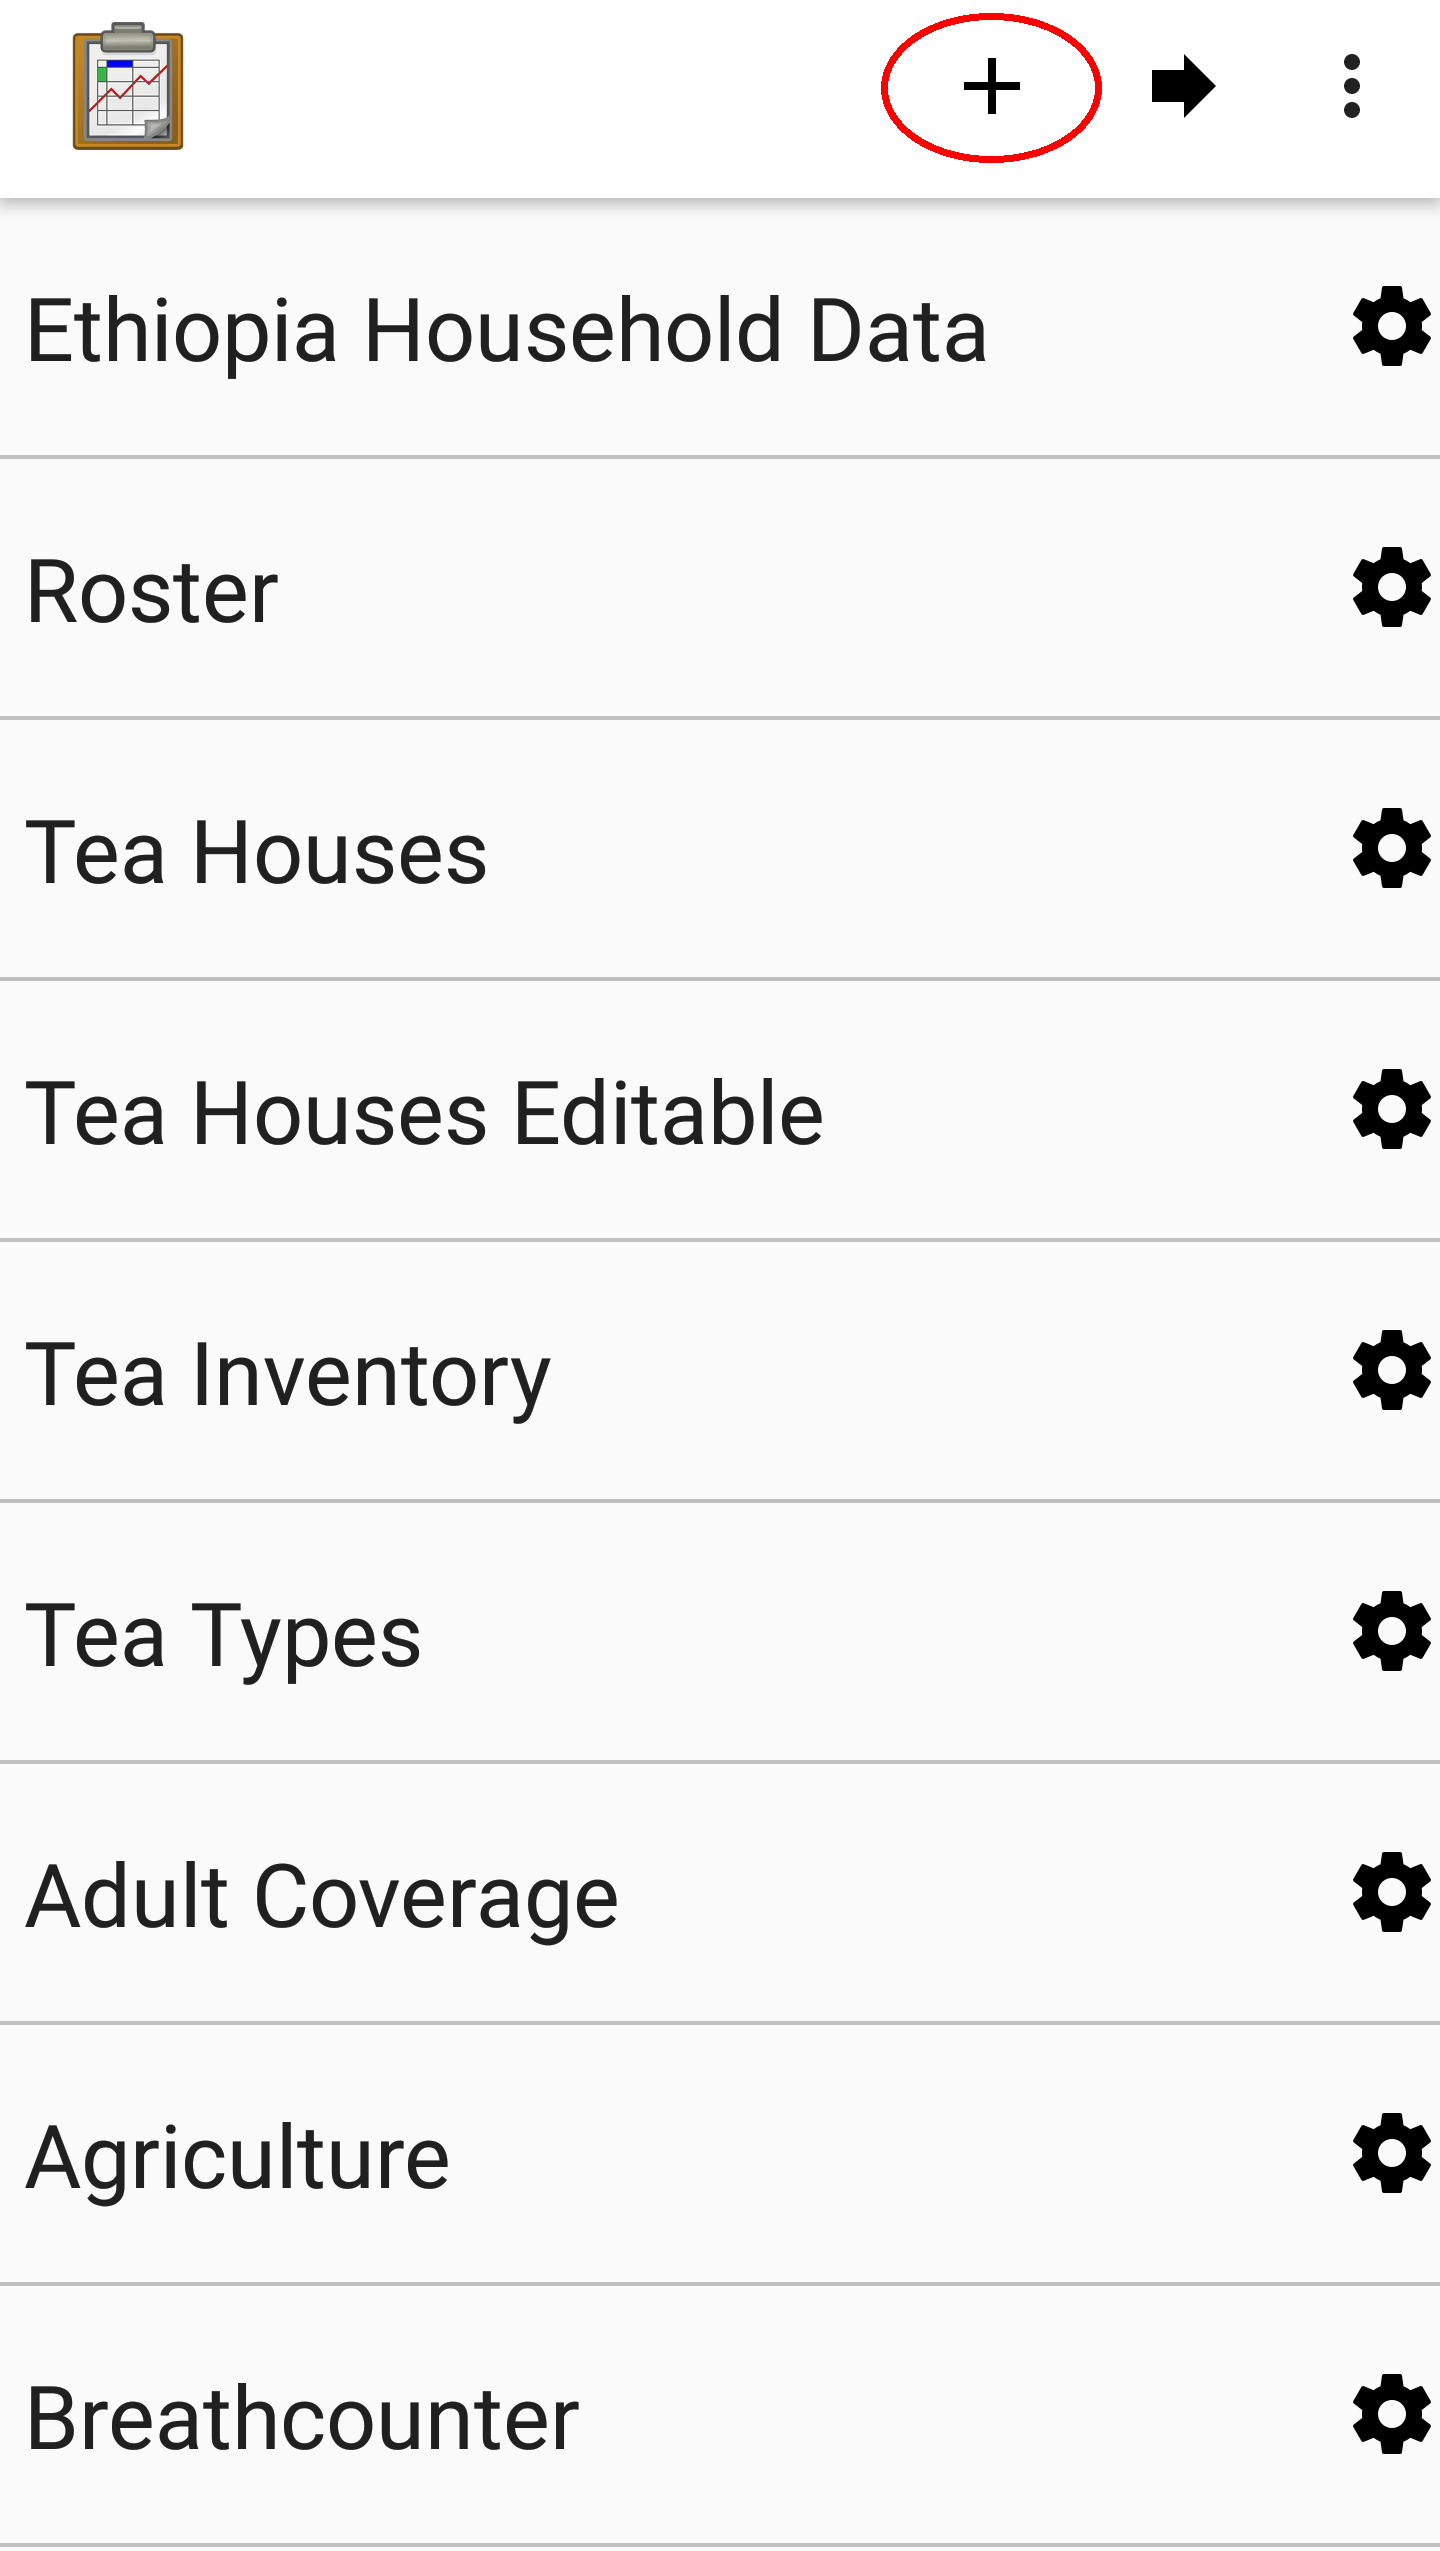
Press Select CSV File to Import.
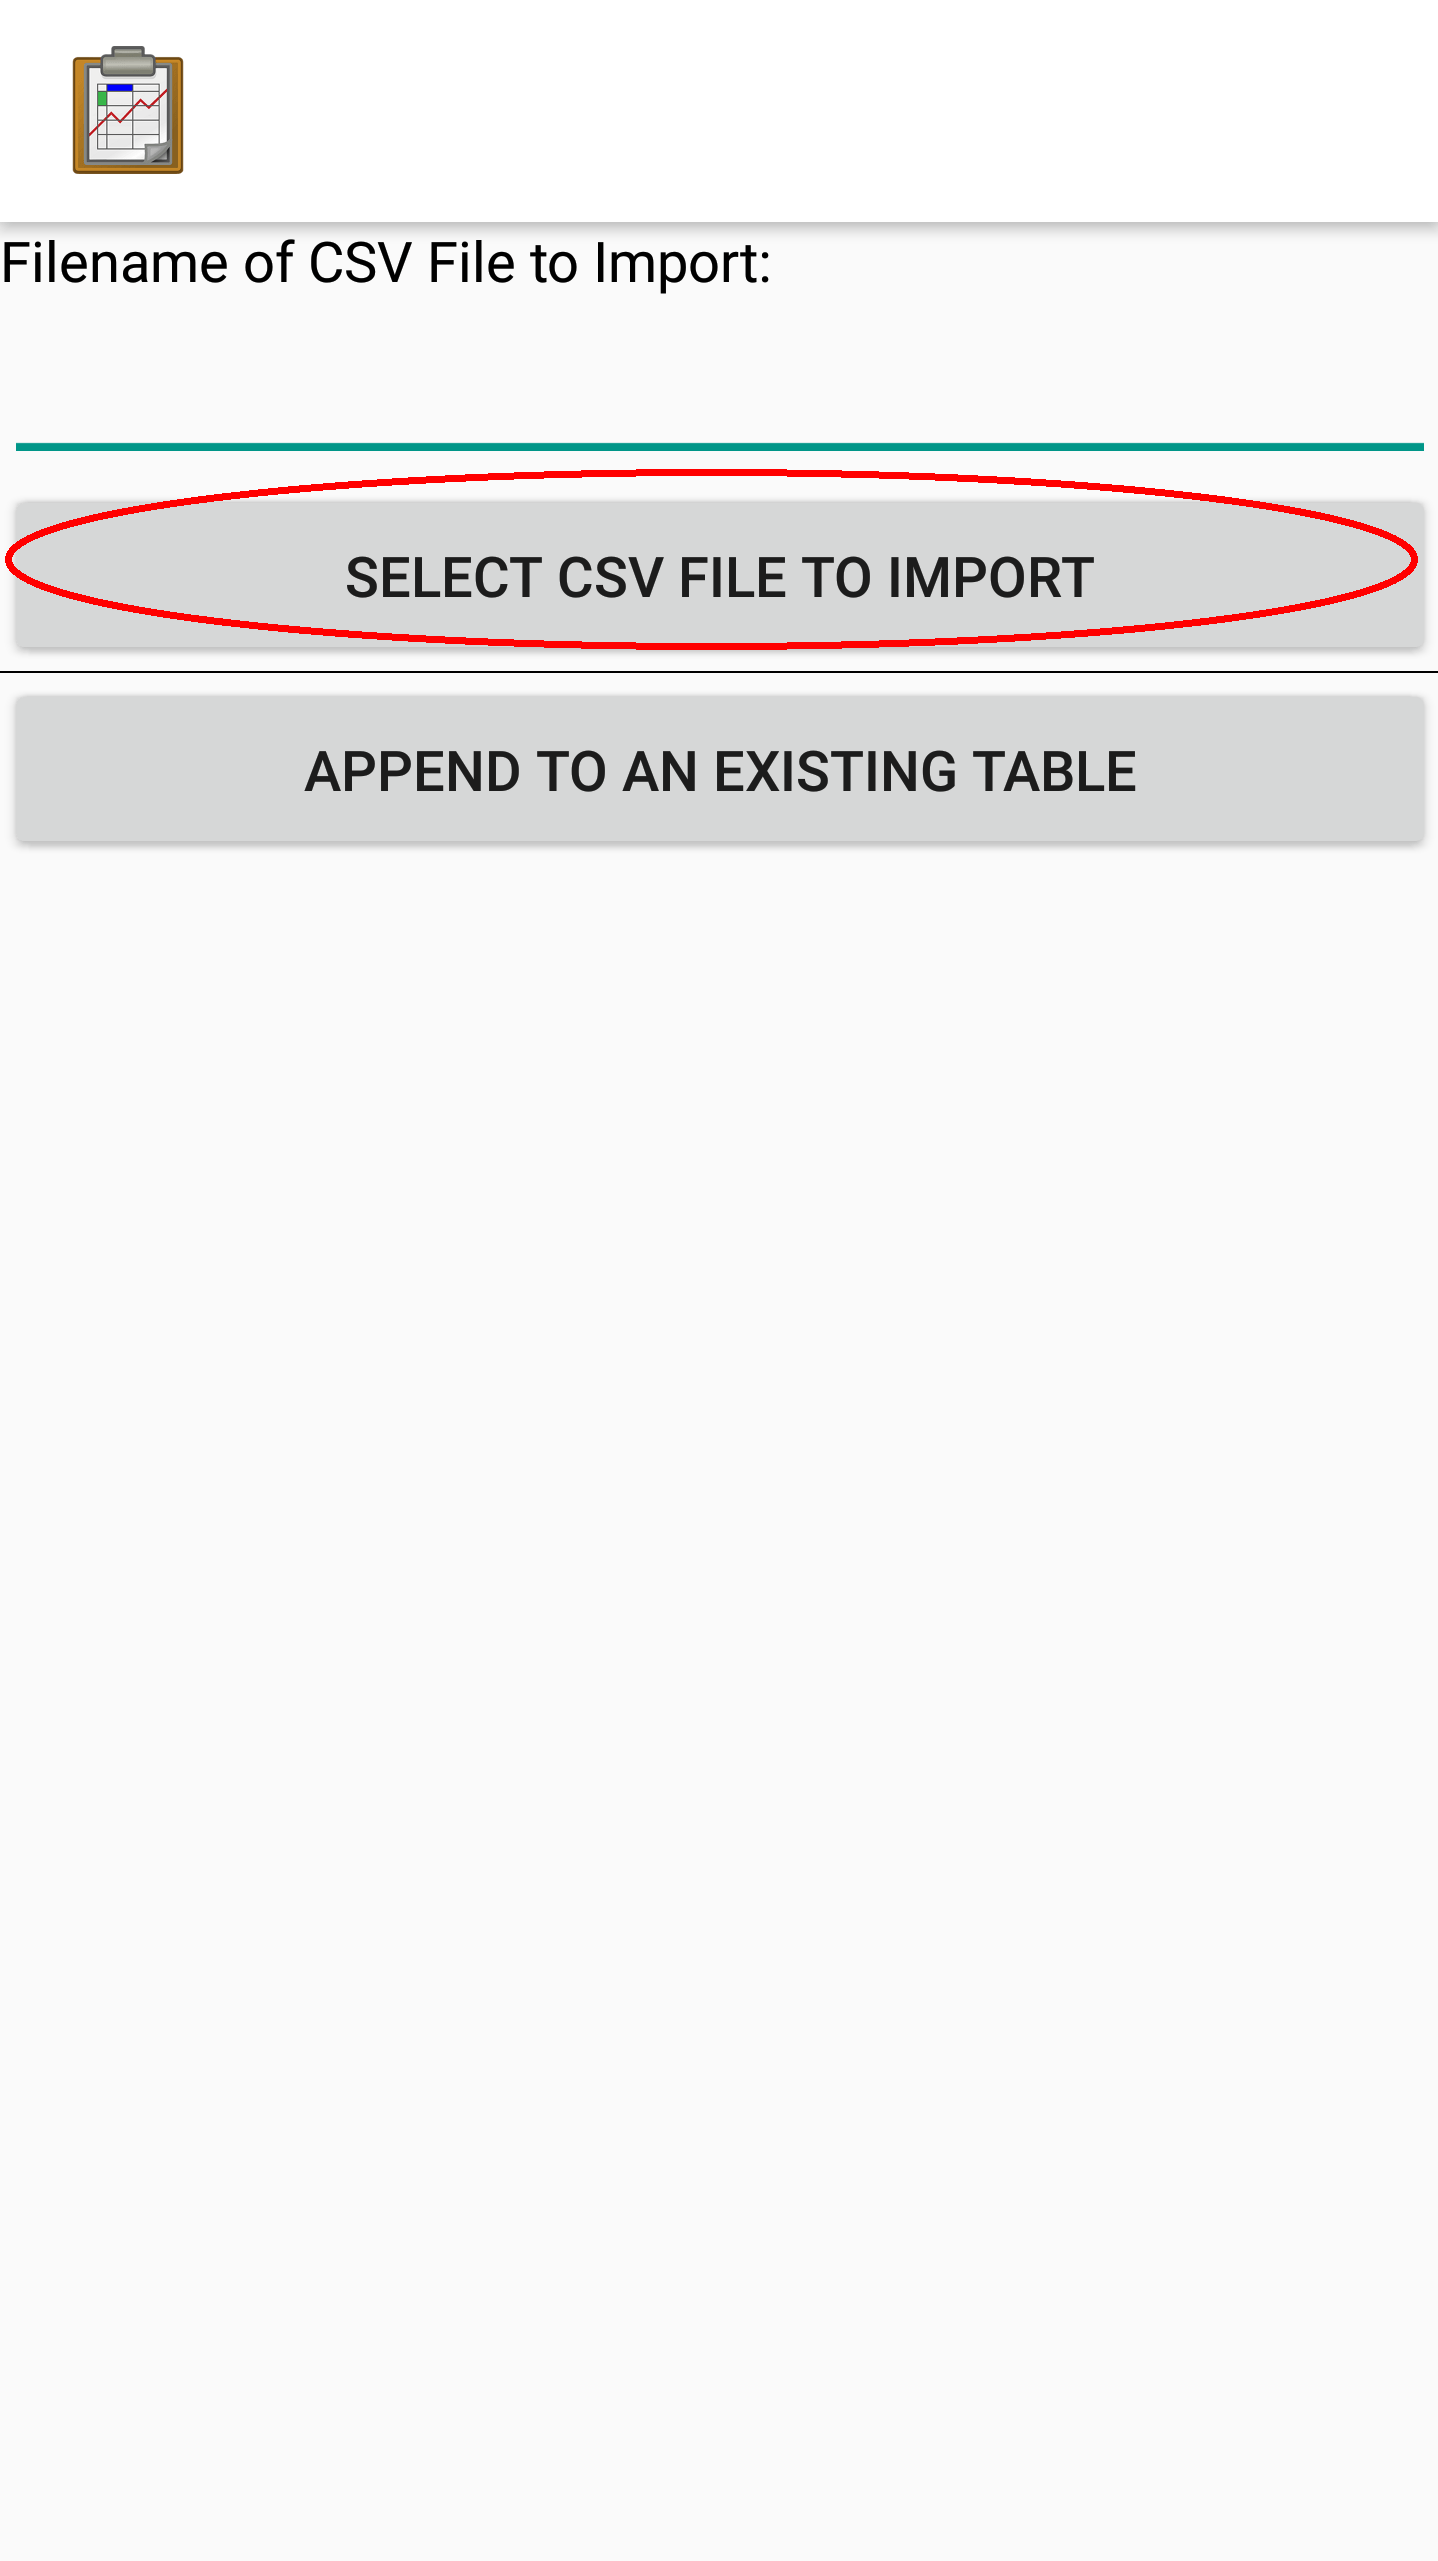
Warning
You must have installed Files by Google from the Play Store.
Find your file, select it, and press Pick file.
Press Append to an Existing Table.
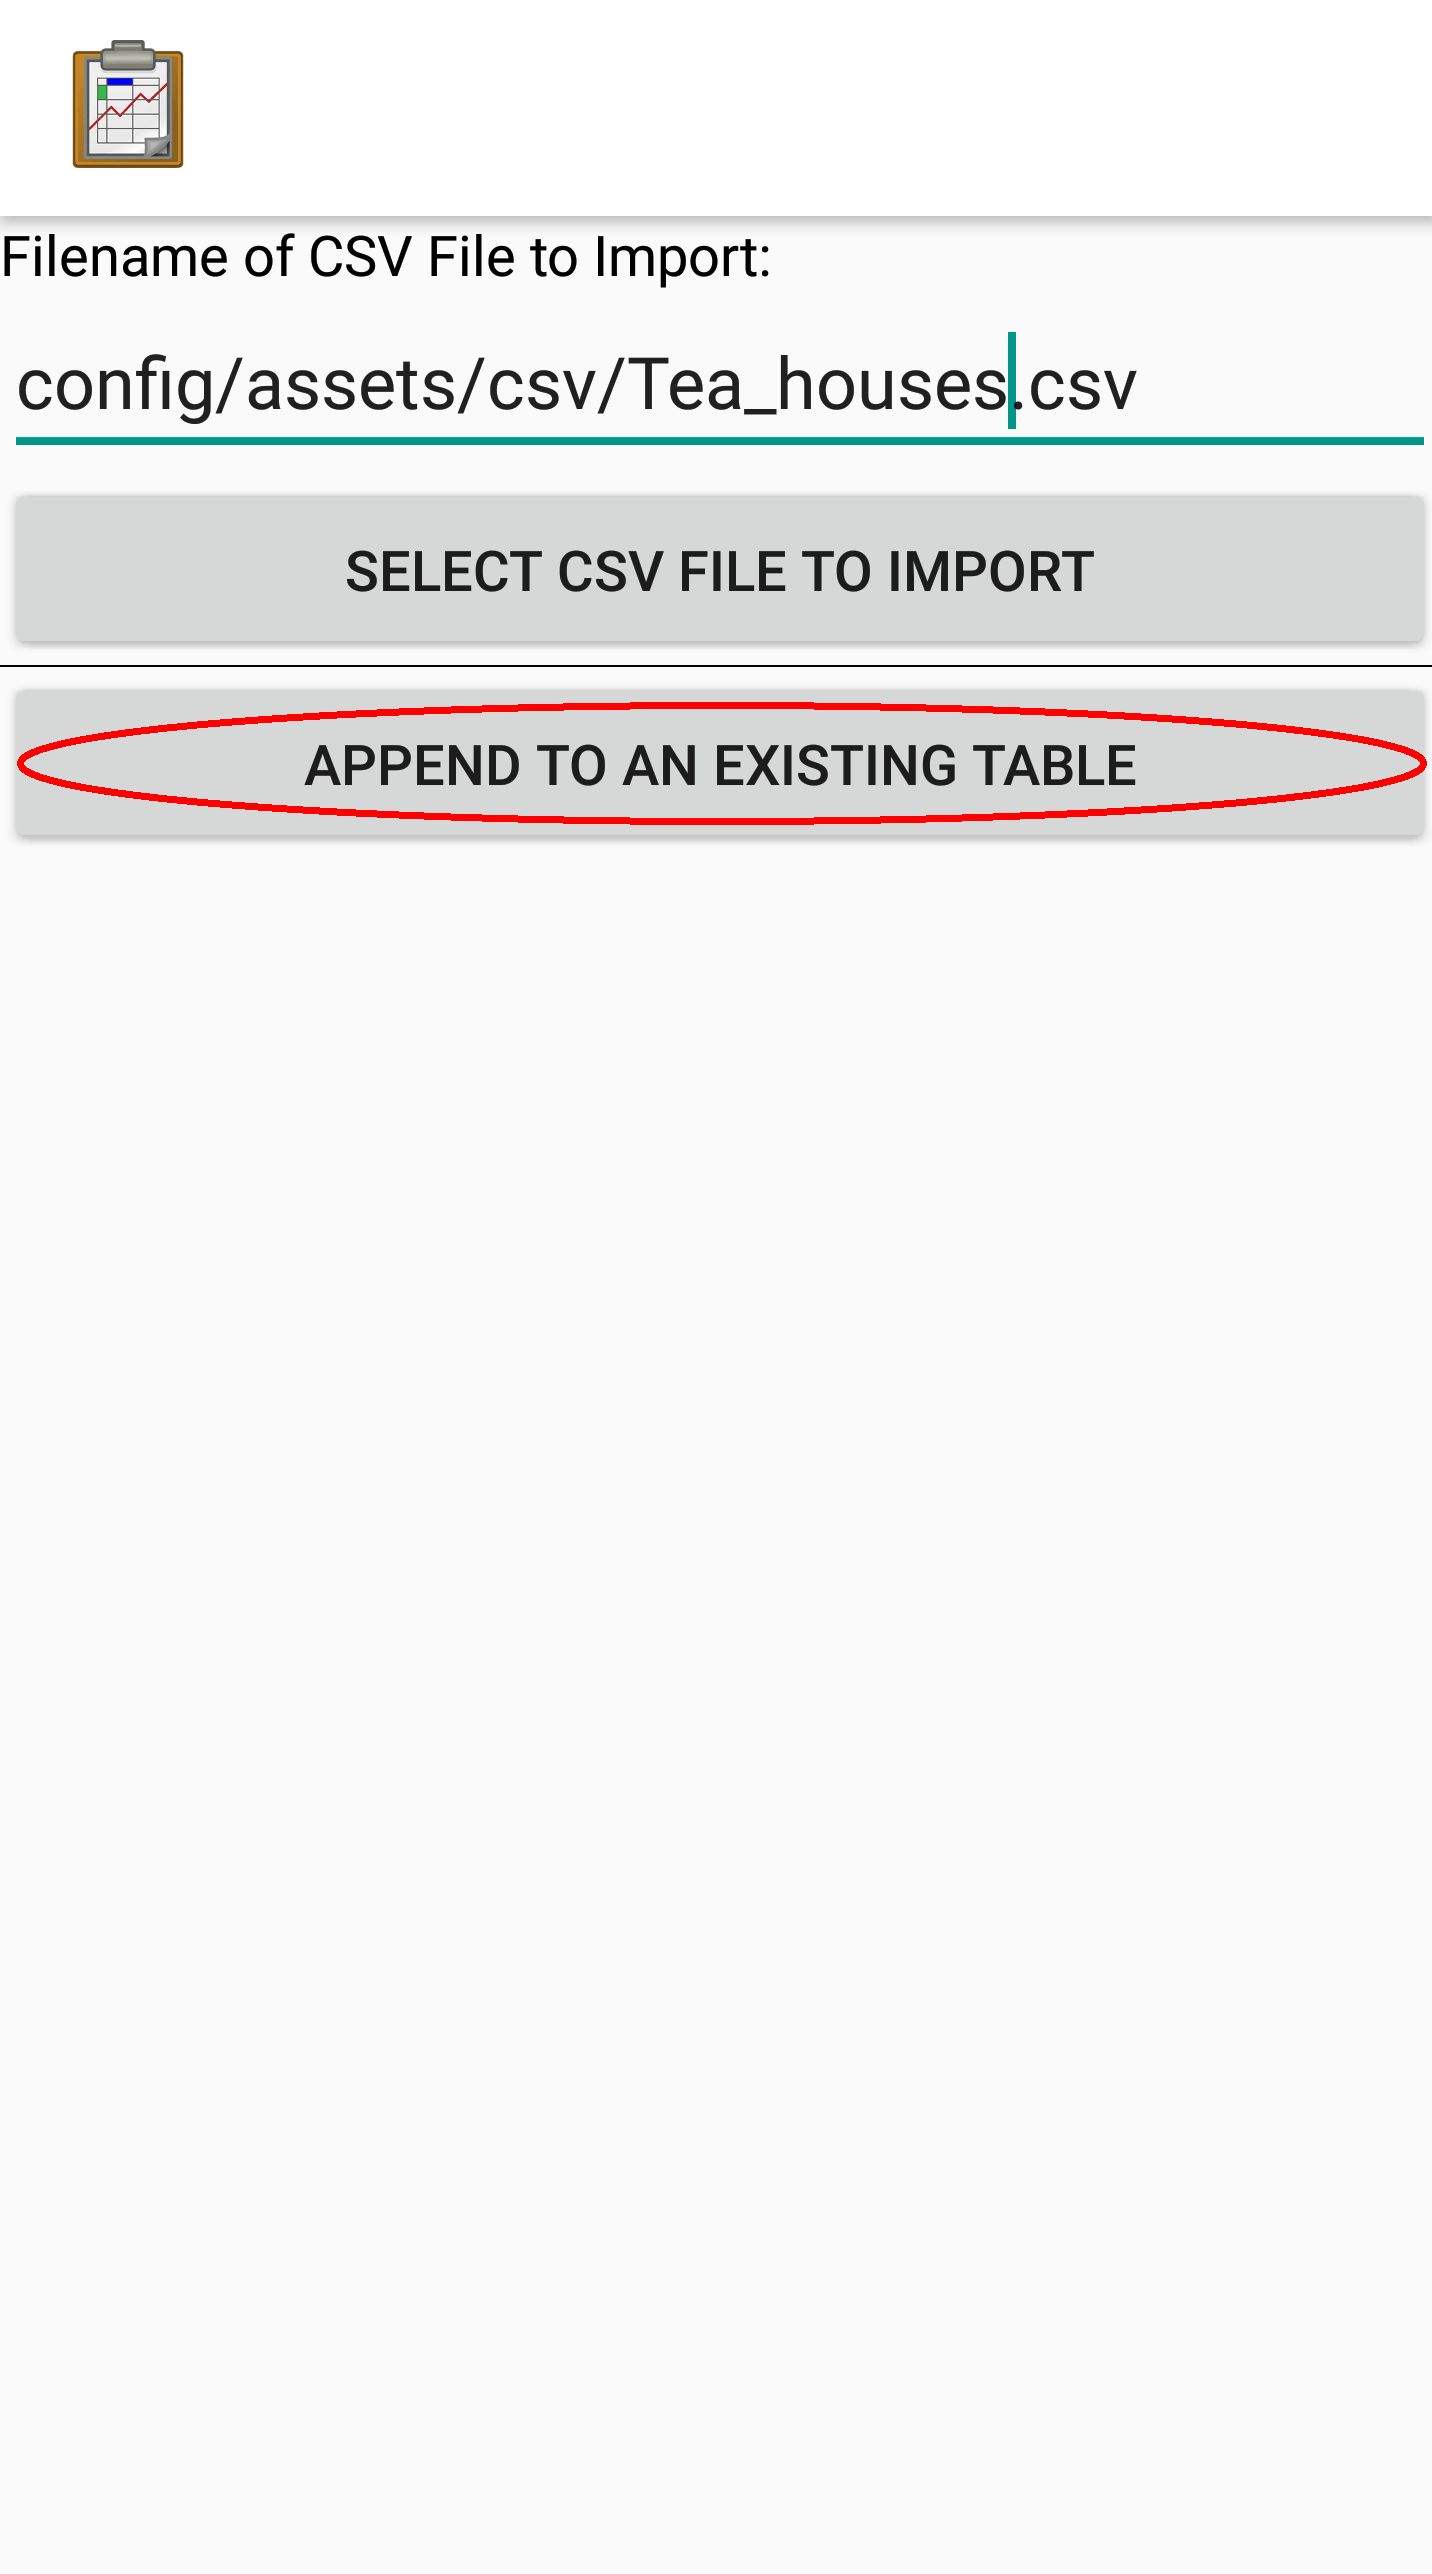
The data will be read from the file and appended to your data table.
Warning
Prior to any deployment, you should sync your device to your server and export the data table and copy the exported CSV file back on top of the simple CSV file that you created above.
This ensures that the additional fields required by the ODK-X tools are properly populated and that a server-managed revision number is added to the data rows so that all devices will have the same internal ids for all of your data rows. This eliminates the possibility of the tables.init mechanism introducing duplicate records and speeds the sync process and minimizes the occurrence of conflicts across the devices when these devices first sync to the server.
Warning
Specifying the values for the _id column is important. Otherwise, each device, when it loads the CSV file, would assign different unique ids for each of the rows, causing much duplication and confusion.
Exporting Data
You can export any of your tables to a CSV file and associated supporting files. These files will be written to the output/csv directory on the device.
A Tables-exported CSV includes all the metadata needed to allow the table to be imported with exactly the same status settings, file associations and metadata settings on another device. Exporting produces the following files:
file:tableid.definition.csv – this defines the data table's structure. It specifies the columns and their column types and is a copy of the file found under
config/tables/tableId/file:tableid.properties.csv – this defines the column heading names, translations, and the HTML files associated with List Views, Detail Views, Map Views, and so on, and is a copy of the file found under
config/tables/tableId/file:tableid.csv – this holds the data file that you can import to recreate the contents of your data table
file:tableId – this holds an instances folder that holds folders named after each row id (the row id is cleaned up to remove any invalid filename characters such as slashes and colons). Each of those folders contains the row-level attachments for that row id.
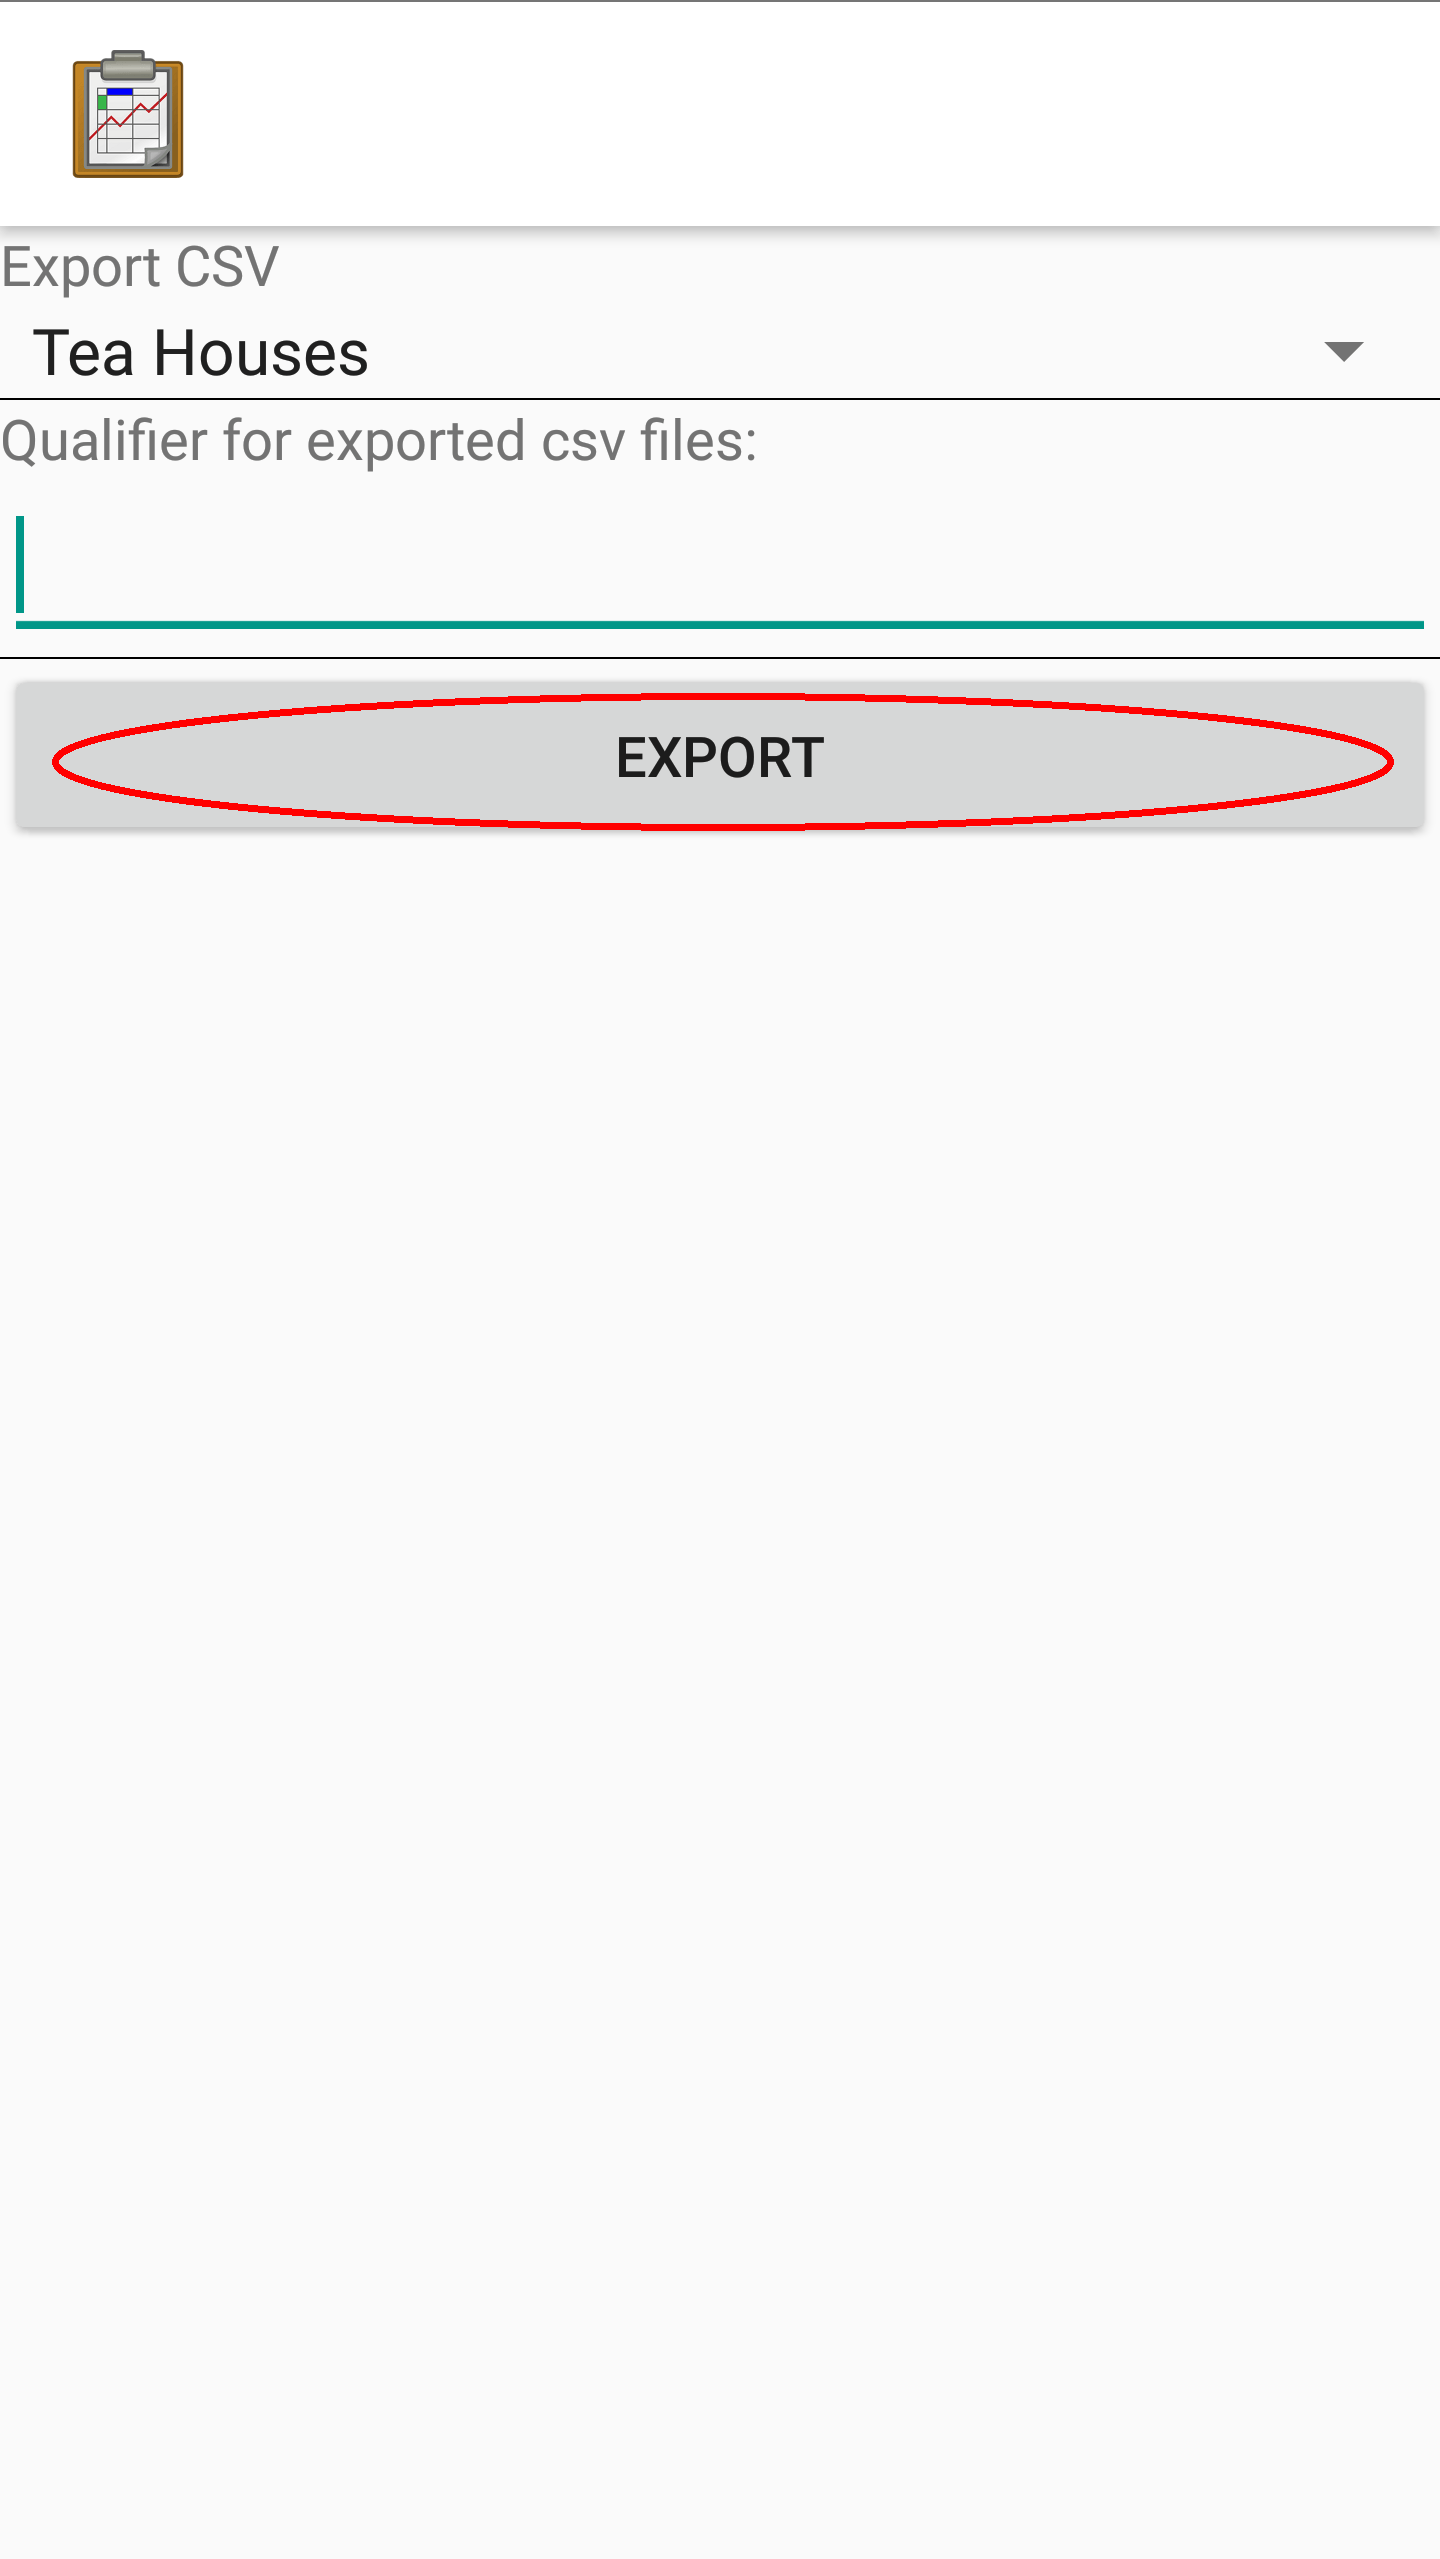
To export a table:
Launch ODK-X Tables and navigate to the Table Manager screen.
Press the arrow -> icon at the top of the Table Manager screen.
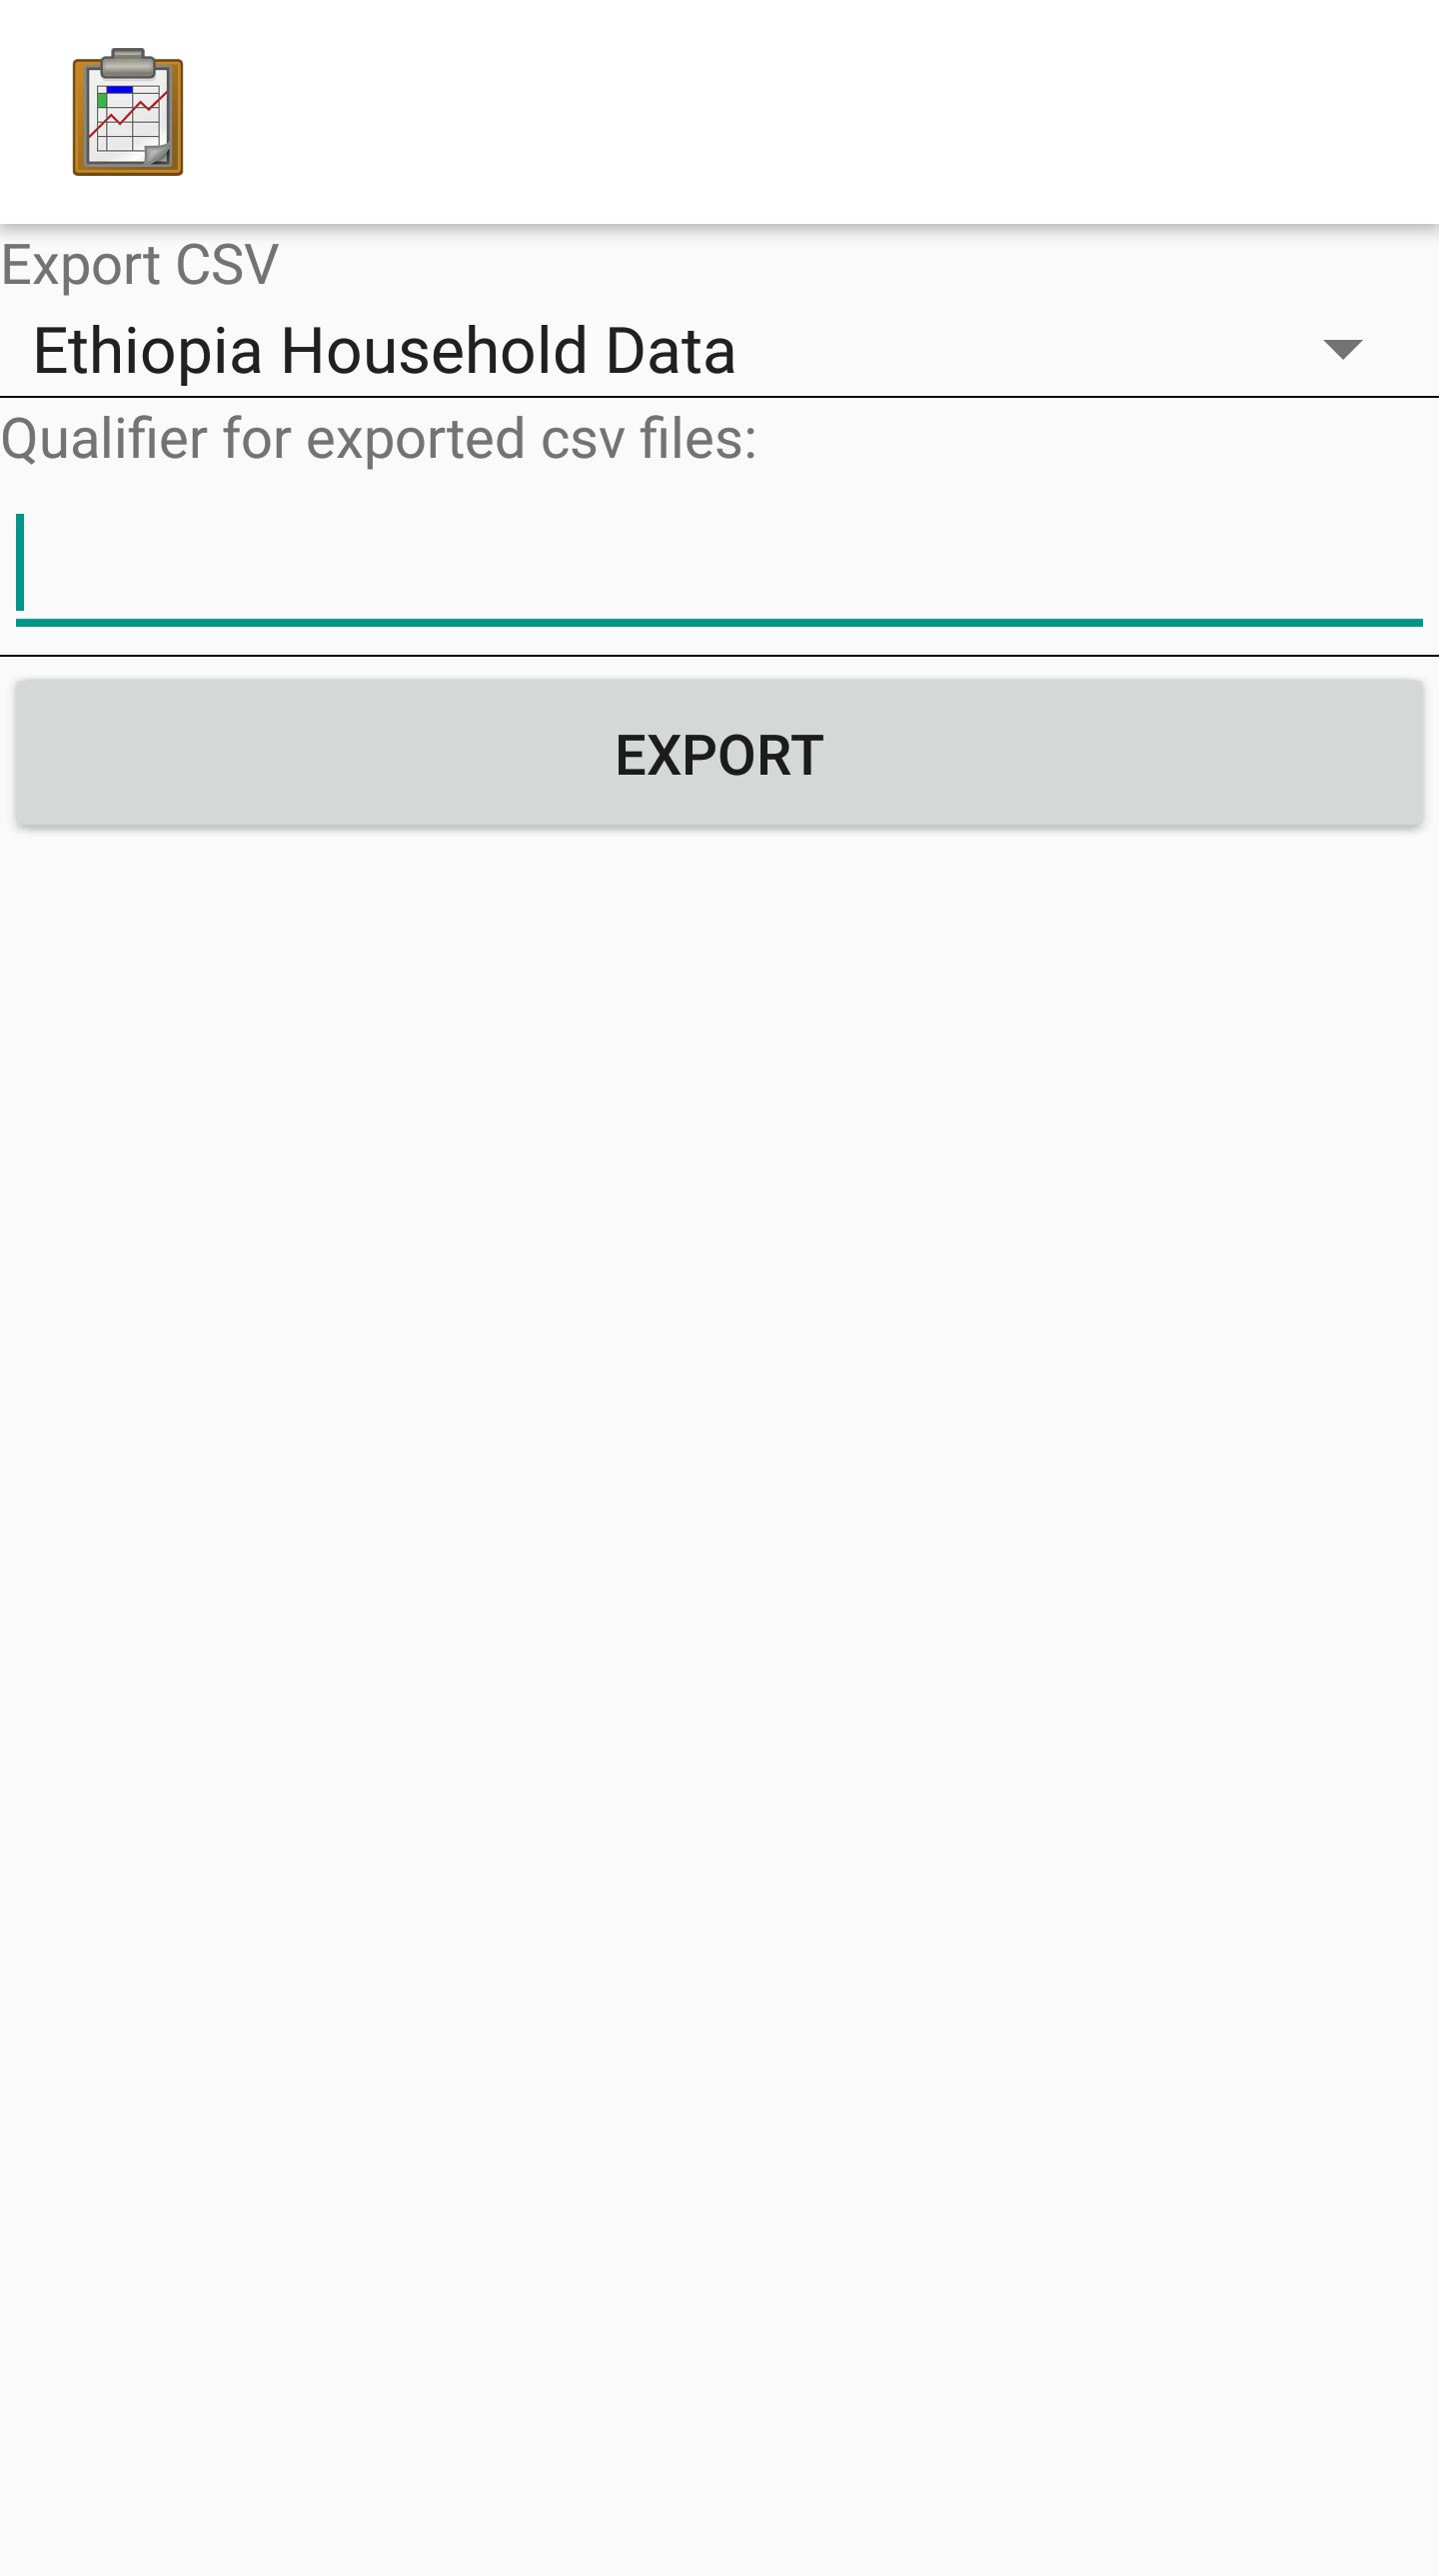
Select the table you want to export.
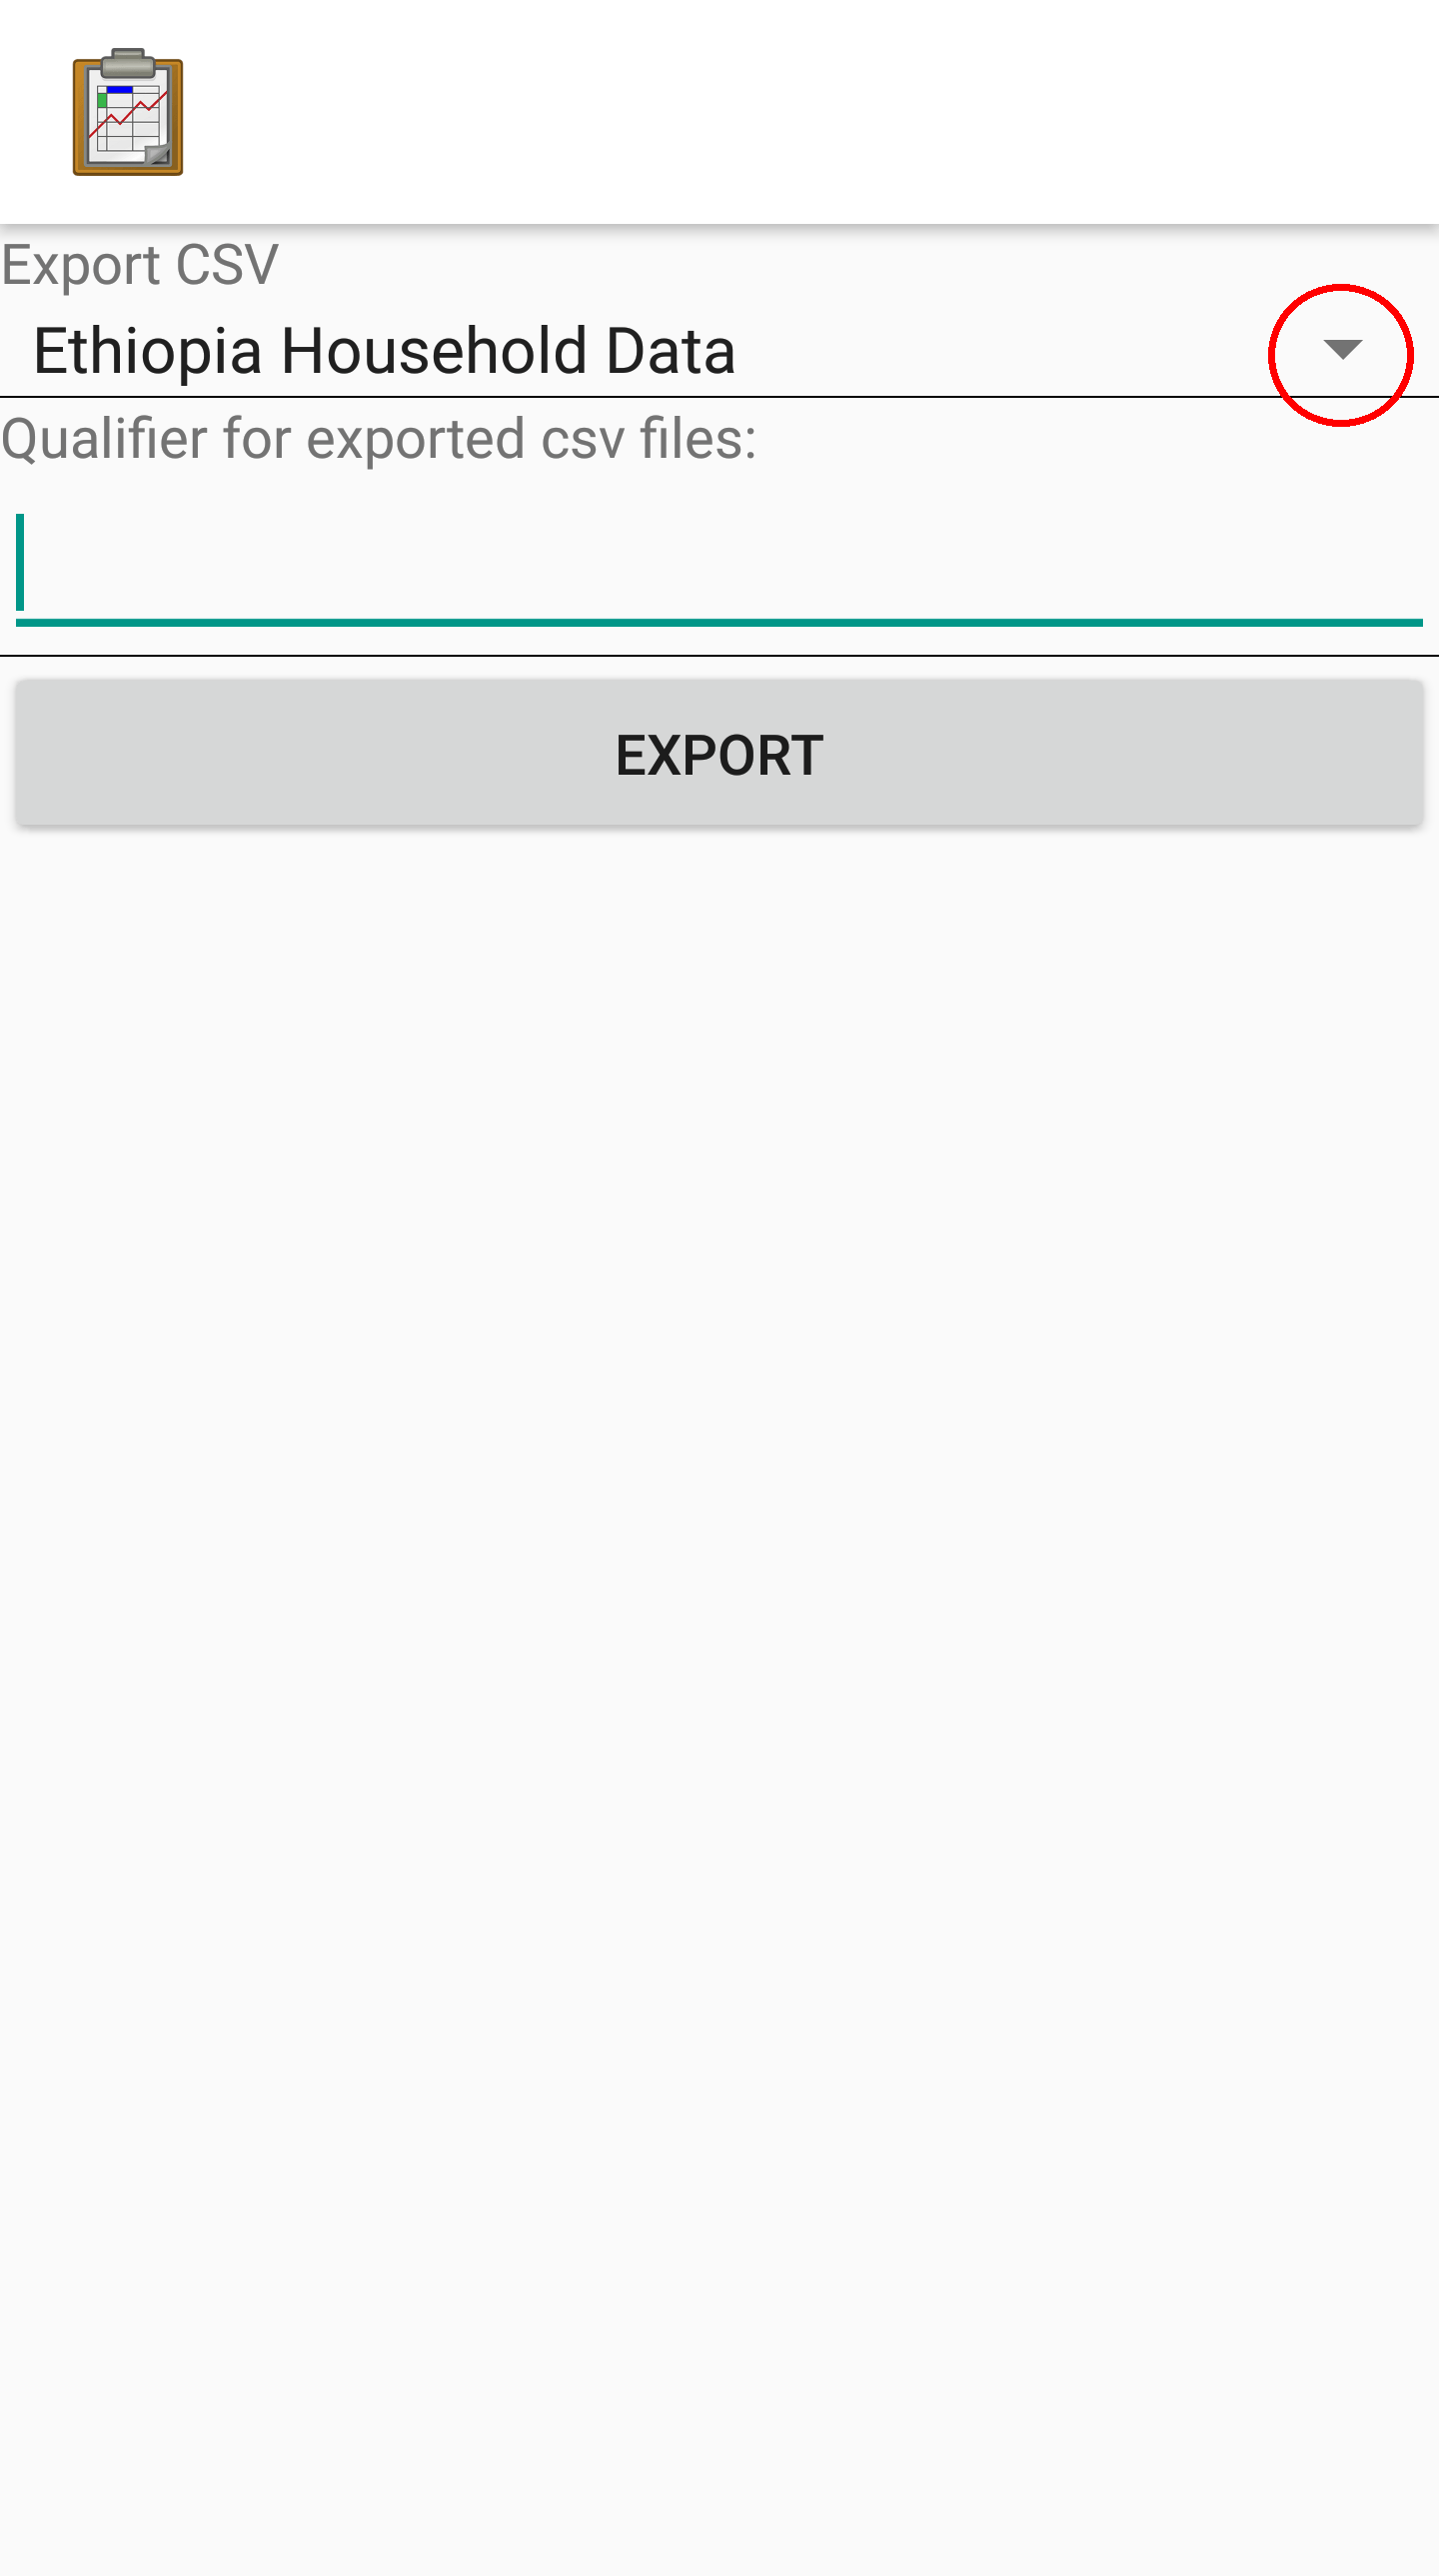
Optionally specify a qualifier that will be inserted into the filenames of the emitted files before the
.csvextension.Press Export.
For example, if you were to export the geotagger table and specified demo as a qualifier, the following files would be written:
output/csv/geotagger.demo.definition.csv
output/csv/geotagger.demo.properties.csv
output/csv/geotagger.demo.csv/geotagger.demo.csv
output/csv/geotagger/instances/1f9e.../137...jpg
output/csv/geotagger/instances/...
Table Properties
Table properties define a table and its behavior on the device. This includes basic necessities such as the table's ID and columns, references to sister files such as the forms to use when adding new rows or the html file to use when rendering a List View, and display settings such as map pin color rules and spreadsheet column width. Some of these properties are defined in the Properties worksheet in the XLSX file.
To modify the properties of a table:
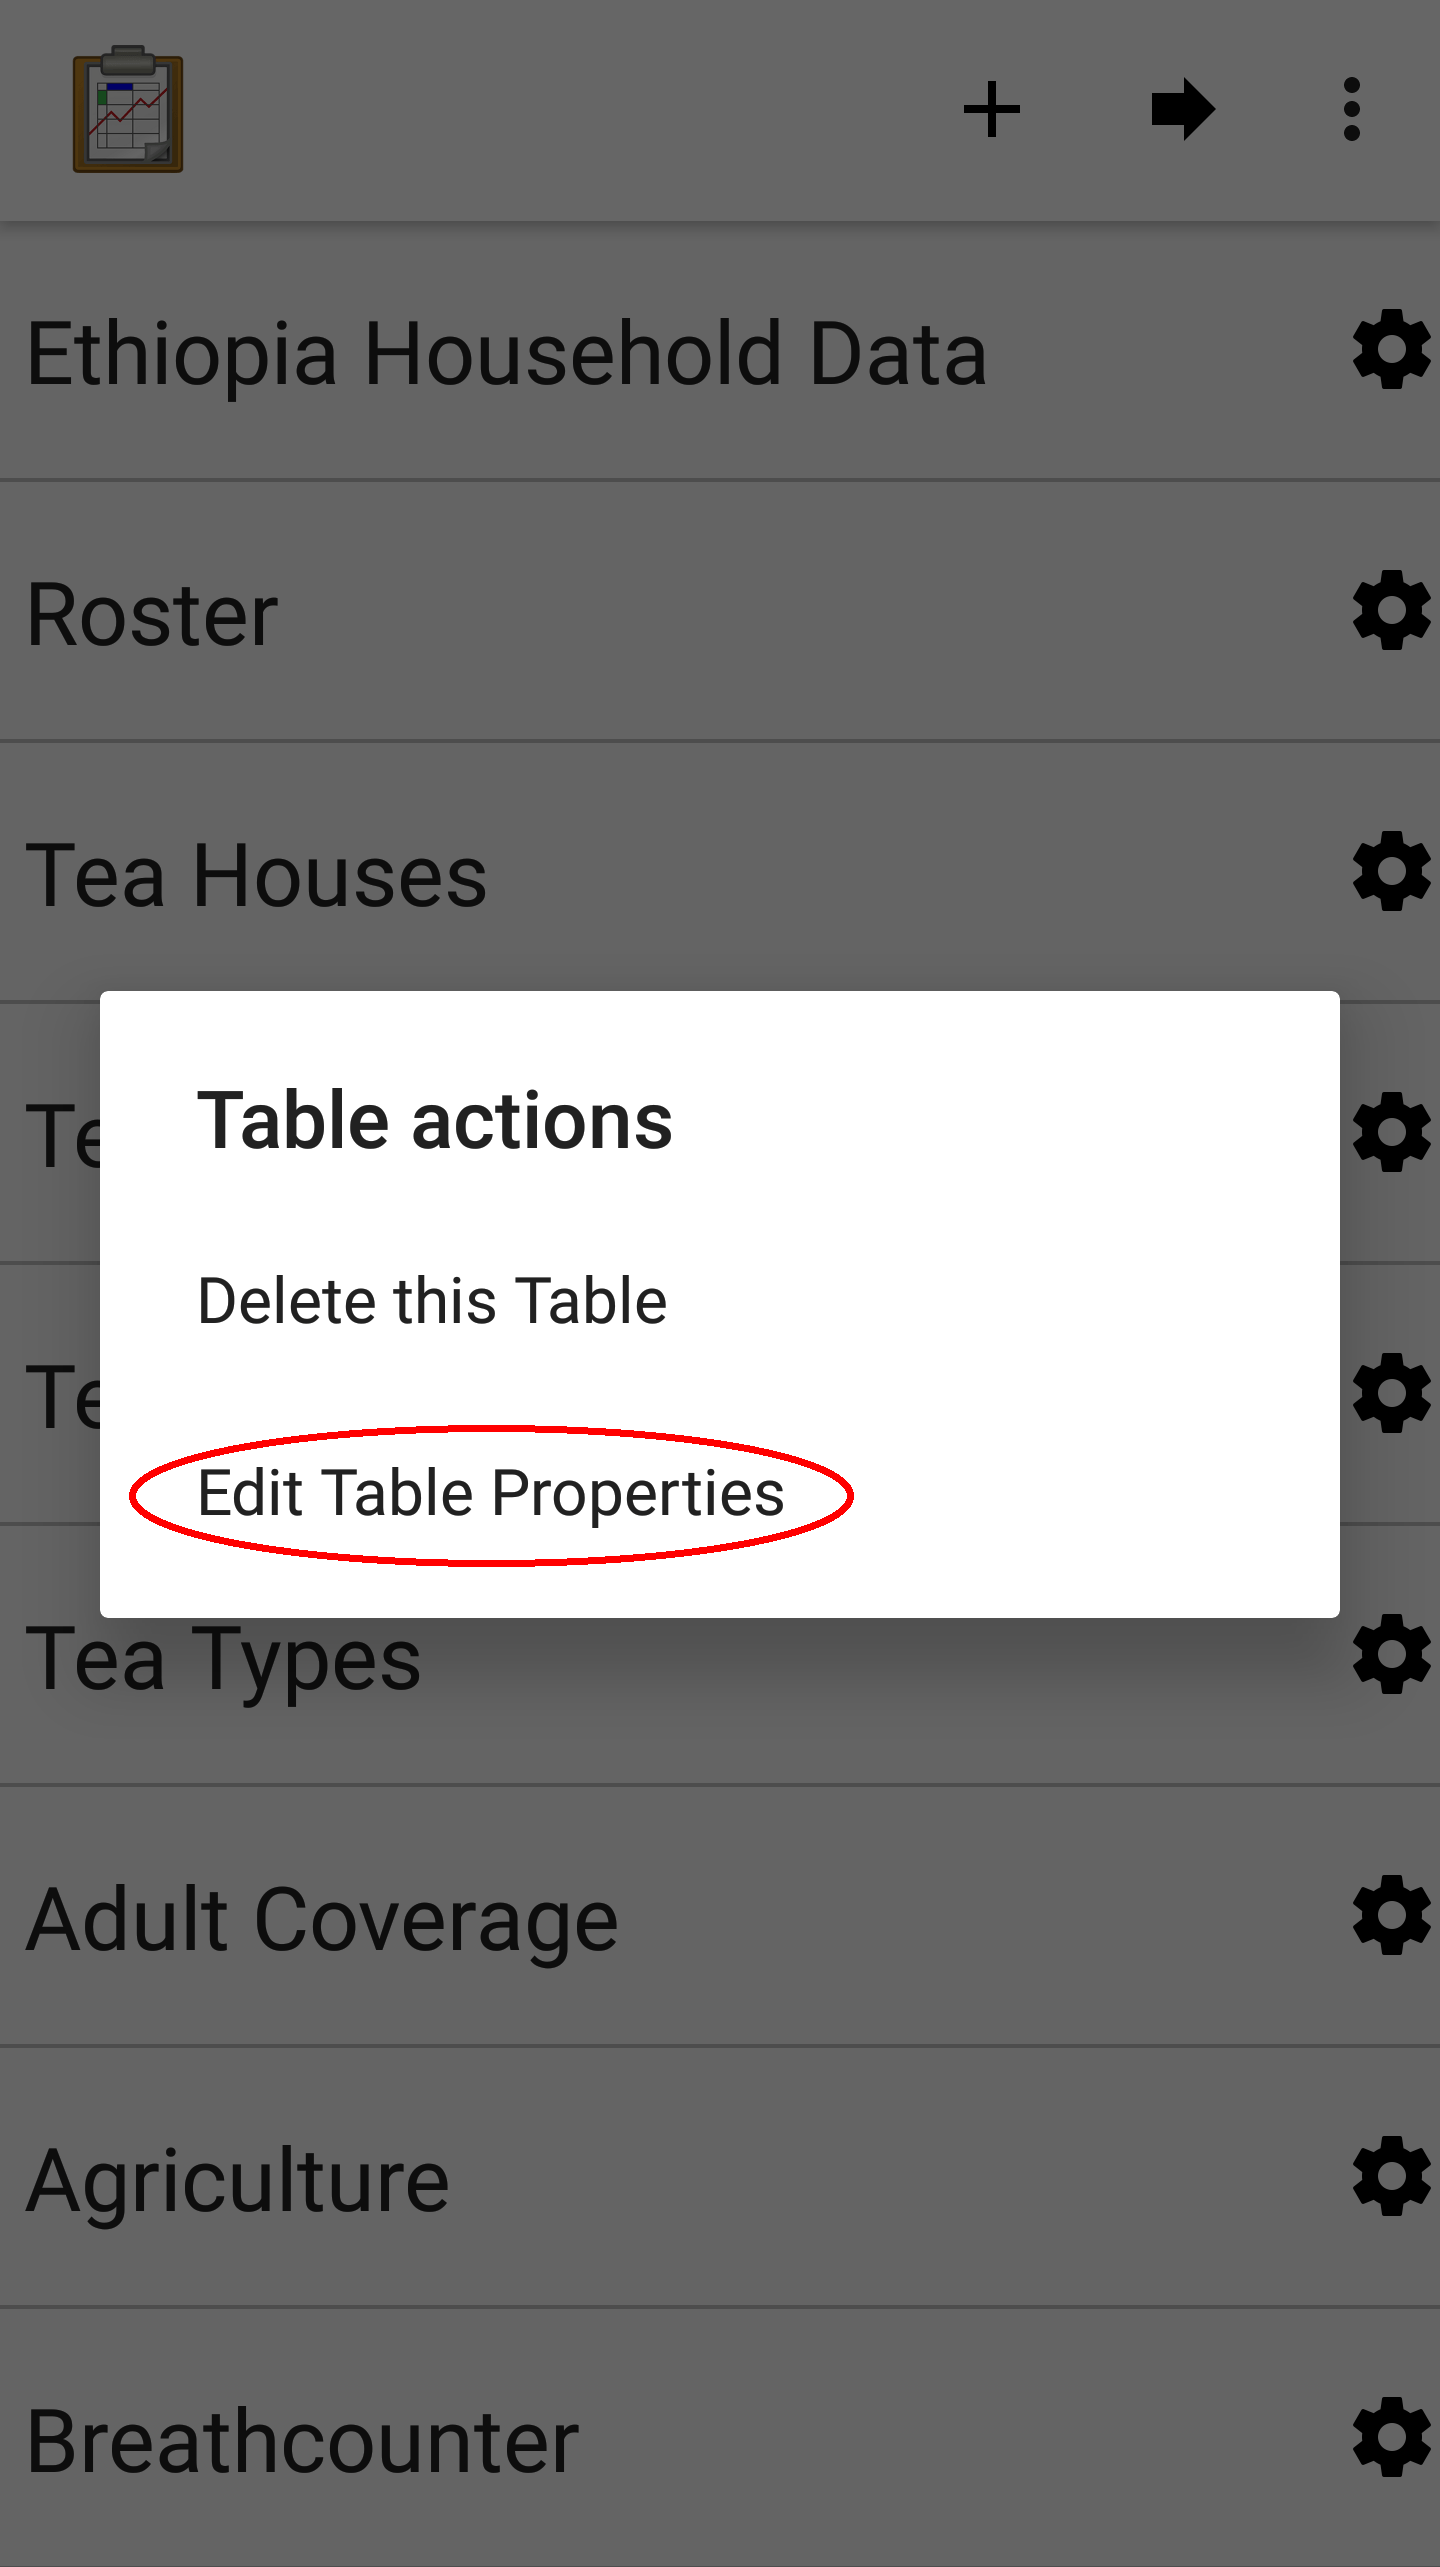
Launch the Table Manager. Tap the gear icon next to the desired table:
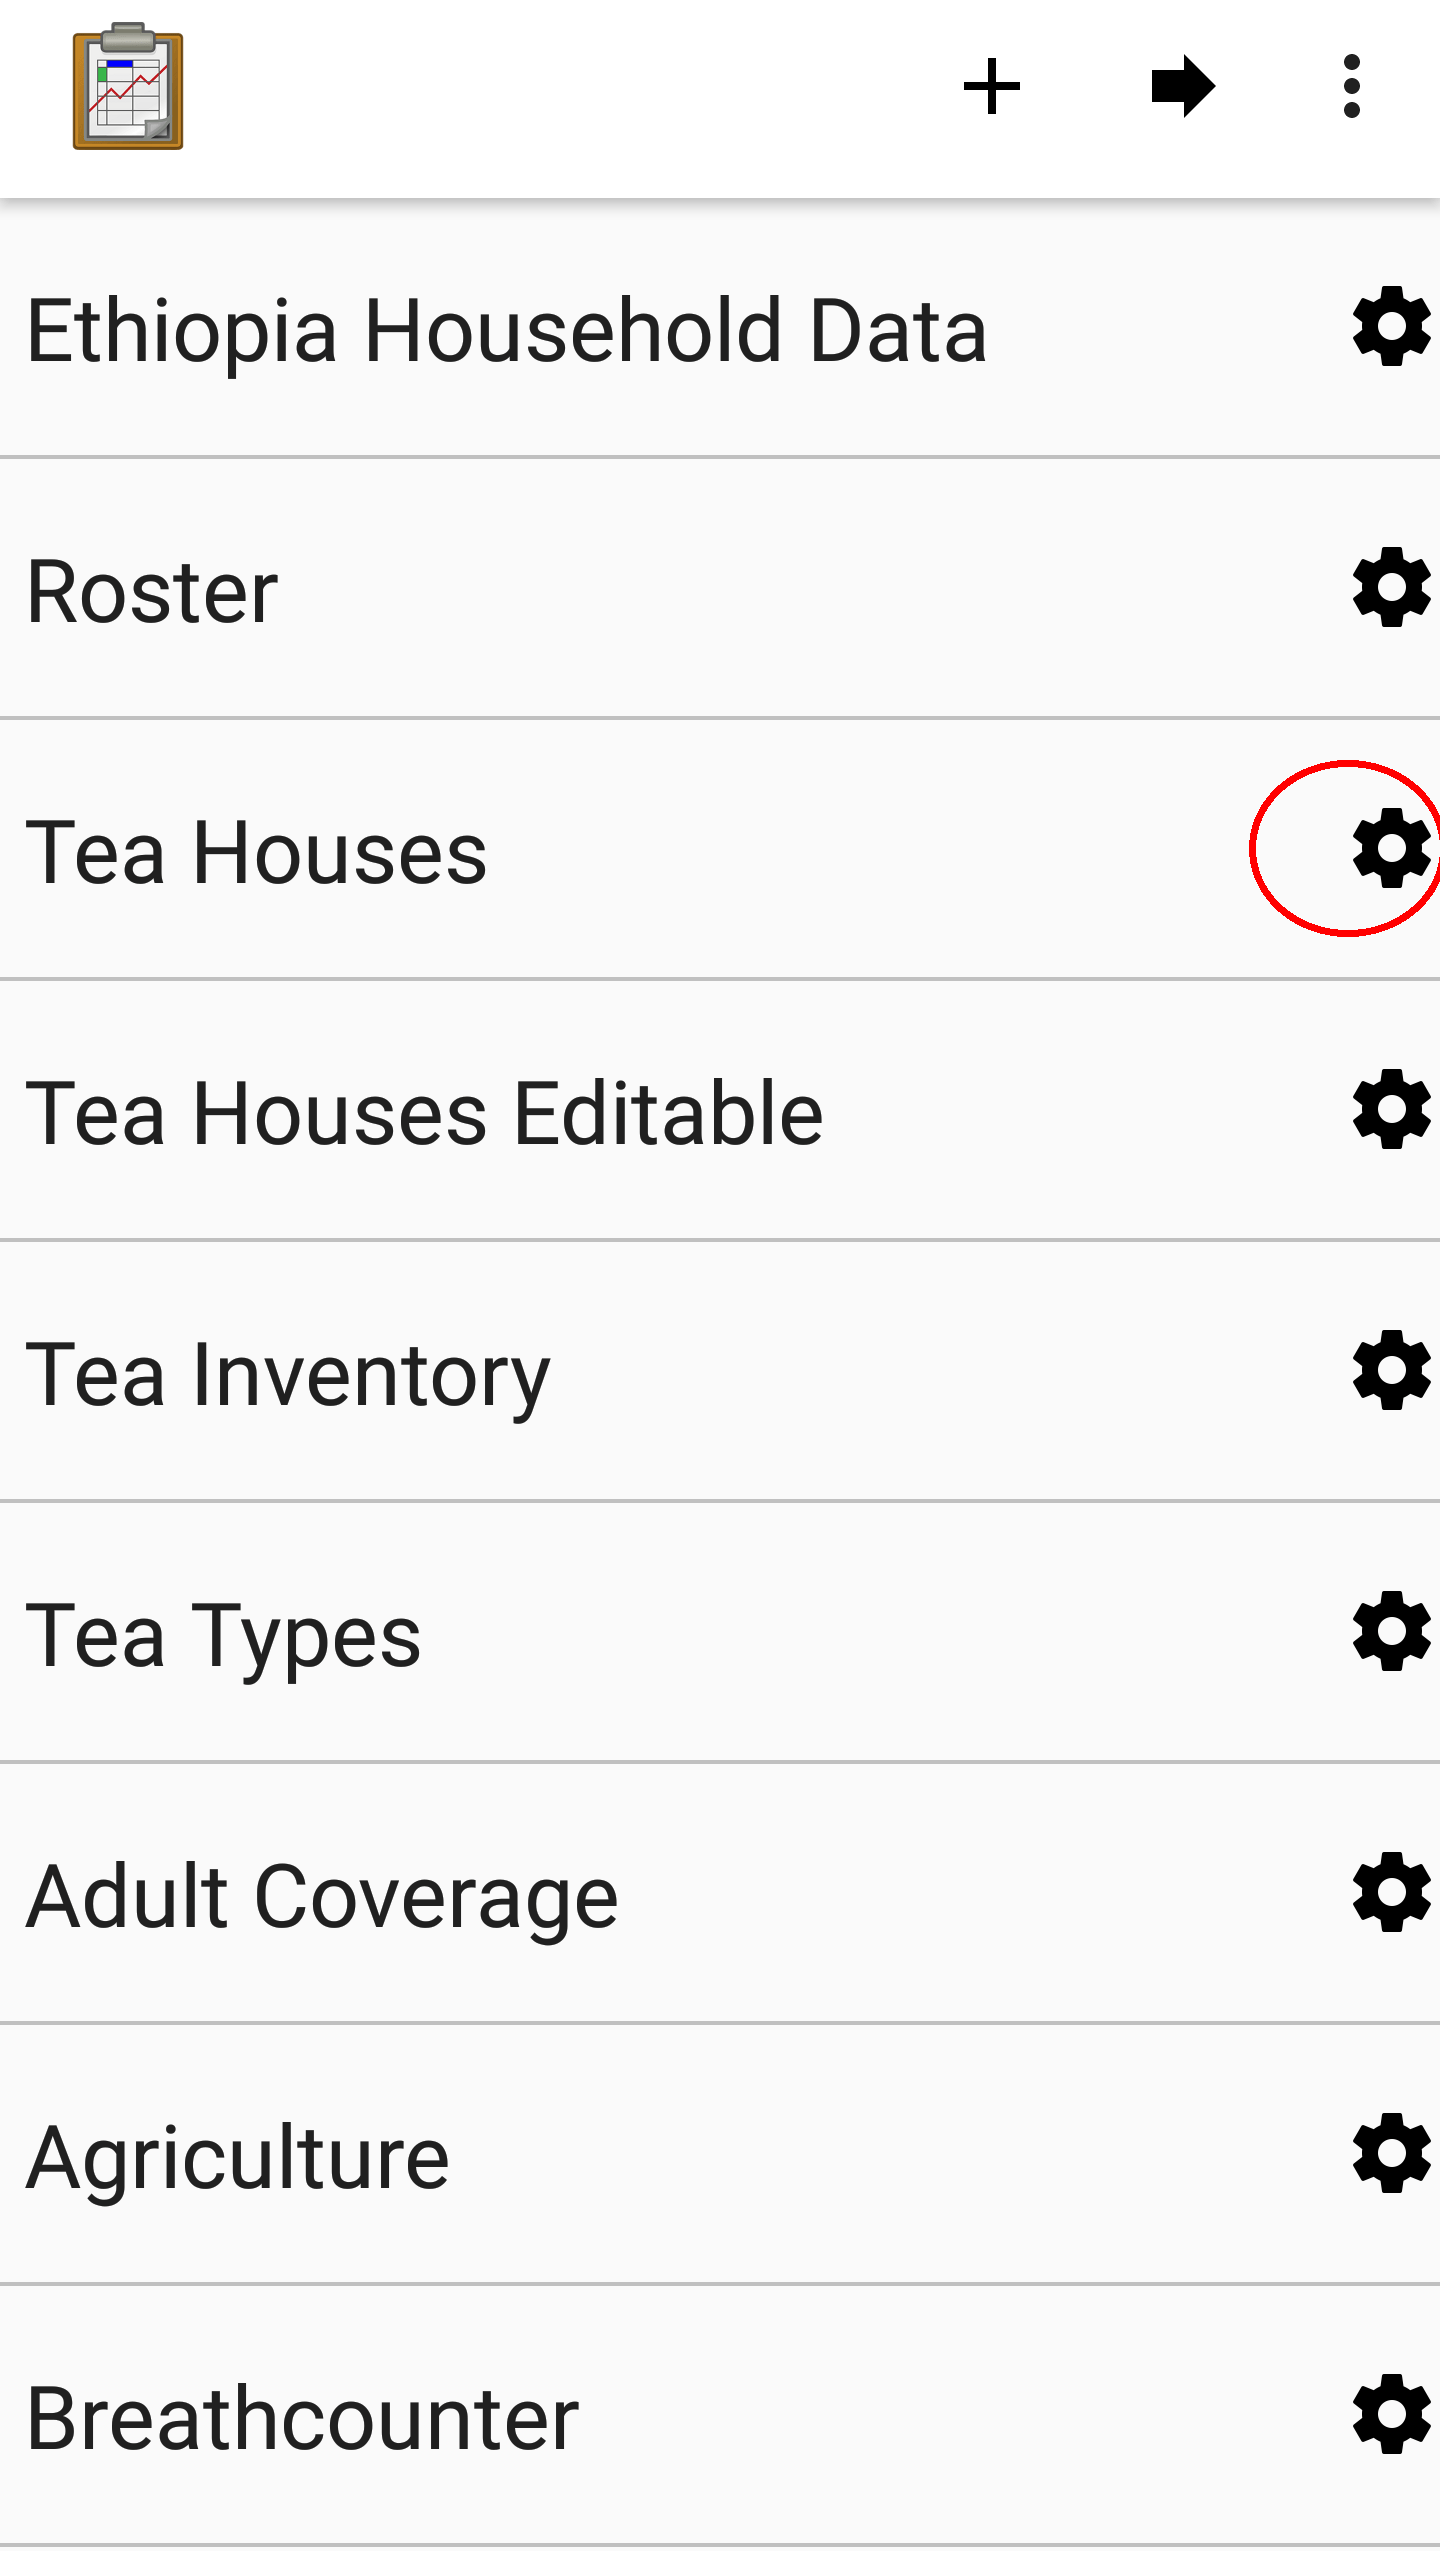
This will launch the Table actions pop up. Select Edit Table Properties
This will launch the table properties screen.
The table properties can also be accessed by tapping that same gear icon in the Spreadsheet View of the desired table.
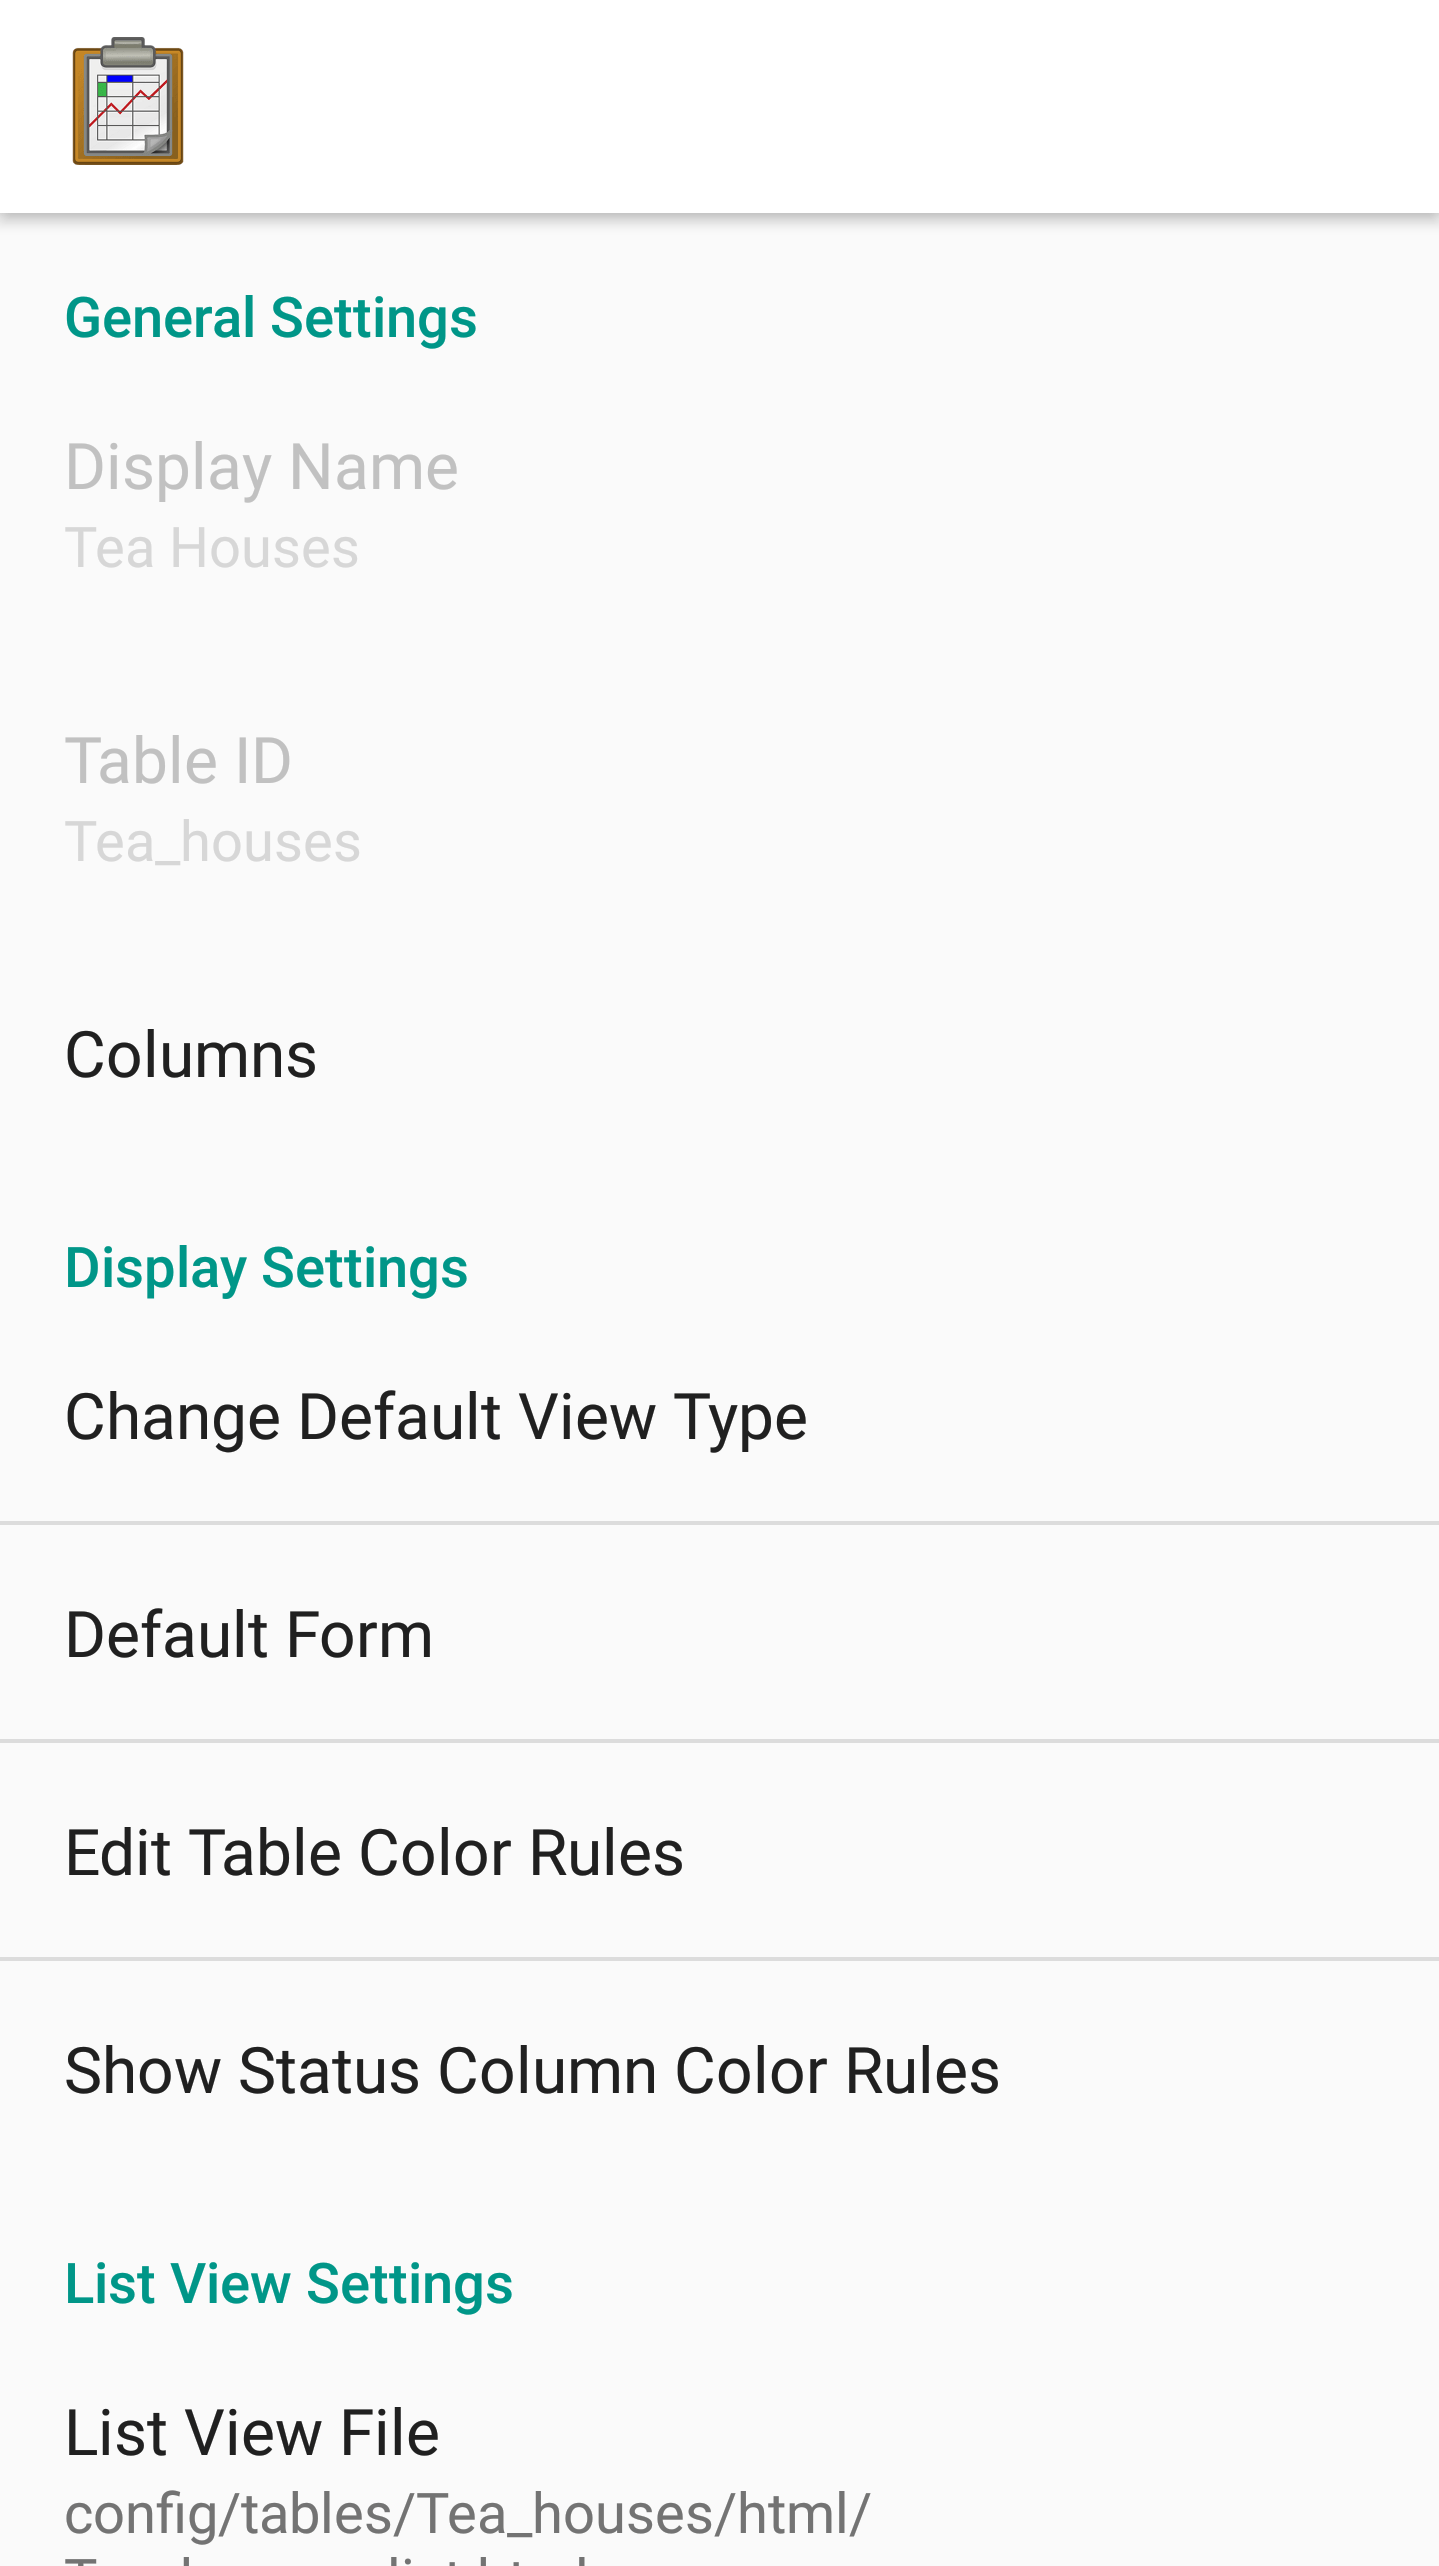
General Settings
The general settings define a table and are mostly not editable on the device. They include:
Display Name: The string to display to as the name of the table, such as in the Table Manager view.
Table ID: The ID of the table, which is used when performing database queries.
Columns: The full list of data columns in the database table.
Columns
Tapping the Columns item will launch a list of all the columns in the table.
Note
The columns list excludes the status and metadata columns that the ODK-X platform automatically adds. It only shows the columns holding data as defined by your organization.
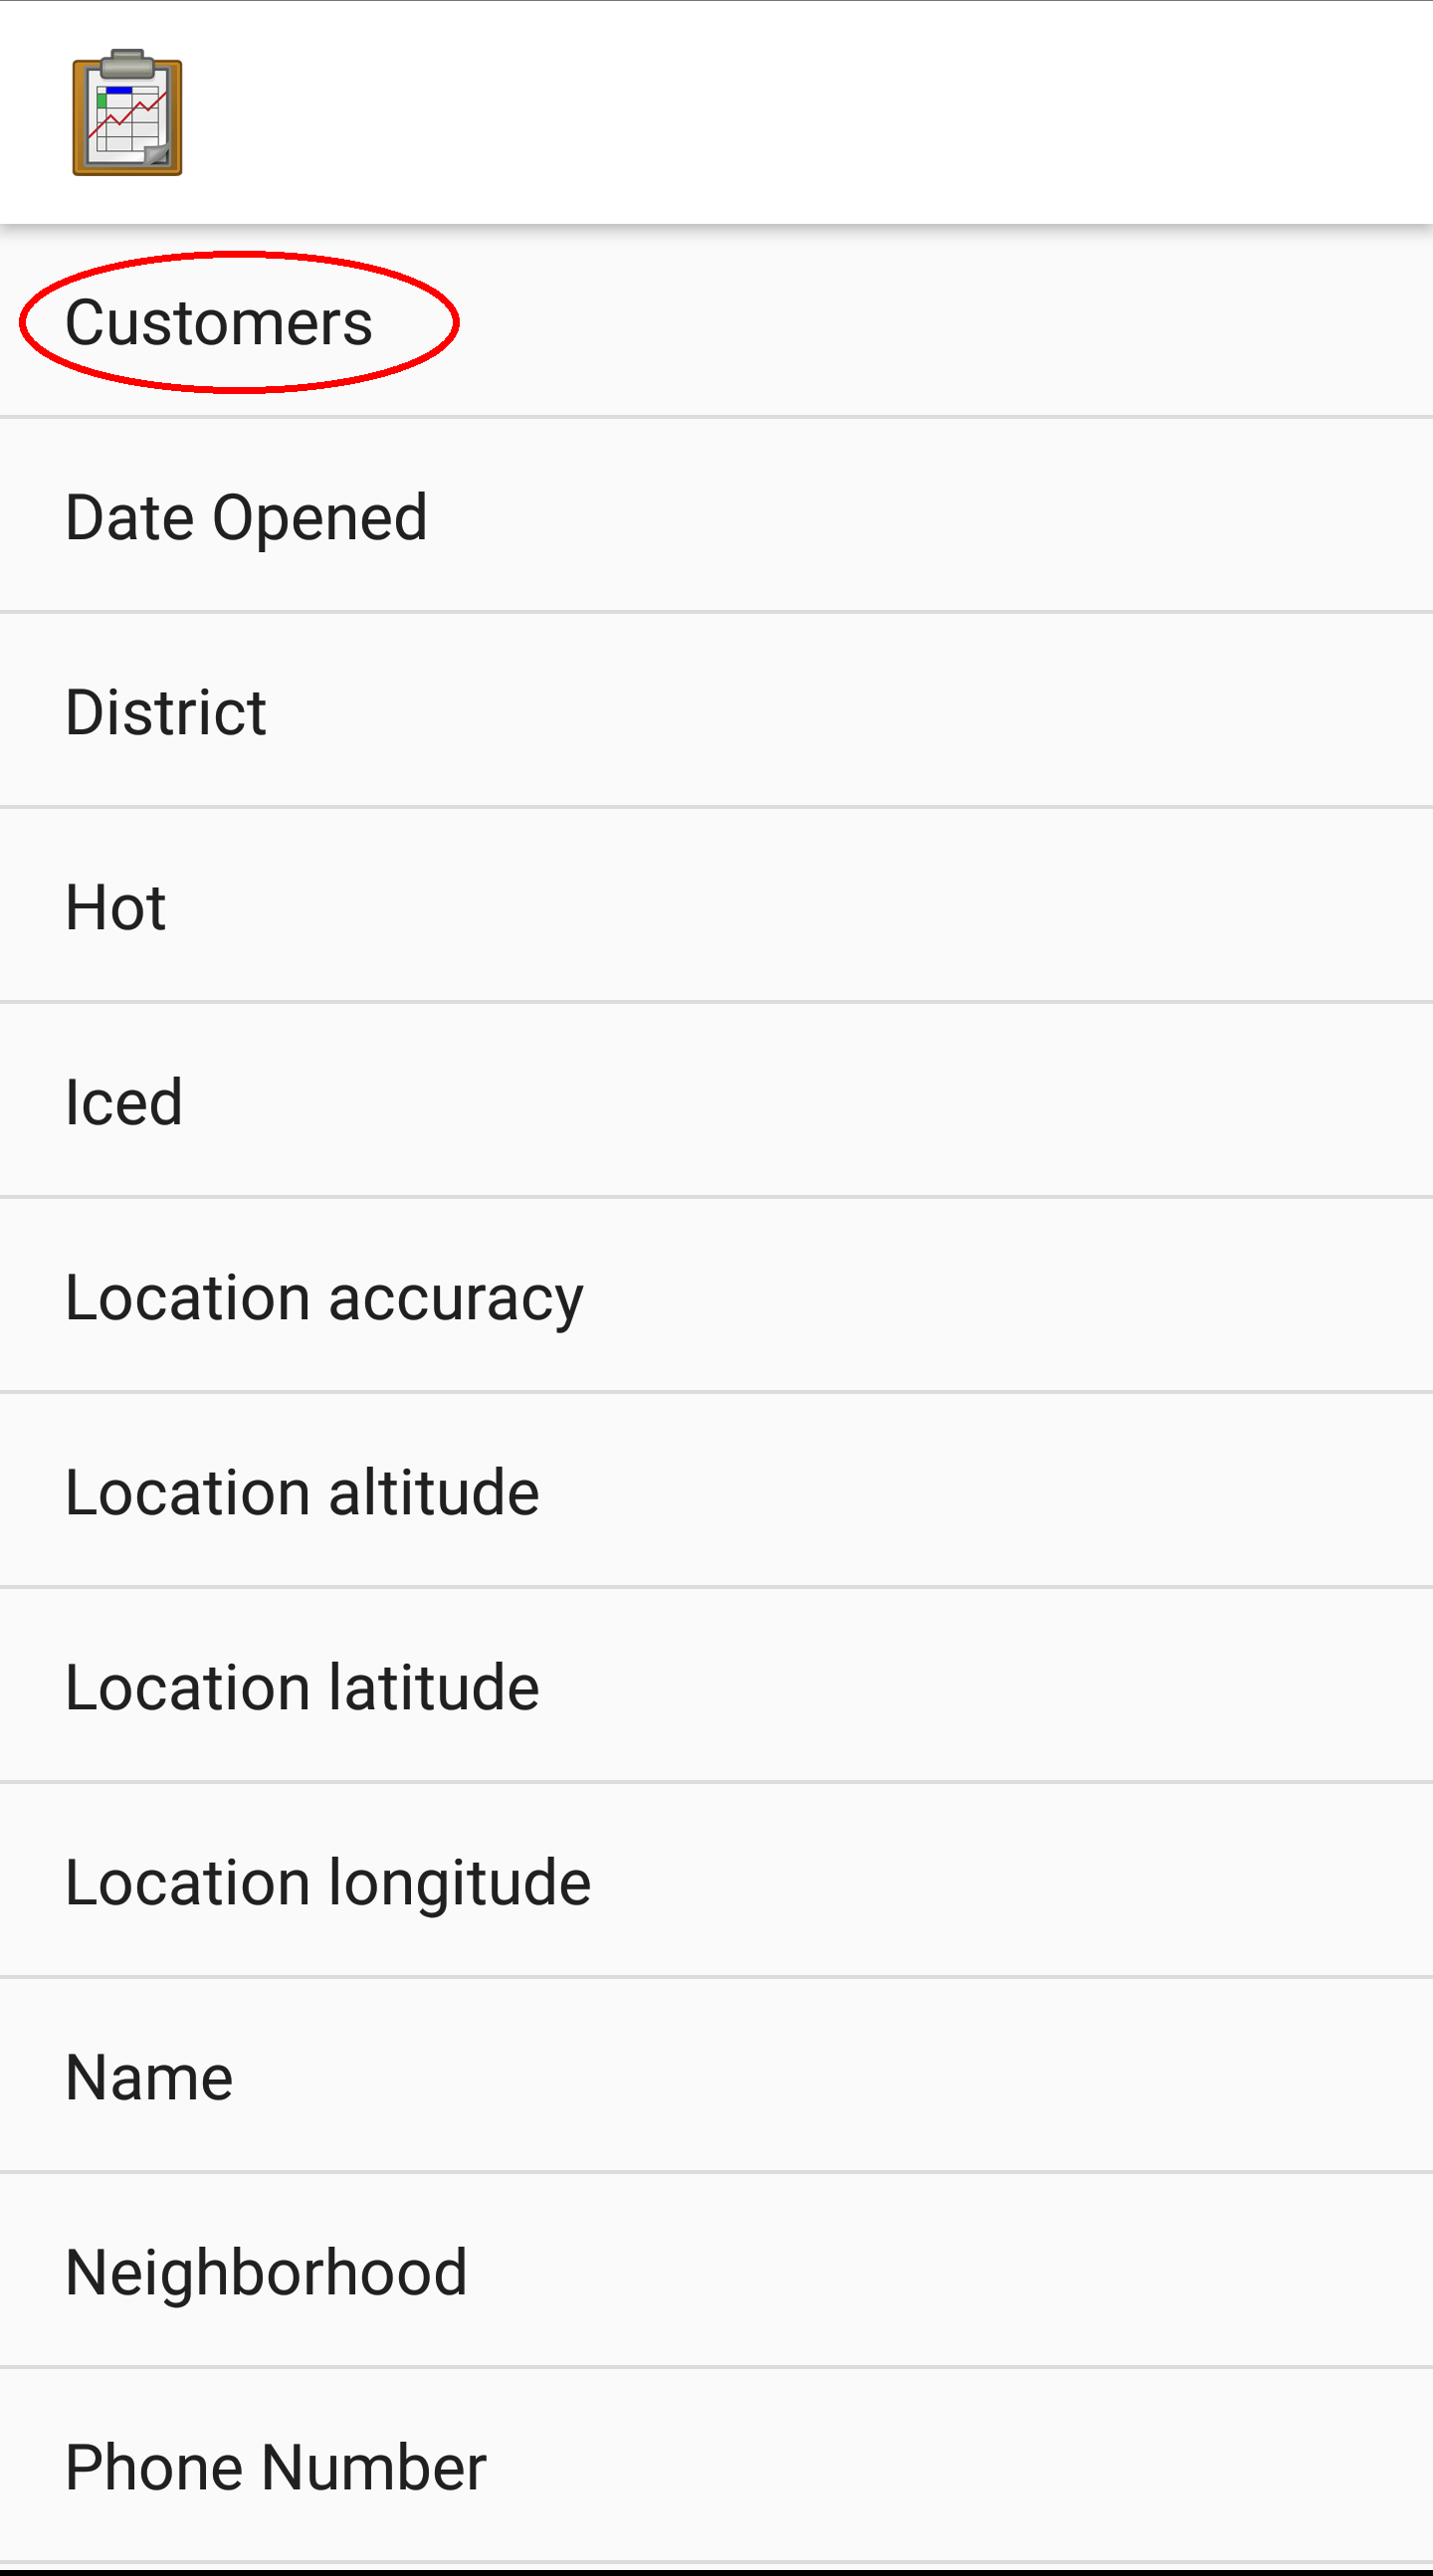
If one of the columns is then selected, properties for that column can be set.
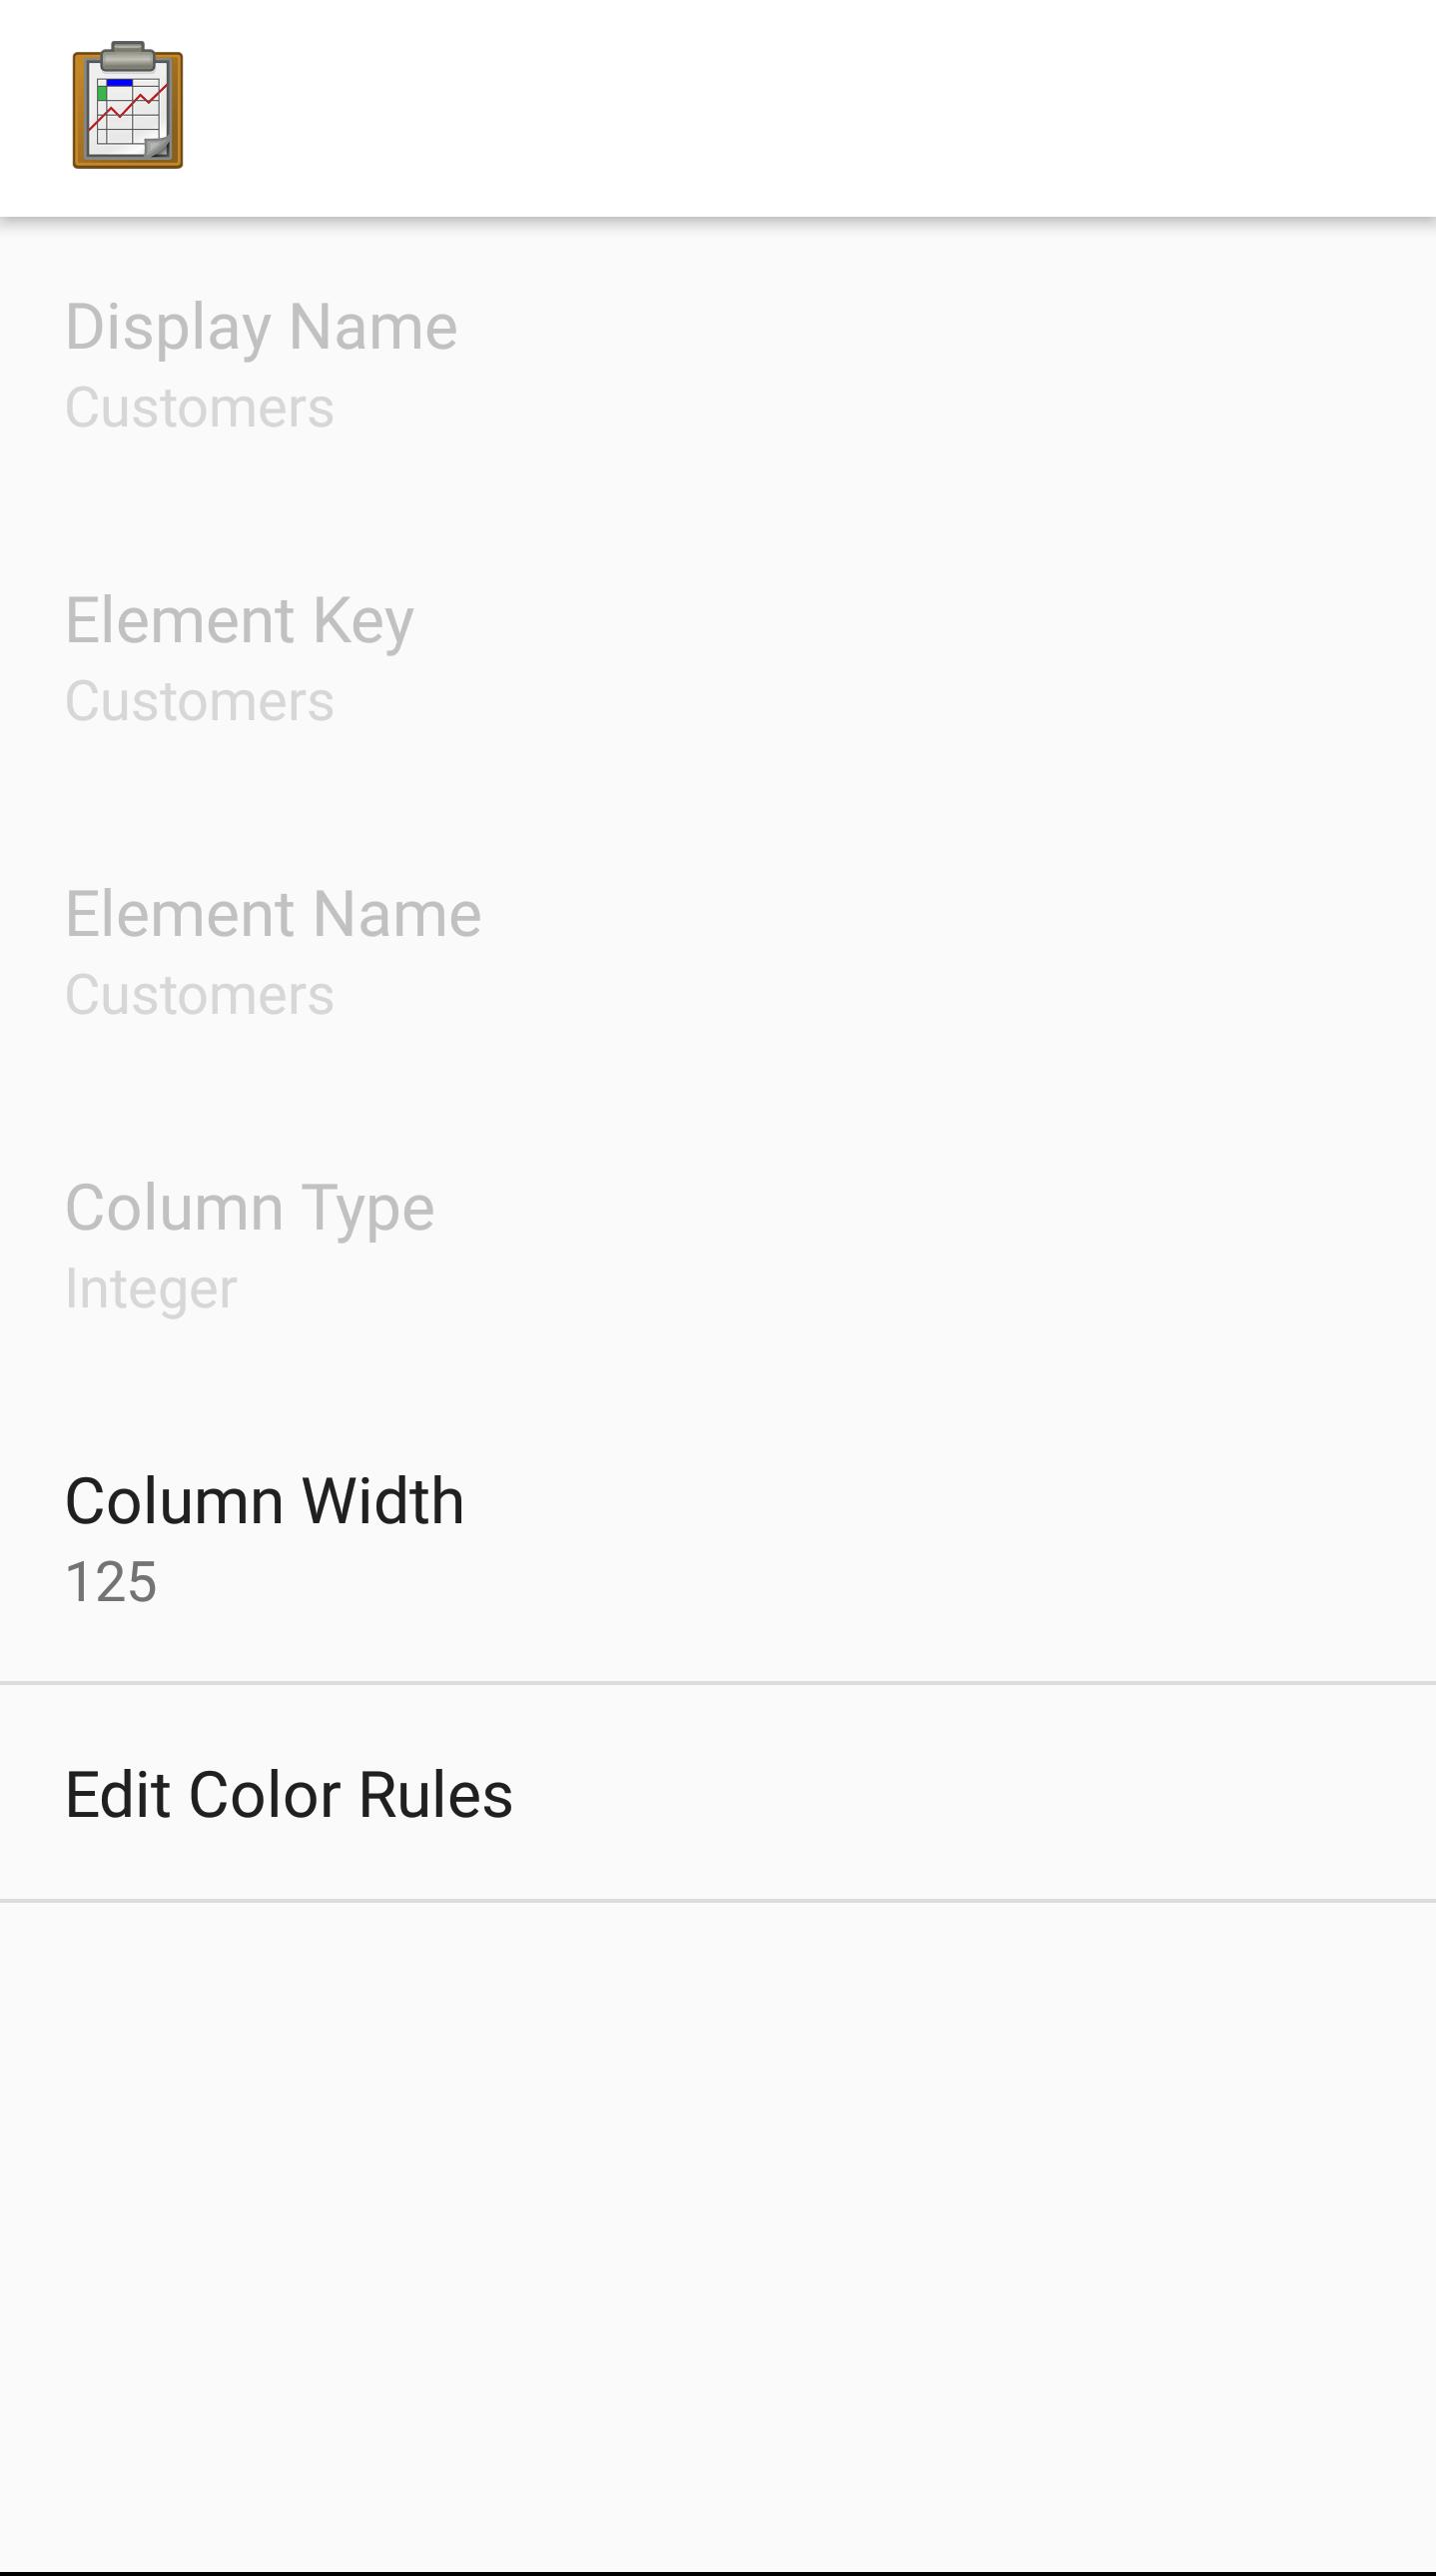
These include database definitions (which cannot be changed on the device):
Display Name: The string to display as the name of the column in Tables.
Element Key: The database key name for the value.
Element Name: The name of the value in the form.
Column Type: The data type of the value in the database.
Additionally, there are two editable properties:
Column Width: The width of the column when it is displayed in Spreadsheet View
To change this value, tap the item labeled Column Width. A popup will appear in which you can enter a new width value.
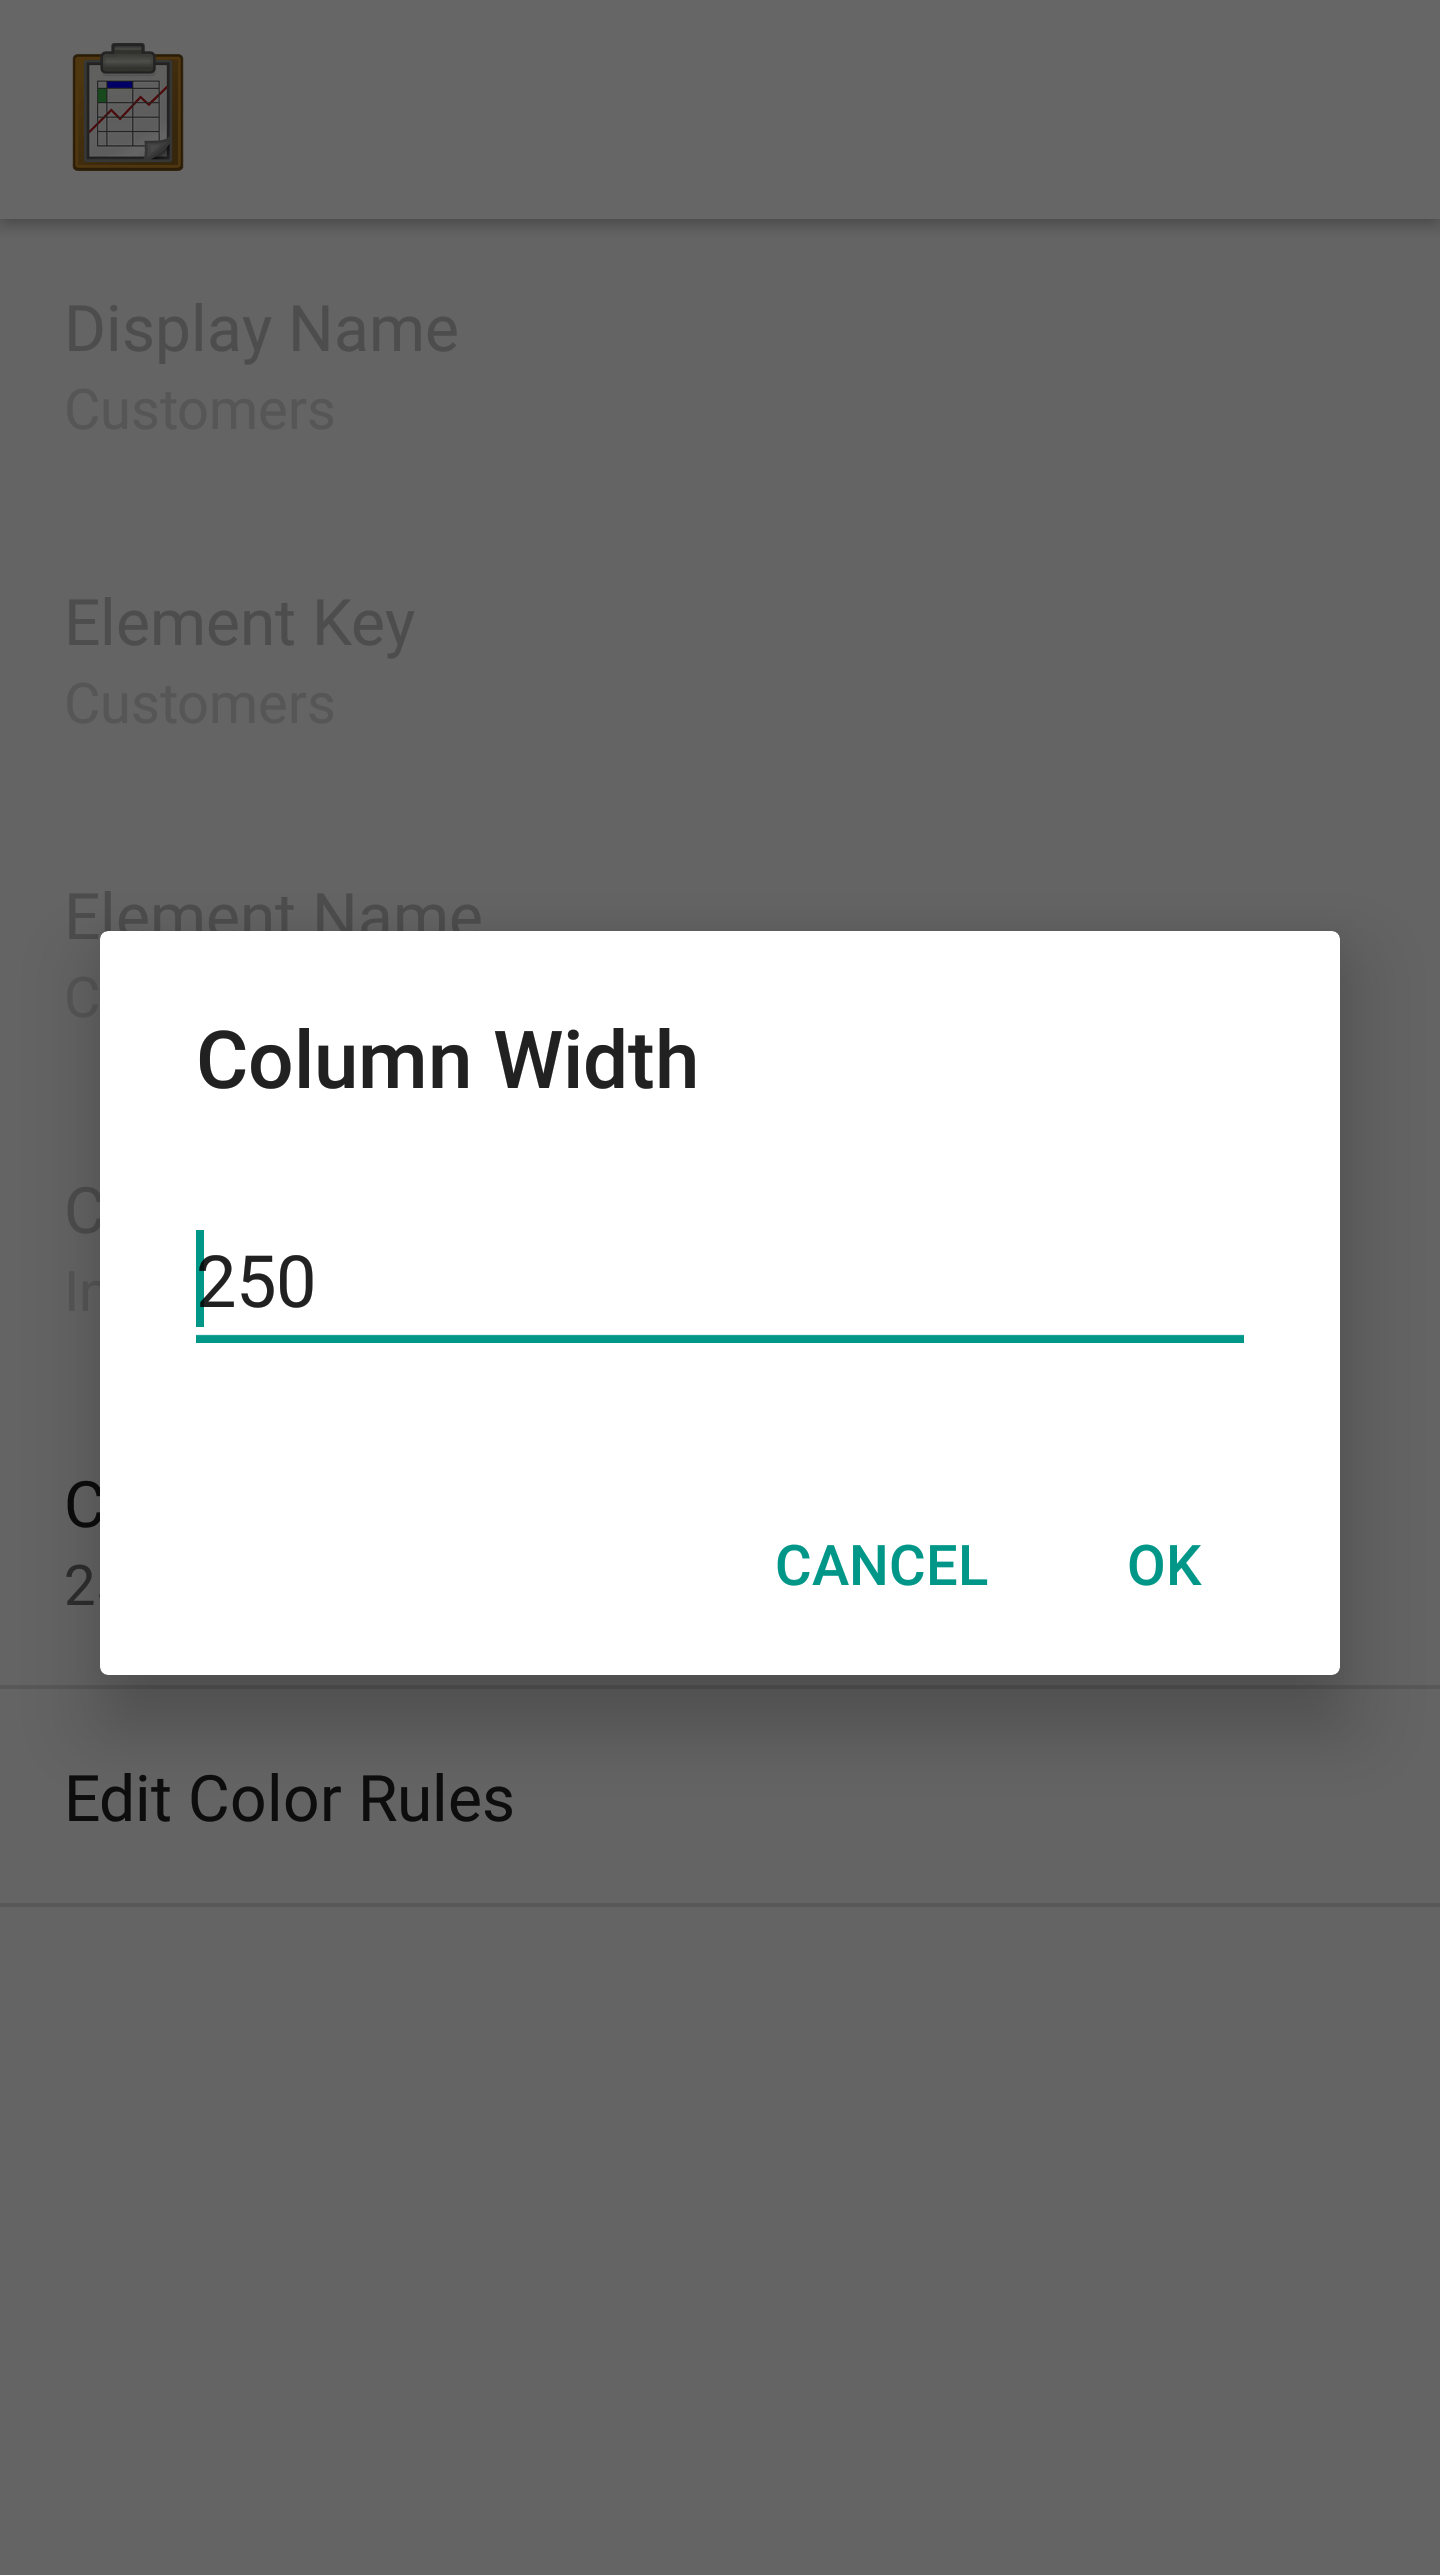
The next time you open Spreadsheet View for this table, the column width will be updated.
Edit Color Rules: This lets you set the color rules. See the color rules guide.
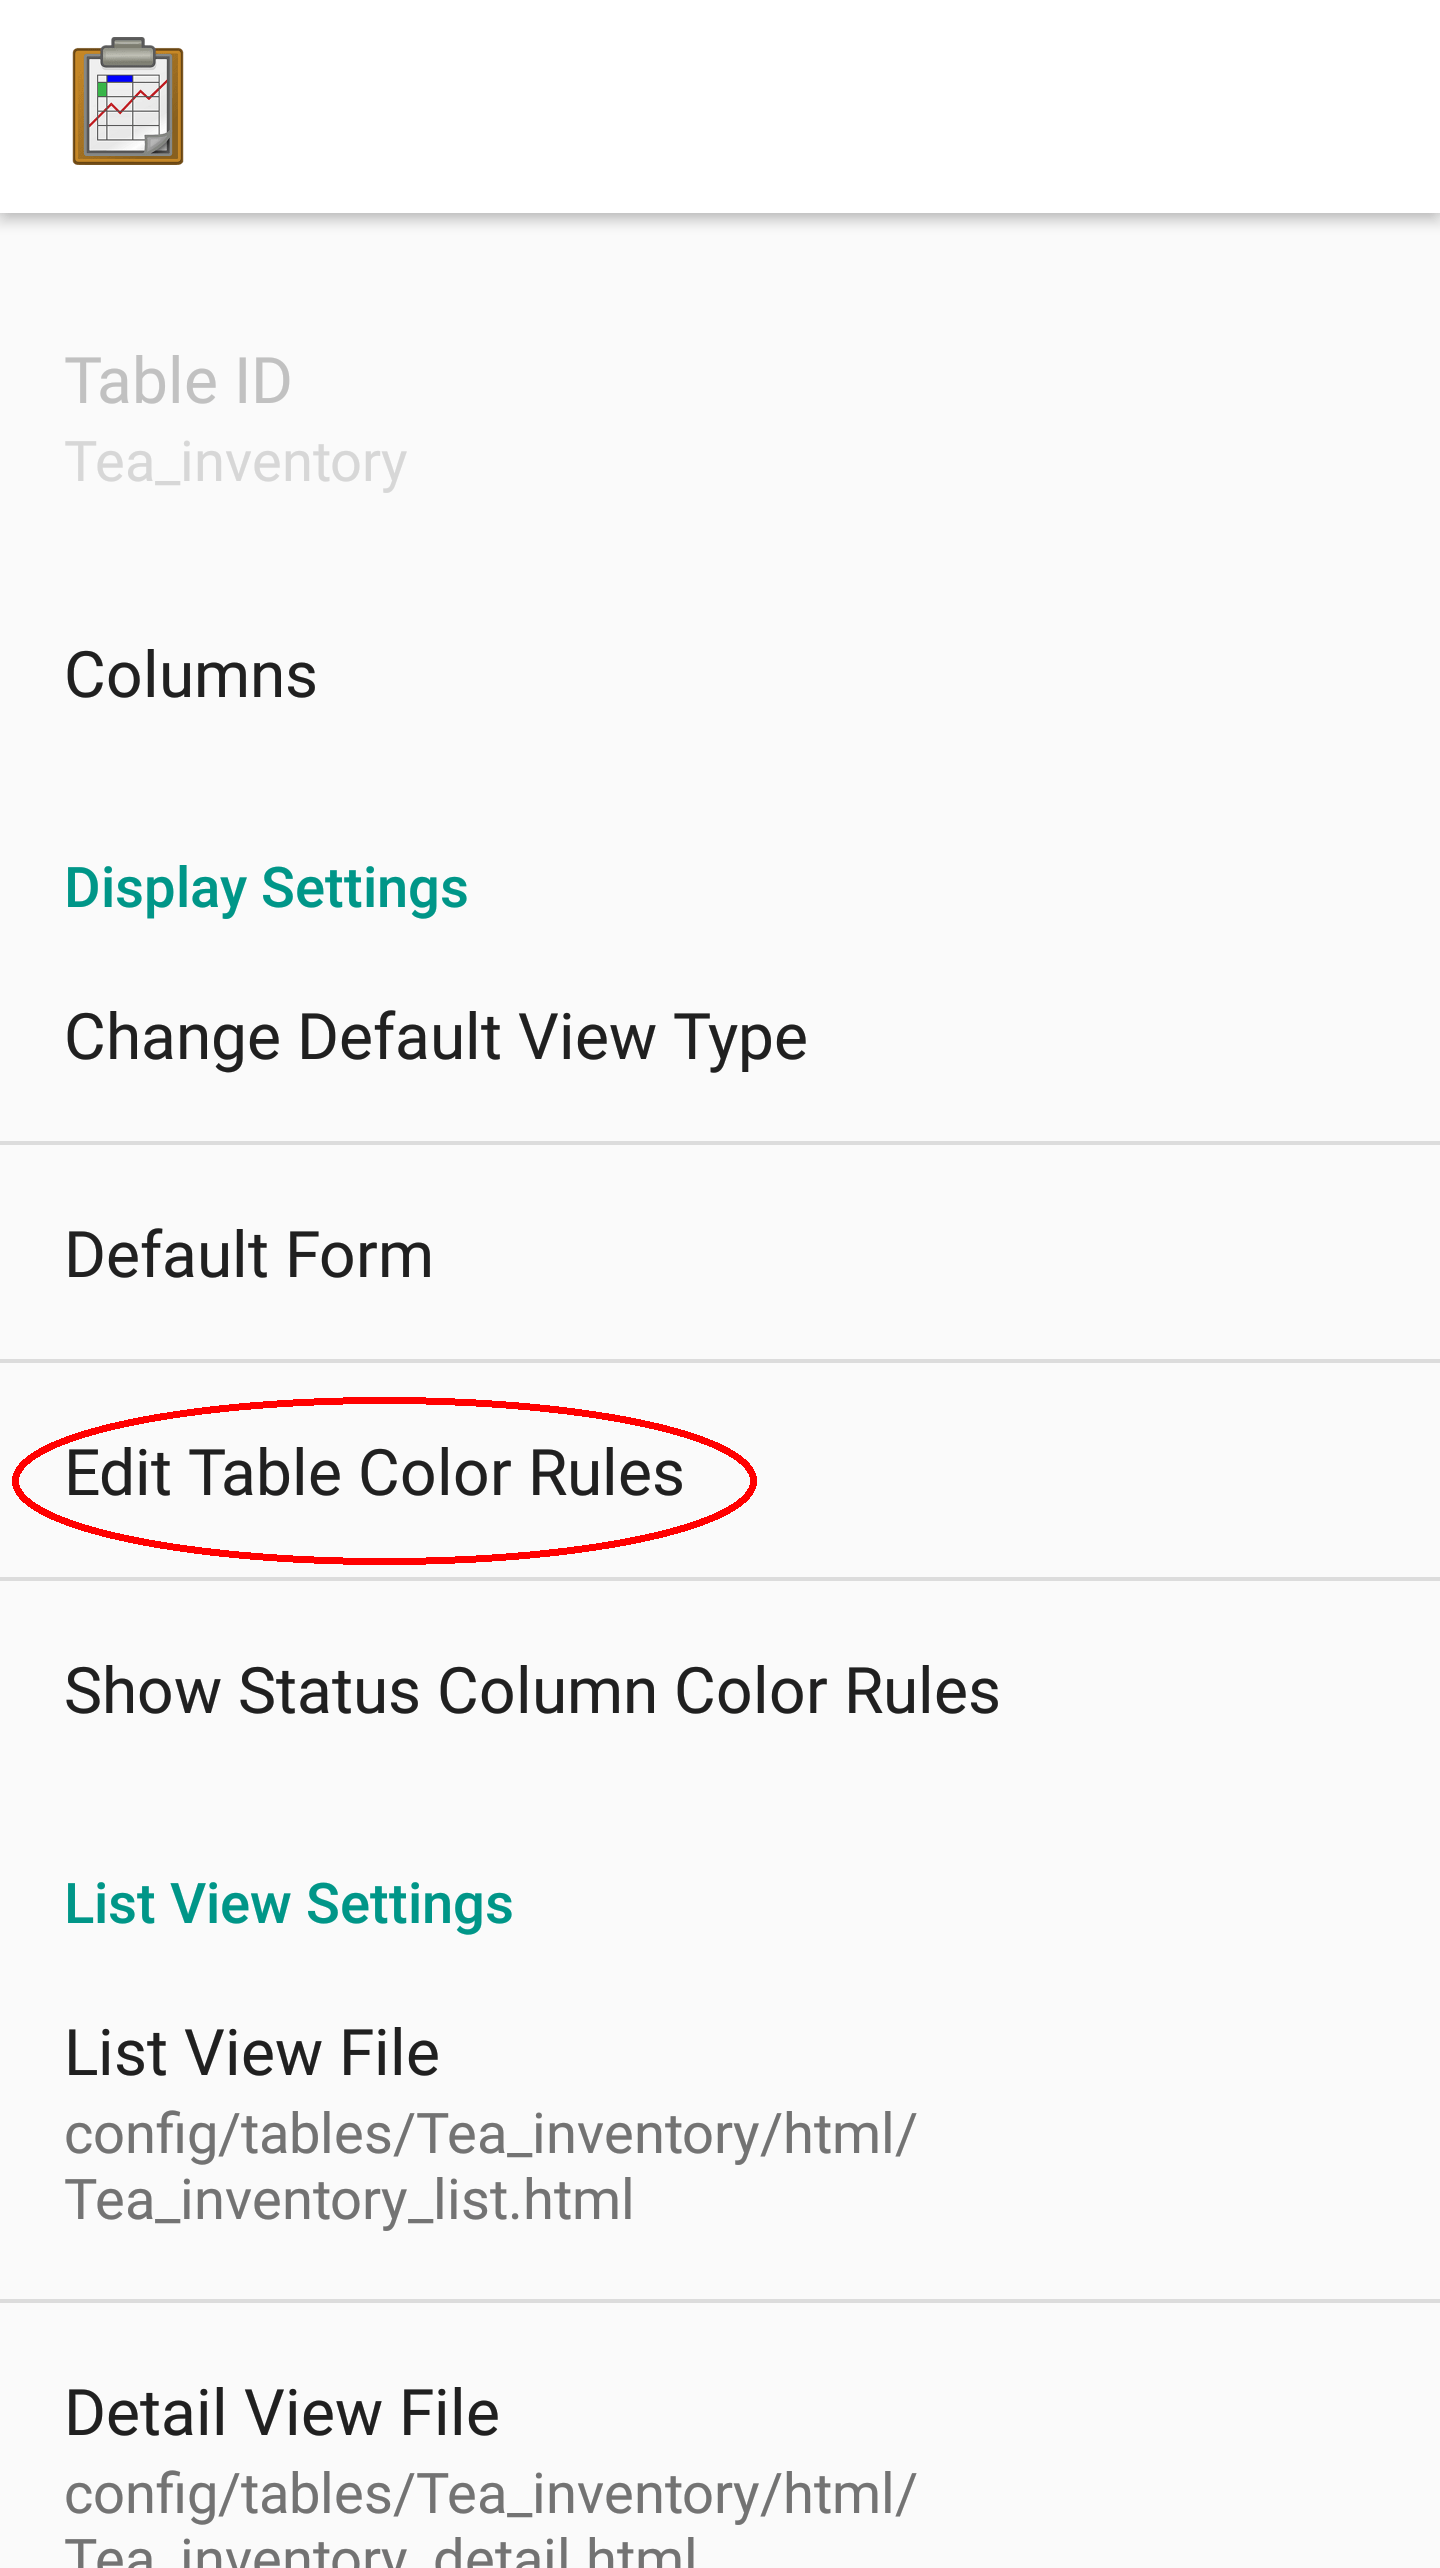
Display Settings
Display settings change how the table is presented to the user. They include:
Change Default View Type: Allows you to change the default view presented when a user selects a table. If selected this will display a pop with all available view types to choose from. This is typically List View or Map View.
Default Form: This is the form ID to launch in Survey when adding a new row.
Edit Table Color Rules: This lets you set the color rules. See the color rules guide below.
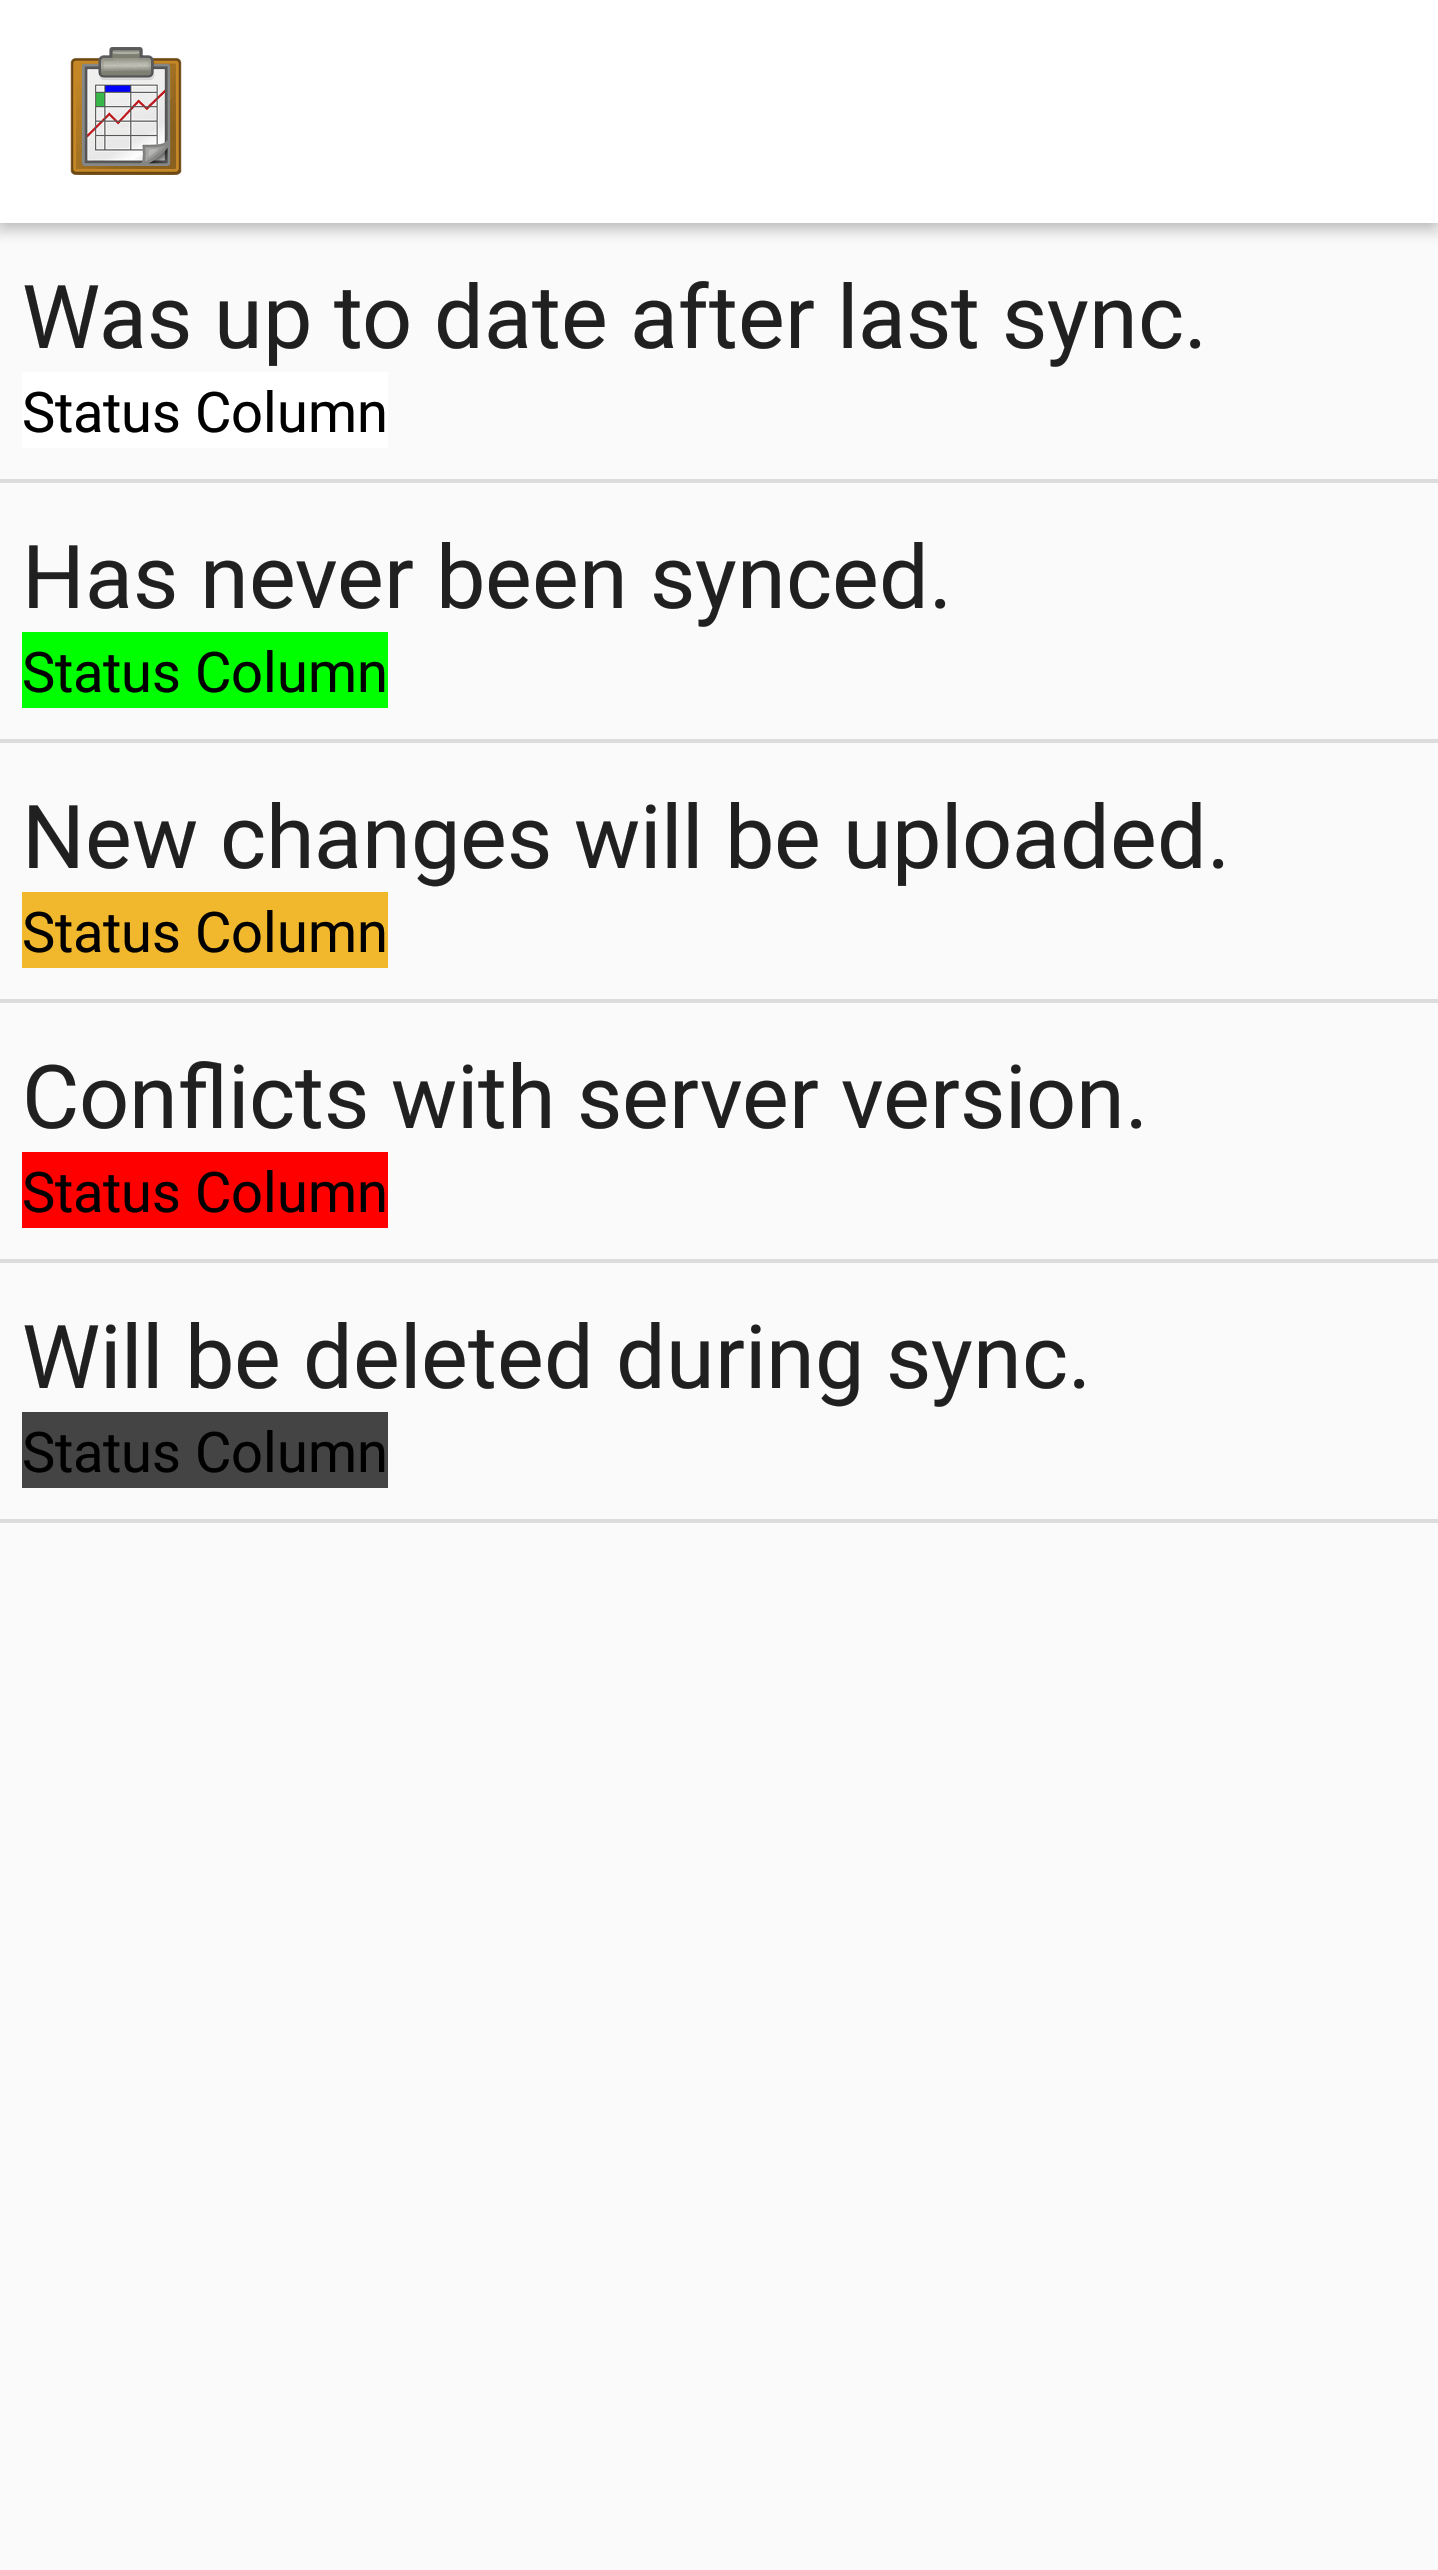
Show Status Column Color Rules: If this is tapped it launches a screen that details the status column colors and their meanings.
Color Rules
Color rules allow you to modify the appearance of cells in Spreadsheet View based on the values of the data in those cells. You can have a collection of color rules set for a table to make visually scanning the spreadsheet much quicker and more informative.
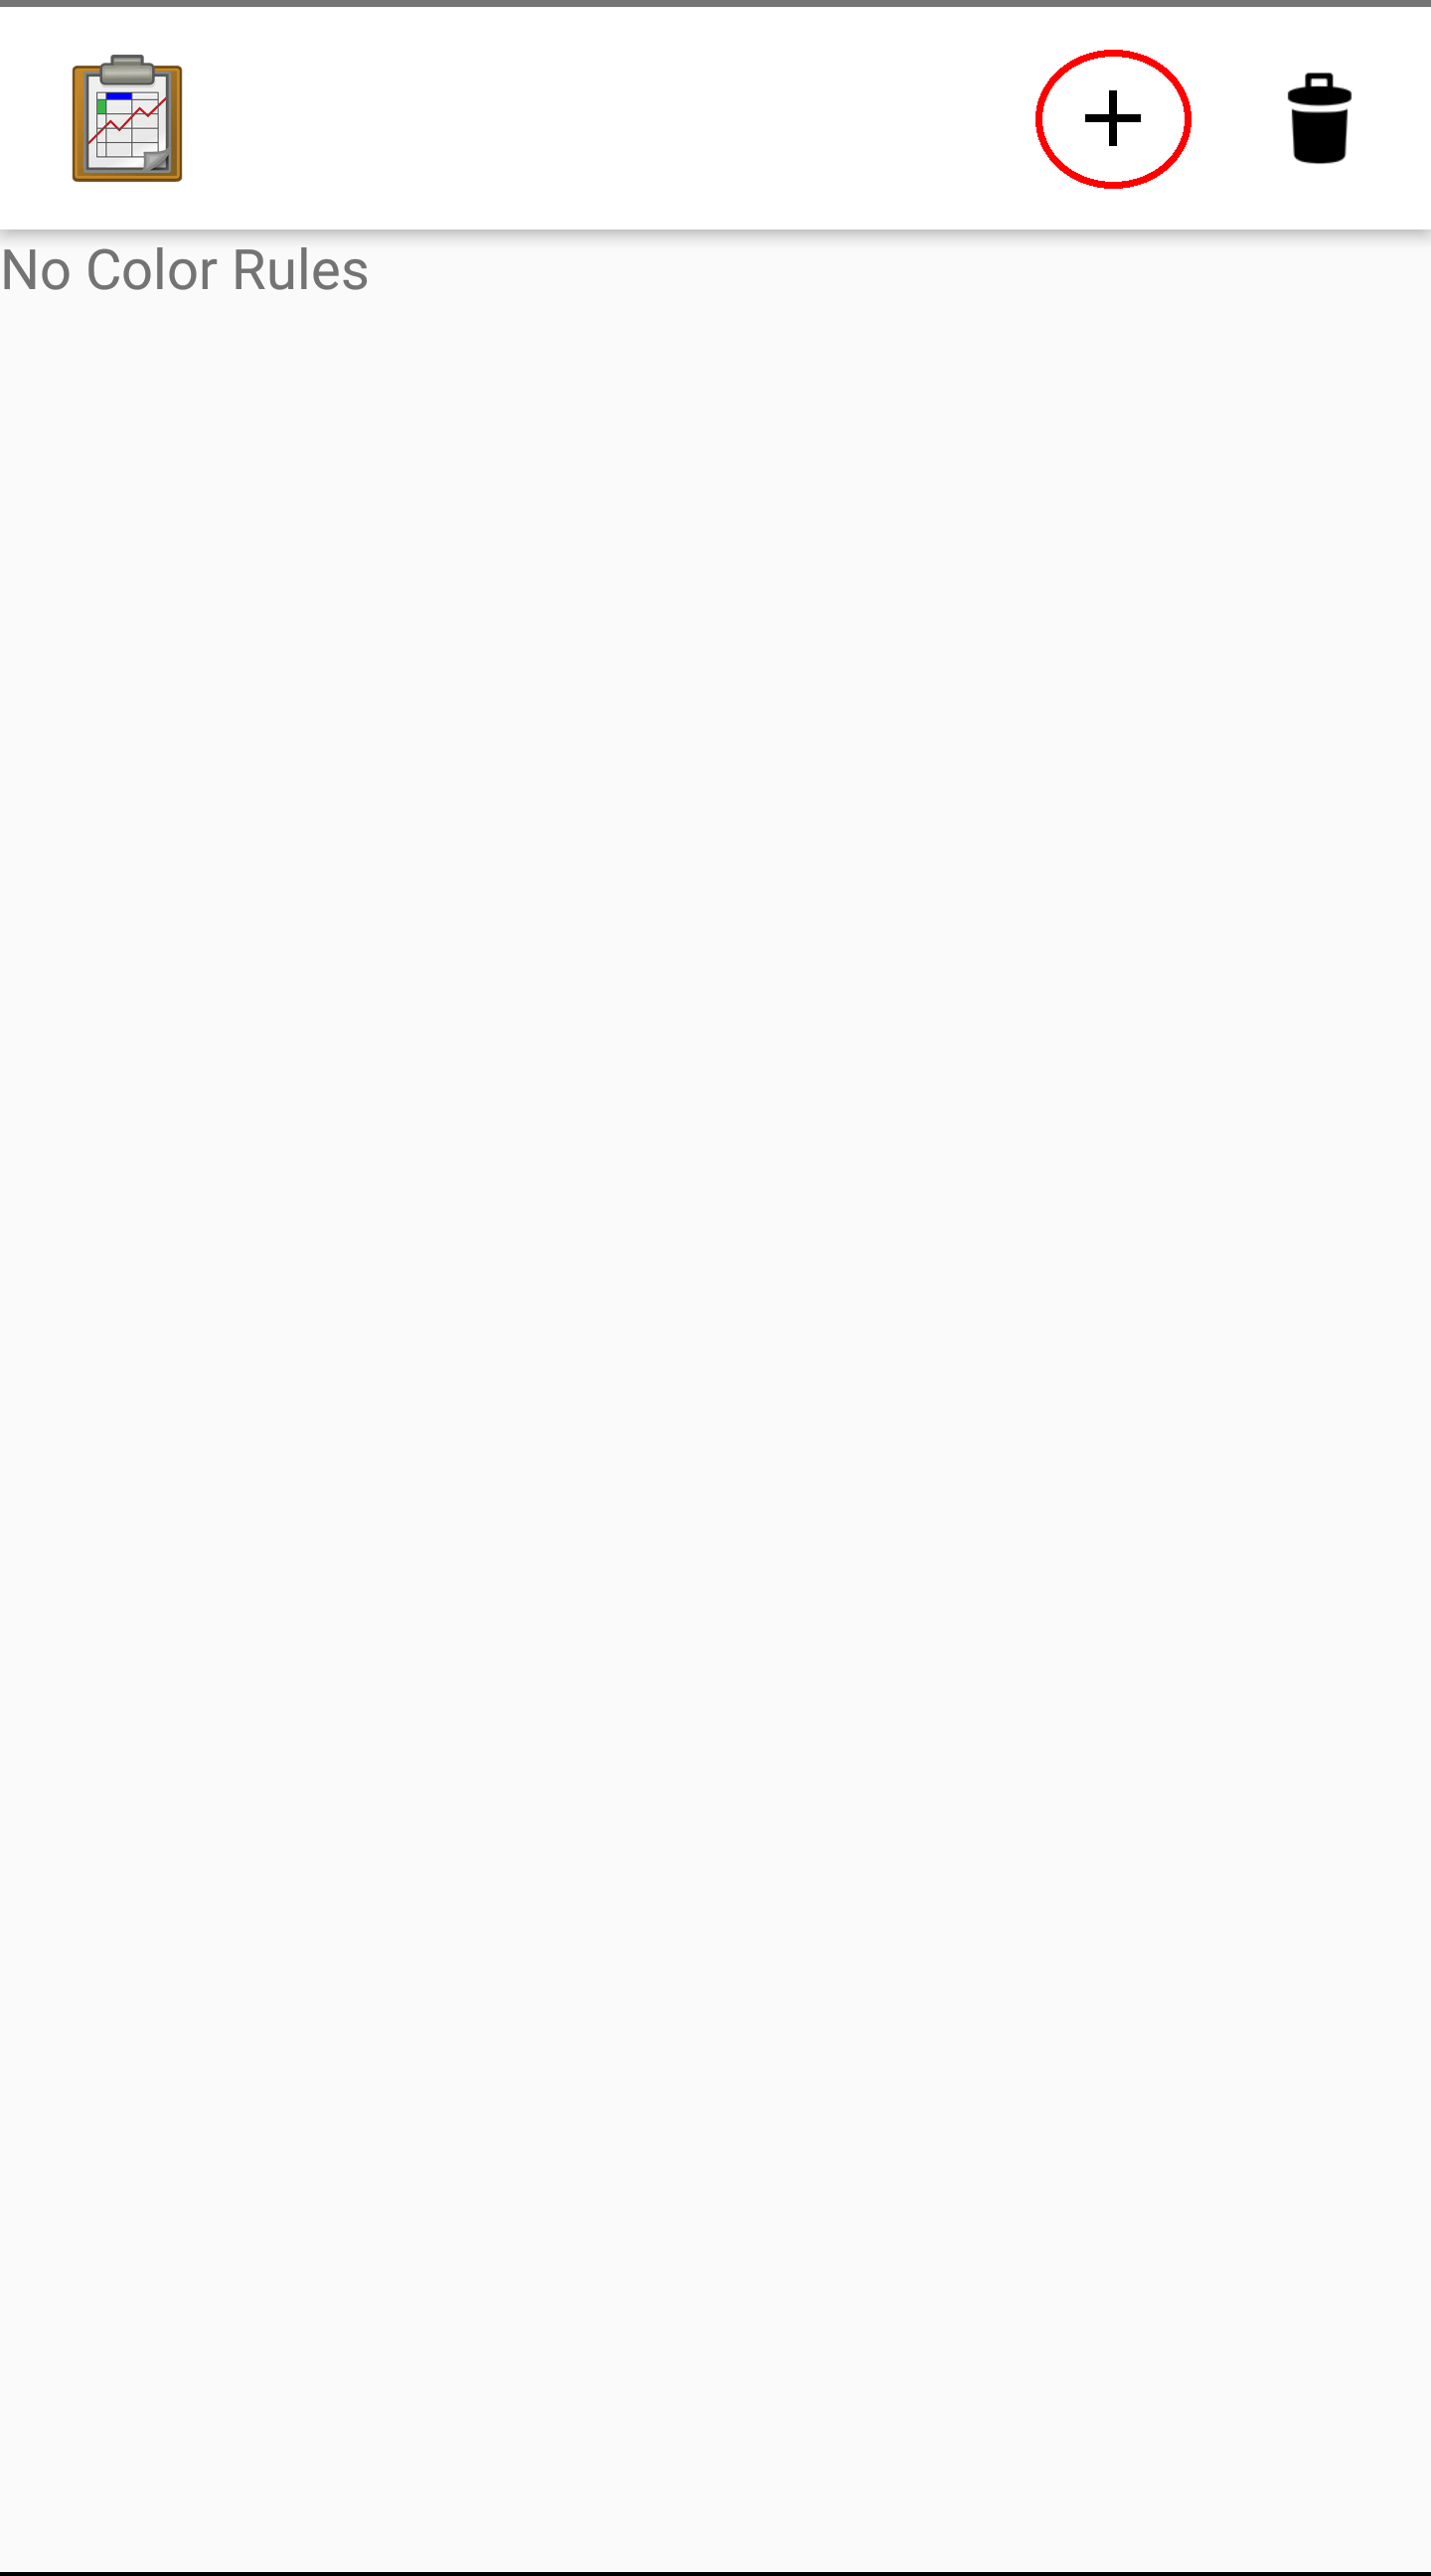
To add a color rule:
Launch Table Properties and scroll down to select the Edit Table Color Rules item.
This will launch the color rules page. Tap the + button in the upper right to add a new color rule.
Choose the Element Key or column that will be affected by this color rule.
Choose a Comparison Type and Value. Combined, these two fields determine the equation to use when checking the color rule. For example, you might have chosen an Element Key of Visits that tracks the number of visits to a tea house. You might then choose a Comparison Type of < and a Value of 1000. This would apply the color rule to all tea houses with a visit value that is less than 1000.
Choose the Text Color and Background Color to apply when this color rule evaluates to true. In our above example, we might set the Backgroung Color to red to highlight all the least popular tea houses.
Press Save.
To clear out the existing color rules, tap the trash can icon in the upper right.
List View Settings
The List View Settings determine which HTML files to use when this table is opened in a List View or a Detail View. These are typically set in the XLSX file, but can be updated here, or swapped between multiple options.
If this is not specified, the table will not be able to be opened in a List View or Detail View.
Map View Settings
The Map View Settings determine which HTML file to use when this table is opened in a Map View. This is used to render the List View at the top portion of the screen. This is typically set in the XLSX file, but can be updated here.
If this is not specified, the table will not be able to be opened in a Map View.
These settings also contain the Color Rule For Map option. This lets you choose between:
None: Uses the default blue color for map markers, and green for a selected map marker.
Table Color Rules: Uses color rules set up in the Color Rules screen to determine the map marker (the same color as the Spreadsheet View cells.
Status Column Color Rules: Uses the color of the status column as the color for the map marker. This is useful to show which map items have had changes since the last sync.
Deleting Tables
The Table Manager allows you to delete a table off a device. However, this is generally discouraged and should rarely be performed.
To delete the table:
Launch the Table Manager. Tap the gear icon next the desired table:
This will open the Table actions pop up. Select Delete this Table.
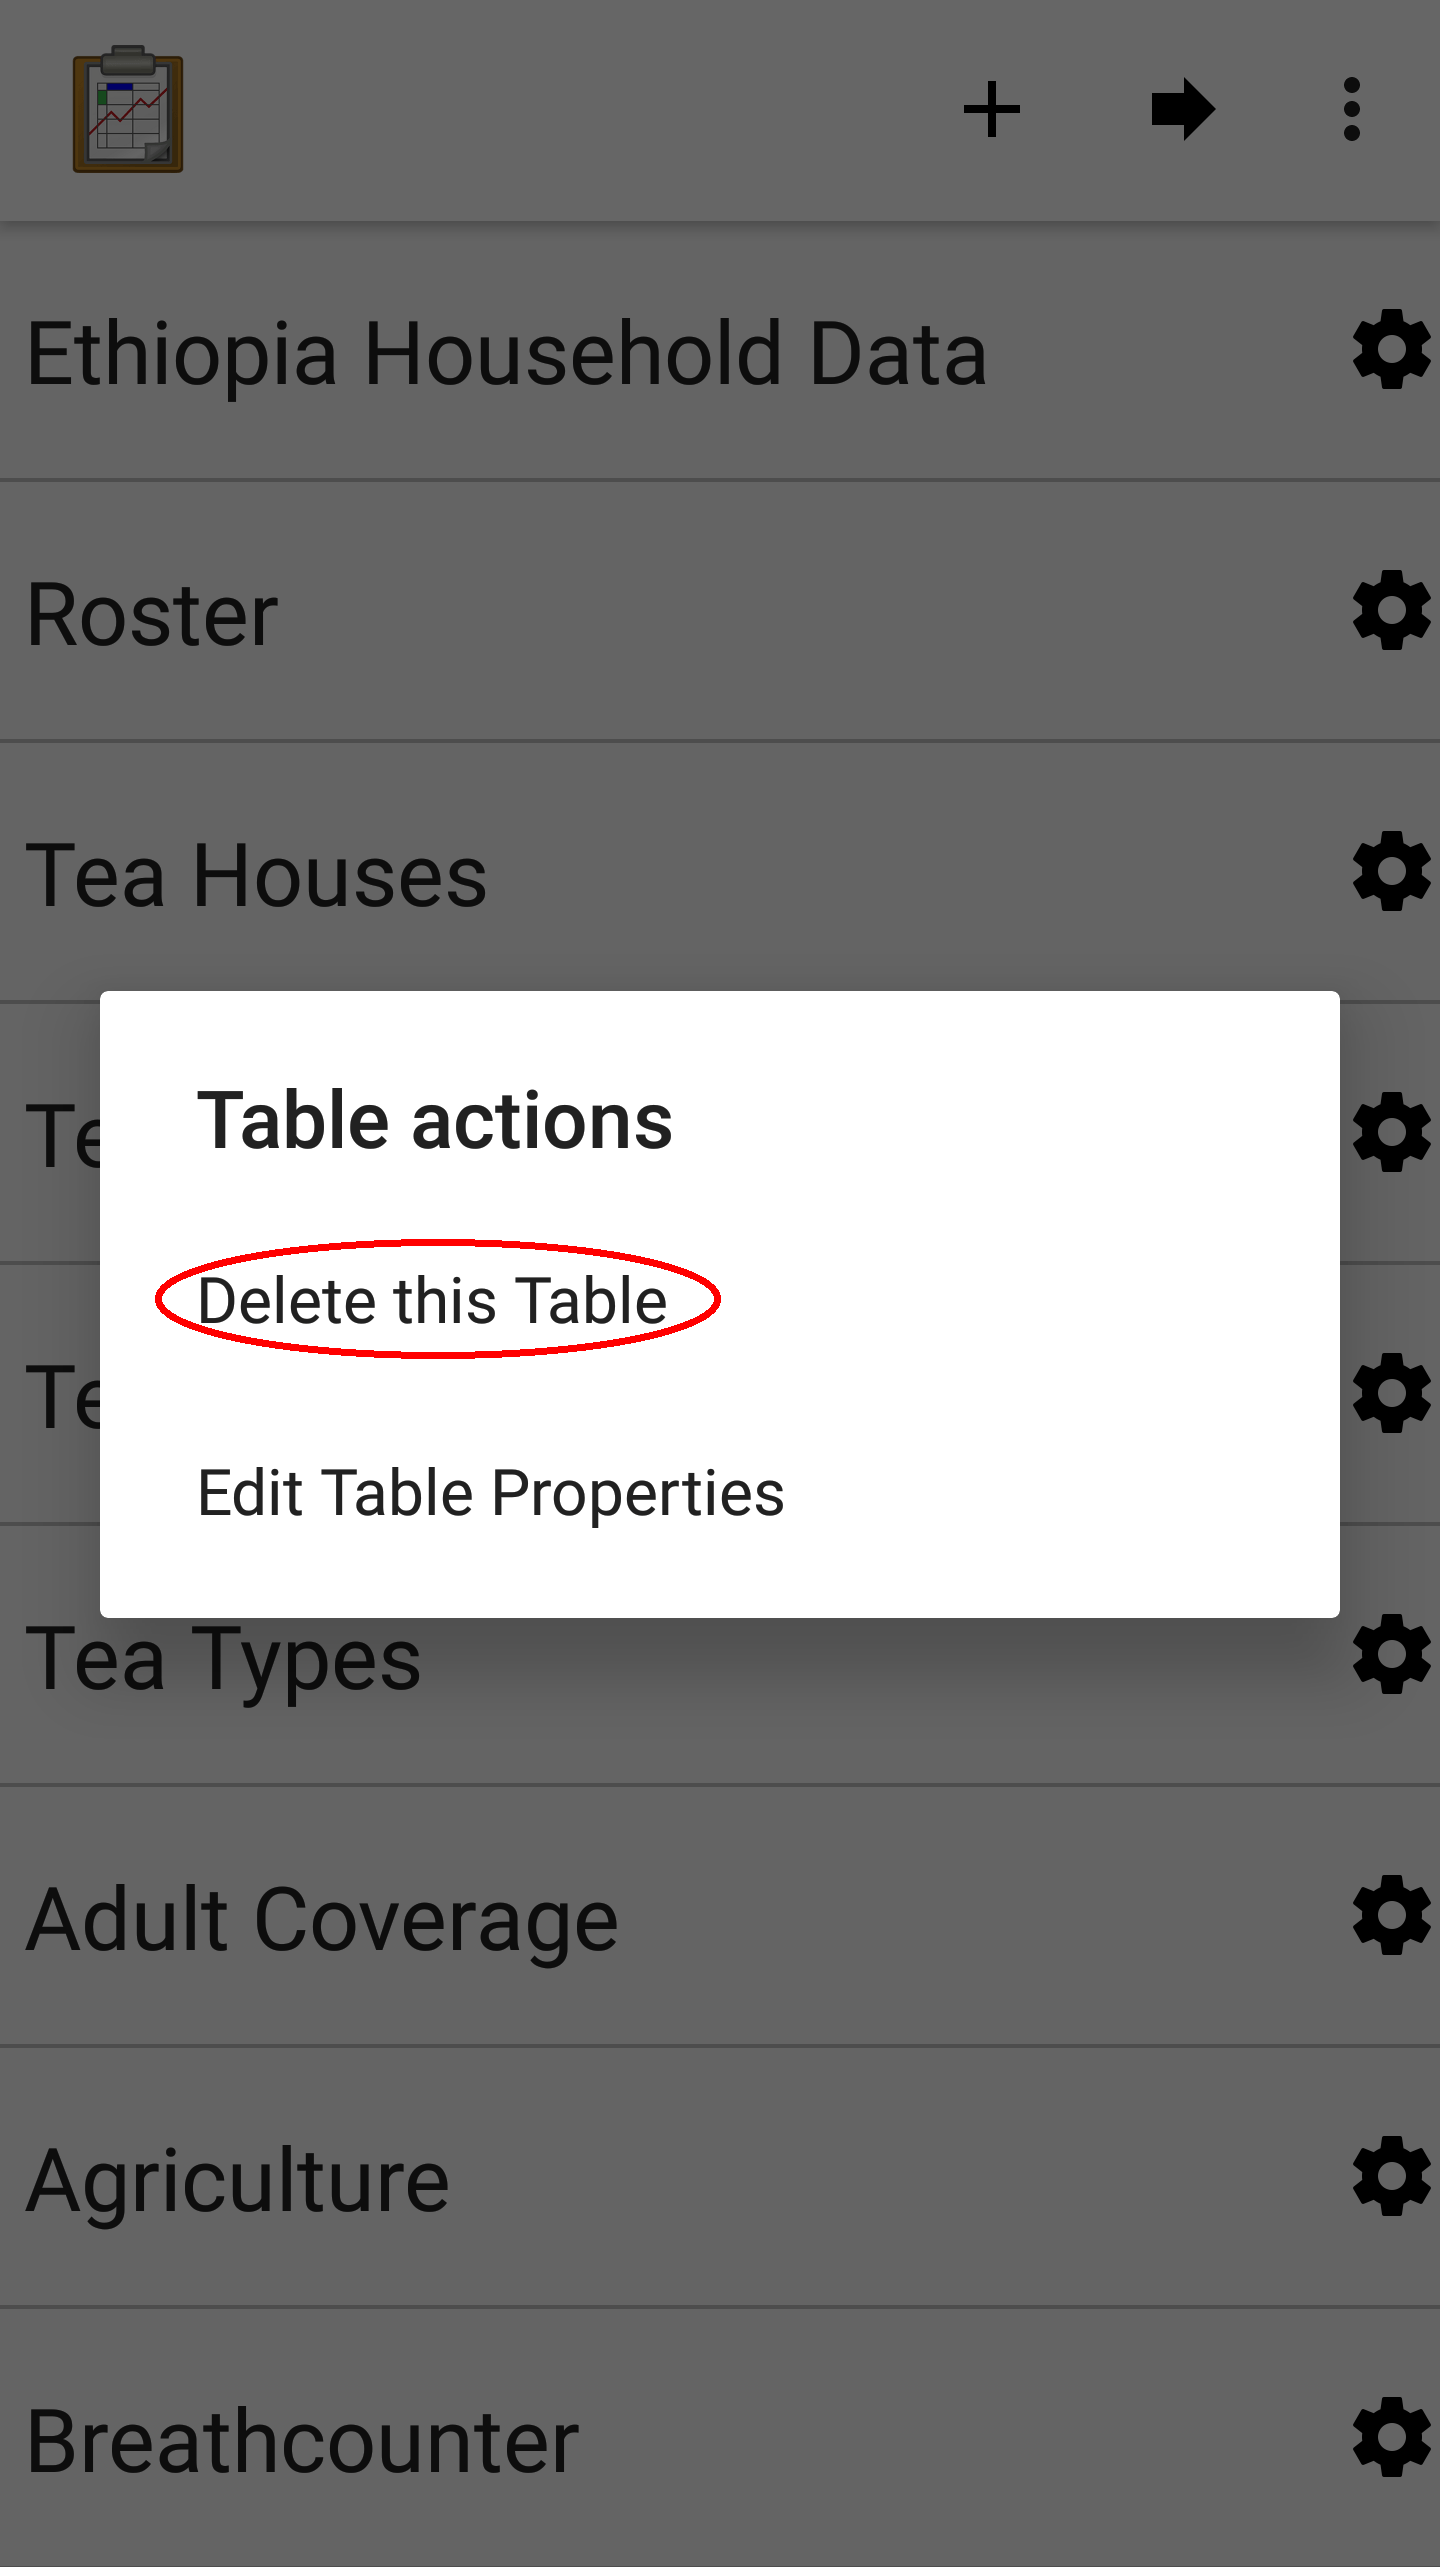
You will then be shown a confirmation dialog. If you are sure, confirm, and the table will be deleted and marked for the next synchronization.
Setting Up a Form Development Environment
To get started creating your own Data Management Applications, go to the ODK-X Application Designer documentation.
Adding Your Own Tables
The creation of data tables is handled within the ODK-X Application Designer. ODK-X Tables can display and present data, but cannot create Tables on the fly. This enables the ODK-X Services application to enforce that the configuration of the device (its tables, HTML files, form definitions, and so on) are identical to those on the server.
Initialize from ODK-X Application Designer
See the documentation for Building an Application and Creating Web Files for more details on adding your own tables and defining their properties.
Creating Customized Web Views
Instructions for creating your own custom web views for presenting and modifying data, and implementing your custom workflow, go to the web view design guide.
For the convenience of Data Management Application developers, the ODK-X platform provides a number of basic view types, such as List Views and Detail Views. These can be used and extended in your applications, or you can create something completely unique to your requirements with a custom view. Some of these views can be configured as defaults in Table Properties, and you can also launch directly into them with JavaScript calls from /system/tables/js/odkTables.js. Examples include:
openDetailViewto launch a Detail View, providing a query to select the desired record.
openListViewto launch a List View, providing a query to select the desired list of records.
openTableToMapViewto launch a Map View with a similar query toopenListView
openDetailWithListViewto launch a Detail With Sublist View. The JavaScript file for the corresponding Detail View should then callsetSubListViewto fill in the bottom portion of the Detail With Sublist View.And more for different view and query types
The above APIs generally take a query as a parameter, run it in the background, and have the results available when the JavaScript file loads. These query results are retrieved with the getViewData API available in /system/js/odkData.js. There are more APIs available for reading, creating, updating, and deleting records in the odkData.js API. Some examples include:
queryto read data from the database
updateRowto modify a row in a table
deleteRowto delete a row from the table
addRowto create a new row to a table
getAllTableIdsto get a list of all defined tables
getUsersto get a list of user accountsAnd more
Third-party libraries, such as Math.js or Snap.js, can also be included.
Example code to explore these APIs and how they can be used (including the Trying Out ODK-X Tables) are available in the App Designer Github Repository.
Custom Home Screen
ODK-X Tables allows you to customize the app home screen. If you supply a custom home screen (config/assets/index.html), you will have the option of using this as the home screen of the app. For an example, see the sample application.
Configuring an App at Startup
If you are installing Tables on a new device and don’t have a server set up from which to pull the data (see the section about syncing, you can alternatively configure Tables to import data at startup. This is useful during forms development, as you can push the form definitions, HTML, and JavaScript for your application data down to the phone from your computer and launch ODK-X Tables, and it will load data from CSV files into your data tables.
The configuration file must be titled tables.init and placed in the /sdcard/odk/tables/config/assets directory. Below is the complete contents of the tables.init file distributed with the sample application:
table_keys=teaHouses, teaTypes, teaInventory, teaHousesEditable, geotagger, plot, plotVisits, femaleClients, maleClients, geopoints, follow
teaHouses.filename=config/assets/csv/Tea_houses.updated.csv
teaTypes.filename=config/assets/csv/Tea_types.updated.csv
teaInventory.filename=config/assets/csv/Tea_inventory.updated.csv
teaHousesEditable.filename=config/assets/csv/Tea_houses_editable.updated.csv
geotagger.filename=config/assets/csv/geotagger.updated.csv
plotVisits.filename=config/assets/csv/visit.example.csv
plot.filename=config/assets/csv/plot.example.csv
femaleClients.filename=config/assets/csv/femaleClients.allfields.csv
maleClients.filename=config/assets/csv/maleClients.allfields.csv
geopoints.filename=config/assets/csv/geopoints.allfields.csv
follow.filename=config/assets/csv/follow.updated.csv
The table_keys key contains a comma and space separated list of table keys. Each table key can then have a .filename that indicate the filename of the CSV data that should be imported. This file should be under the config/assets/csv directory and the name should begin with the tableId, followed by an optional qualifier (for example, allfields), and end with .csv. If there are row-level file attachments for the table, they would be placed in a tableId file within the csv directory. Each row-level file attachment filename is relative to the folder for that row's id. If the rows _id column was myUniqueIdForSam, then the filenames in the data table for row-level attachments for that row would be relative to /sdcard/opendatakit/default/config/assets/csv/tableId/instances/myUniqueIdForSam/.
Note
Any table ids appearing in this file must already have their table definitions and metadata values defined in the definition.csv and properties.csv files within their corresponding config/tables/tableId directory.
Tip
Only one attempt is made to read and import data at start-up. If that attempt fails, some or all tables may not be initialized or may be partially initialized. You can trigger a re-processing of this file by going to Settings and clicking Reset configuration then exiting the ODK-X tool and re-opening it.
As mentioned earlier, this file is never uploaded to the server. After you have created your user application and loaded data onto your device using this mechanism, resetting the app server will push all the configuration files and all of data (the data rows loaded by the tables.init script) up to the server (except for this tables.init file). Other devices that synchronize with the server will retrieve all of those data rows during the data-row synchronization phase. There is no need for the devices that synchronize with the server to have a copy of the tables.init file and independently perform these actions.
Launching With a Different AppName
The ODK-X tools are designed to support multiple independent Data Management Applications running on the Android device. Each of our tools has the ability to run in the context of either a default application name, or a specified application name.
For further details on how to launch multiple AppNames and create your own new AppNames, see Survey's guide to Launching With a Different AppName.