Using ODK-X Scan
Scanning a Form
Prior to scanning
Have a printed form ready. For more information on printing the form created in Form Designer see the printing instructions.
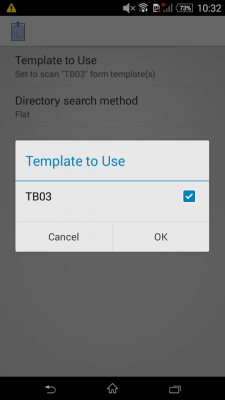
Open the Scan app, and be sure that the template you want to use this session is selected in the settings. Go to , make sure the correct form is selected, and click OK.
Scanning the form
When you are ready to begin scanning, click Scan New Form from the main page in Scan. This will bring up a camera window.
Adjust your positioning until there is a good view of the form in the viewfinder. When you are ready to take the picture, tap the camera icon.
The form should take up 80% of the photo area.
Make sure that the form is lying as flat as possible so that there will be no curvature in the form.
Tap anywhere in the viewfinder to focus the camera.
If the preview of the photo looks good, tap the checkbox icon to move onto the next step. To retake the photo tap the Back button and to exit the camera tap the X.
Once you select the check mark to begin photo processing, a small message will pop up saying Processing photo in background.
When the photo has been successfully (or unsuccessfully) processed, you will see a notification at the top of the screen in the Android toolbar. Pull the top toolbar down and tap the ODK-X Scan notification. This will open Scan and pull up the photo of the selected scan.
The successfully processed photo will show an overlay of colored boxes that indicate the fields that Scan has detected. Any bubbles or checkboxes recognized as filled will show an overlay of the value that was assigned to them in the form designer. Number fields will show an overlay of the number that the app recognized for each digit.
If the photo was unsuccessfully processed you will be prompted to retake the photo.
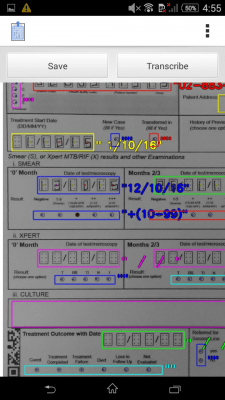
From this screen, you can choose to either begin reviewing the data from this scan, or save it to review later. Press Transcribe to be taken into ODK-X Survey where you will be able to view and edit data.
Or press Save. This scan is now accessible by tapping the drop down options (at the top right of the screen), then ). From the drop down options, you can select Scan New Form to continue scanning and saving forms.
Tip
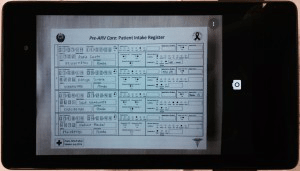
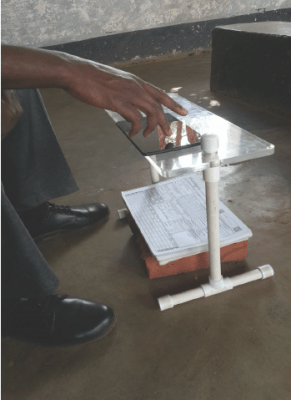
To increase accuracy of Scan's results, you can consider building a stand with a clear plastic surface to place your phone or tablet on top off while you take the each photo. The stability can help improve the alignment and reduce blur in photos. Below is an example of a stand built with PVC piping and Plexiglass.
Survey: View, Verify, & Edit Data
Reviewing Your Data
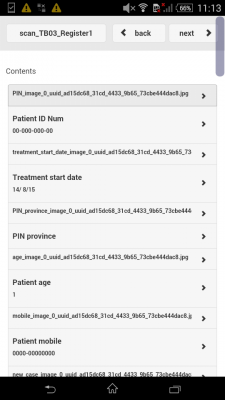
You'll be taken to Survey after pressing Transcribe on a scan. There you'll see a clickable list of all of the fields pulled from your form template, your Table of Contents. You can return to this screen when transcribing data by pressing the button on the top, left (with your form template's name, the example image below being scan_TB03_Register1).
To verify and edit any of the data
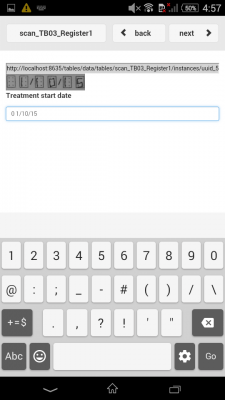
Select the field you want to view, and you'll be taken to a screen where you'll find an image of the field and the data, as interpreted by Scan, and an editable box below. Type in any changes if there are discrepancies between the data digitized by Scan and the ground truth data.

Navigate to the next section to validate and edit either by:
Pressing the Next or Back buttons at the top of the screen,
Or go to the button with your form name and select Contents to return to the main screen of captured data.
Note
The order that these fields are presented can be set when originally creating the form template in Form Designer. With a data field selected, in Form Properties enter a numbered order (for example: 1, 2, 3, and so on) in Order of Fields.
Note
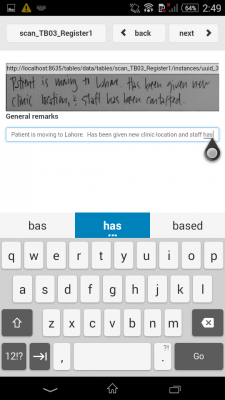
Text boxes and text fields cannot be digitized. However, Scan will capture an image of text boxes (not text fields: text fields are to be used primarily as labels on your form), and when verifying data in Survey you can type in the data directly into the app.
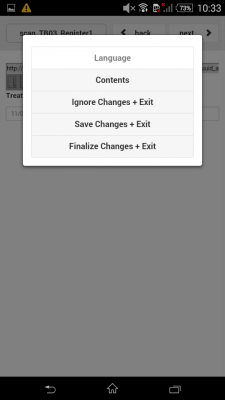
Saving and Finalizing Changes
You have the option of saving changes you've made to the data and returning to it later to further review. Go to the . You can access this scan's data again from . They will be arrange in the chronological order they were originally scanned.
If you've made changes you don't want to keep, .
Once you've verified all the fields, select . You will also have the option to if you are navigating through the data fields by using the next button and reach the end of the data contents. Once you are finished here you will return to Scan, where you can scan a new form or transcribe a saved scan. Both options accessible through navigating to Scan's Main Menu.
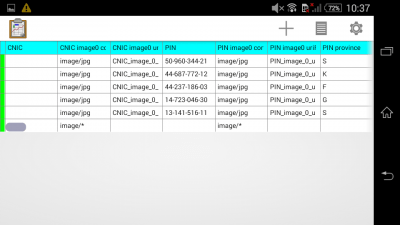
Your Data in Tables
With each verified and finalized scan, a new line of data will be entered into Tables. To view (on your device) the verified data collected in this instance: open the Tables app and select the line with your form's name listed. This will open up a spreadsheet of your data. If you need to need to edit the data in a record from here:
Double tap on the cell you want to edit.
You'll be given the option to either Edit or Delete that row. Choosing Edit will launch the form in Survey.
You can change the View Type, Color Settings, and more by pressing the settings wheel and making any changes you need.